
")
Soft Christmas Thumbprint Cookies: 5 Delicious Steps
Table of Contents
- 1. Introduction: The Magic of Christmas Thumbprint Cookies
- 2. Why You’ll Adore These Soft Christmas Thumbprint Cookies: 5 Delicious Steps
- 3. Gather Your Ingredients: What You’ll Need
- 4. Baking Your Dream: Step-by-Step Instructions
- 5. Expert Tips and Creative Variations
- 6. Serving and Storage Suggestions
- Foire Aux Questions
There’s nothing quite like the smell of fresh-baked cookies filling your home during the holiday season. Today, we’re diving into a festive favorite that promises to bring smiles and deliciousness: the **Soft Christmas Thumbprint Cookies**. These delightful treats are not only incredibly easy to make but also offer that melt-in-your-mouth texture everyone craves.
Imagine a buttery, tender cookie base cradling a vibrant dollop of jam or a rich chocolate ganache. Perfect for cookie exchanges, holiday parties, or simply cozy evenings by the fire, these homemade Christmas treats are sure to become a cherished tradition.
1. Introduction: The Magic of Christmas Thumbprint Cookies
The holidays are synonymous with baking, and few cookies capture the spirit quite like thumbprints. Their charm lies in their simplicity and versatility. With a simple press of a thumb, you create a perfect little well ready for your favorite sweet filling.
These **Soft Christmas Thumbprint Cookies** are designed to be irresistibly tender, with a perfect balance of sweetness and a hint of festive cheer. Get ready to embark on a baking journey that will fill your kitchen with joy and delicious aromas!
2. Why You’ll Adore These Soft Christmas Thumbprint Cookies: 5 Delicious Steps
You’ll fall in love with this easy thumbprint cookie recipe for many reasons. First, the texture is simply divine—soft, chewy, and never dry. Second, they are incredibly customizable, allowing you to experiment with various fillings to suit any taste.
Plus, this recipe is straightforward, breaking down the process into just **5 delicious steps**, making it approachable for bakers of all skill levels. These cookies are perfect for getting kids involved in the holiday baking fun too! For more general baking tips, check out this great resource: Sally’s Baking Addiction.
3. Gather Your Ingredients: What You’ll Need
Before we start mixing, let’s make sure you have all the necessary components for these delectable cookies. A well-stocked pantry makes holiday baking a breeze.
3.1. Cookie Dough Ingredients
This simple list of ingredients comes together to create the perfect base for our **Soft Christmas Thumbprint Cookies**. Quality ingredients make all the difference!
- 1 cup (2 sticks) unsalted butter, softened
- ½ cup granulated sugar
- 1 large egg yolk (reserve the white for rolling, if desired)
- 1 teaspoon vanilla extract
- 2 cups all-purpose flour
- ¼ teaspoon salt
- ¼ cup powdered sugar (for dusting, optional)
3.2. Filling Options
Here’s where the fun really begins! Choose your favorite or mix and match for a colorful assortment. Your chosen filling will define your unique homemade Christmas treats.
- Raspberry jam, apricot jam, or strawberry jam
- Lemon curd
- Melted chocolate or Nutella
- Caramel sauce
4. Baking Your Dream: Step-by-Step Instructions
Ready to bake? Follow these simple steps to create your batch of perfect **Soft Christmas Thumbprint Cookies**. This detailed guide ensures a successful and delicious outcome every time.
4.1. Step 1: Preparing the Cookie Dough
- In a large bowl, cream together the softened butter and granulated sugar until light and fluffy. This usually takes about 2-3 minutes with an electric mixer.
- Beat in the egg yolk and vanilla extract until well combined. Scrape down the sides of the bowl to ensure everything is incorporated.
- In a separate bowl, whisk together the all-purpose flour and salt. Gradually add the dry ingredients to the wet ingredients, mixing on low speed until just combined. Be careful not to overmix the dough.
- Cover the dough with plastic wrap and chill in the refrigerator for at least 30 minutes. This helps prevent the cookies from spreading too much.
4.2. Step 2: Shaping the Thumbprint Cookies
- Preheat your oven to 350°F (175°C) and line baking sheets with parchment paper.
- Roll the chilled dough into 1-inch balls. If you want a more festive look, you can roll the balls in reserved egg white and then in sprinkles or finely chopped nuts before pressing.
- Place the balls about 1 inch apart on the prepared baking sheets.
- Using your thumb or the back of a rounded teaspoon, gently press an indentation into the center of each cookie dough ball.
4.3. Step 3: Baking to Golden Perfection
- Bake the cookies for 10-12 minutes, or until the edges are lightly golden. The centers may still look soft, but they will firm up as they cool.
- Remove the baking sheets from the oven and, if the indentations have puffed up, gently press them down again with your thumb or a spoon.
- Let the cookies cool on the baking sheets for 5 minutes before transferring them to a wire rack to cool completely.
4.4. Step 4: Adding Your Favorite Filling
- Once the cookies are completely cooled, spoon your desired filling into each indentation. For a neat look, you can warm thicker jams slightly to make them easier to spoon.
- If using melted chocolate, allow it to set before serving or storing.
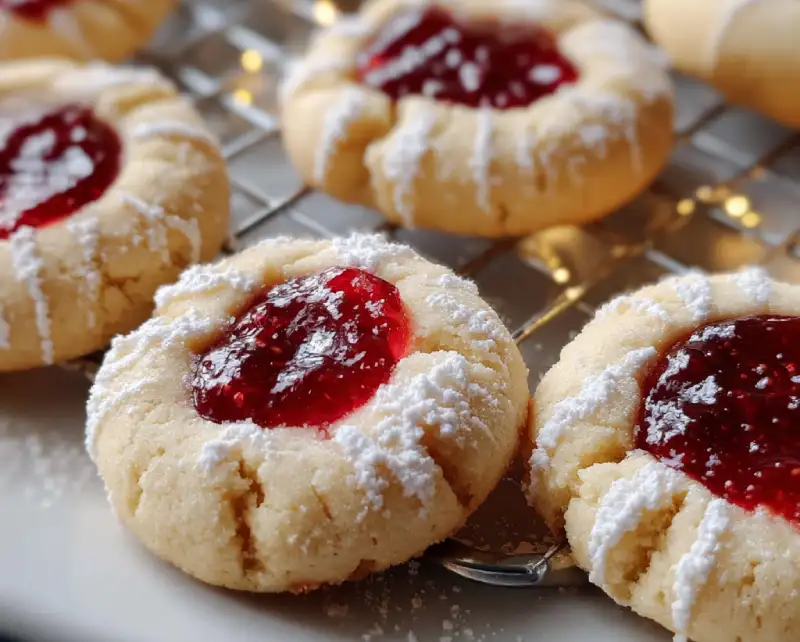
- Dust with powdered sugar, if desired, for an extra touch of holiday magic.
5. Expert Tips and Creative Variations
To truly master these **Soft Christmas Thumbprint Cookies**, consider these expert tips. Chilling the dough is crucial for preventing spread, ensuring your cookies hold their perfect shape.
Feel free to get creative with your fillings! Beyond jams and chocolate, try a dollop of cream cheese frosting, a small piece of fruit candy, or even a sprinkle of edible glitter for extra holiday sparkle. Don’t be afraid to experiment to find your family’s favorite combination for these cookie exchange recipe stars. See others recipes here
6. Serving and Storage Suggestions
These beautiful **Soft Christmas Thumbprint Cookies** are best enjoyed fresh, but they also store wonderfully. Arrange them on a festive platter for a stunning holiday display that will impress all your guests.
Store leftover cookies in an airtight container at room temperature for up to 5-7 days. If your filling requires refrigeration (like cream cheese frosting), store the cookies in the fridge. You can also freeze the baked, unfrosted cookies for up to 3 months, then fill them after thawing.
Foire Aux Questions
Can I freeze these Soft Christmas Thumbprint Cookies?
Yes, absolutely! You can freeze the baked, unfrosted cookies for up to 3 months. Simply place them in an airtight container or freezer bag, separated by parchment paper, to prevent sticking. Thaw them at room temperature before filling with your favorite jam or ganache.
What if my thumbprints puff up during baking?
It’s common for the indentations to slightly puff up during baking. Don’t worry! As soon as you remove the cookies from the oven, gently press down on the centers again with your thumb or the back of a small spoon. This will re-create the perfect well for your filling.
What are some alternative fillings for thumbprint cookies?
Beyond traditional jams, the possibilities are endless! Try lemon curd, melted caramel, dulce de leche, cream cheese frosting, or a small square of your favorite chocolate bar. For a truly decadent treat, you could even use a homemade ganache or a sprinkle of toasted nuts.