
")
Japanese Katsu Bowls: 10 Easy Recipes for the Best Taste
Table of Contents
- Welcome to the World of Katsu Bowls!
- Why You’ll Love These Japanese Katsu Bowls: 10 Easy Recipes
- The Essential Ingredients for Katsu Bowls
- Step-by-Step Katsu Bowl Instructions
- Expert Tips for the Perfect Katsu Bowl
- Delicious Variations: Exploring Different Katsu Bowl Recipes
- Serving Suggestions: Complete Your Katsu Bowl Meal
- Storing and Reheating Your Katsu Bowls
- FAQ
Welcome to the world of delicious **Japanese Katsu Bowls: 10 Easy Recipes for the Best Taste**! If you’re looking for a satisfying, crispy, and flavorful meal that’s surprisingly simple to make at home, you’ve come to the right place. Get ready to embark on a culinary journey that will bring authentic Japanese flavors right to your kitchen.
Welcome to the World of Katsu Bowls!
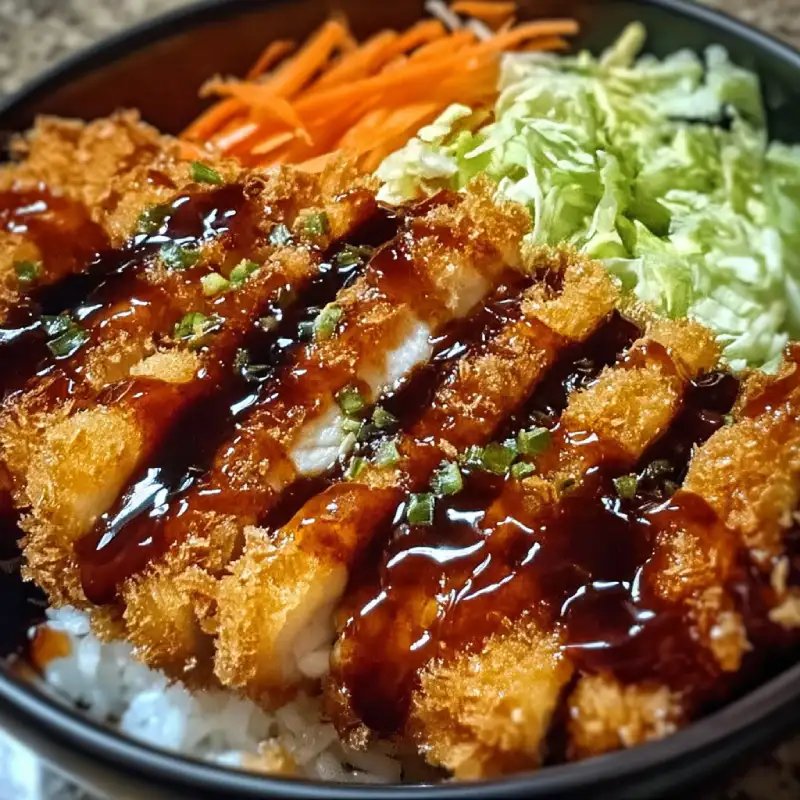
There’s something incredibly comforting about a perfectly prepared katsu bowl. Crispy fried cutlets nestled on a bed of fluffy rice, often simmered in a savory-sweet dashi broth with onions and egg – it’s a symphony of textures and tastes. This classic Japanese dish, known as Katsudon, is a staple for a reason.
Whether you prefer chicken katsu or pork katsu, the basic principles remain the same: achieving that golden, crunchy exterior and tender, juicy interior. We’ll guide you through making the very best katsu bowls, ensuring delicious results every time.
Why You’ll Love These Japanese Katsu Bowls: 10 Easy Recipes
These recipes are designed for both beginners and experienced home cooks. You’ll find them straightforward, adaptable, and incredibly rewarding to prepare. Plus, who can resist the allure of crispy katsu paired with a warm, comforting rice bowl?
- **Easy to Follow:** Our step-by-step instructions break down the process into manageable parts.
- **Versatile:** Easily swap proteins or add your favorite vegetables.
- **Satisfying:** A complete meal that’s hearty and fulfilling.
- **Authentic Flavor:** Recreate that beloved Japanese restaurant taste right at home.
You’ll soon discover why **Japanese Katsu Bowls** are a new family favorite!
The Essential Ingredients for Katsu Bowls
Crafting the perfect katsu bowl starts with quality ingredients. While the list might seem extensive, many items are pantry staples. Here’s what you’ll need for these delicious Read our in-depth guide here.
For the Katsu:
- 2 boneless, skinless chicken breasts or 2 pork loin cutlets (about 1/2 inch thick)
- 1/2 cup all-purpose flour
- 1 large egg, beaten
- 1 1/2 cups panko breadcrumbs
- Vegetable oil, for frying
- Salt and freshly ground black pepper, to taste
For the Dashi Broth & Bowl Assembly:
- 1 large onion, thinly sliced
- 1/2 cup dashi stock (or chicken broth)
- 2 tablespoons soy sauce
- 2 tablespoons mirin
- 1 tablespoon sugar
- 2 large eggs, lightly beaten
- 2 cups cooked Japanese short-grain rice, hot
- Optional garnishes: chopped green onions, nori strips, shichimi togarashi
For Serving (Tonkatsu Sauce):
- Store-bought tonkatsu sauce, or homemade (see tips below)
Chicken or Pork: Choosing Your Protein
The choice between chicken katsu and pork katsu is largely a matter of personal preference. Pork loin offers a slightly richer flavor and firmer texture, while chicken breast is lean and universally loved. Both are excellent choices for a delectable katsu bowl. Ensure your cutlets are pounded evenly for consistent cooking.
Step-by-Step Katsu Bowl Instructions
Follow these simple steps to create your own mouthwatering katsu bowl. This guide focuses on a classic Katsudon, one of the most popular **Japanese Katsu Bowls** you can master.
Preparing the Katsu
- **Prepare the Protein:** If using pork, score the edges of the cutlets to prevent curling. Pound chicken or pork to about 1/4 to 1/3 inch thickness. Season both sides with salt and pepper.
- **Set Up Breading Station:** Prepare three shallow dishes. One with flour, one with beaten egg, and one with panko breadcrumbs.
- **Bread the Katsu:** Dredge each cutlet thoroughly in flour, shaking off excess. Dip into the egg mixture, ensuring full coating. Finally, press firmly into the panko breadcrumbs until completely covered.
- **Fry the Katsu:** Heat about 1 inch of vegetable oil in a large skillet or deep pot to 350°F (175°C). Carefully place katsu into the hot oil, frying in batches if necessary, for 3-5 minutes per side, or until golden brown and cooked through.
- **Drain:** Remove katsu to a wire rack set over paper towels to drain excess oil.
Assembling the Katsu Bowl
- **Cook the Sauce Base:** In a small saucepan or shallow skillet, combine sliced onion, dashi, soy sauce, mirin, and sugar. Bring to a simmer over medium heat and cook for 2-3 minutes until onions are slightly softened.
- **Add Katsu:** Place one fried katsu cutlet into the simmering sauce. Allow it to soak up some of the flavors for about 1 minute.
- **Add Egg:** Gently pour about half of the lightly beaten egg over the katsu and around the pan. Cover immediately and cook for 1-2 minutes, or until the egg is set to your desired doneness (some prefer it slightly runny).
- **Serve:** Slide the katsu and egg mixture directly over a bowl of hot Japanese rice. Repeat for the second serving.
- **Garnish:** Garnish with chopped green onions, nori strips, or shichimi togarashi as desired. Serve immediately with a side of tonkatsu sauce.
Expert Tips for the Perfect Katsu Bowl
Achieving katsu perfection is easier than you think with these professional tips. From frying techniques to flavor enhancements, these pointers will elevate your dish.
- **Even Pounding:** Ensure your chicken or pork cutlets are evenly pounded to ensure consistent cooking and tenderness.
- **Cold Oil Start for Panko:** For extra crispy katsu, some chefs suggest coating the katsu and then placing it in *cold* oil, bringing the temperature up slowly. This allows the panko to crisp evenly.
- **Don’t Overcrowd:** Fry katsu in batches to maintain oil temperature and prevent soggy results.
- **Make Your Own Tonkatsu Sauce:** While store-bought is convenient, a homemade version is simple and adds depth. Combine ketchup, Worcestershire sauce, soy sauce, sugar, and a touch of mustard. For a detailed guide on homemade tonkatsu sauce, check out Serious Eats.
- **Quality Rice:** Use short-grain Japanese rice for the best texture and absorbency for your bowl.
Delicious Variations: Exploring Different Katsu Bowl Recipes
Once you master the classic, the world of katsu variations awaits! These delicious interpretations allow for endless creativity and flavor combinations.
- **Miso Katsu:** Drizzle with a rich miso-based sauce instead of the traditional dashi-egg simmer.
- **Cheese Katsu:** Stuff your pork or chicken cutlet with a slice of melting cheese before breading and frying.
- **Curry Katsu (Katsu Curry):** Serve your crispy katsu alongside a generous helping of Japanese curry over rice. This is a very popular and hearty option.
- **Tofu Katsu:** For a vegetarian option, use firm tofu slices instead of meat. Marinate the tofu first for extra flavor.
- **Ebi Katsu:** Use breaded and fried shrimp (ebi fry) instead of chicken or pork for a seafood twist.
Serving Suggestions: Complete Your Katsu Bowl Meal
A katsu bowl is often a meal in itself, but a few simple side dishes can elevate it to a full Japanese feast. Consider these additions to complement the rich flavors.
- **Miso Soup:** A warm bowl of savory miso soup is a perfect traditional accompaniment.
- **Pickled Ginger (Gari):** The zingy, refreshing taste of pickled ginger cuts through the richness of the fried katsu.
- **Green Salad with Sesame Dressing:** A light, crisp salad provides a fresh contrast.
- **Steamed Vegetables:** Broccoli, asparagus, or green beans add nutrition and color.
Storing and Reheating Your Katsu Bowls
While katsu is best enjoyed fresh, you can certainly store and reheat components of your **katsu bowls**.
Store leftover katsu separately from the rice and sauce mixture in airtight containers in the refrigerator for up to 2-3 days. Reheating fried katsu can be tricky to maintain crispiness.
- **Katsu:** Reheat in an air fryer at 350°F (175°C) for 5-7 minutes, or in an oven at 375°F (190°C) for 10-15 minutes, until heated through and crisp. Avoid microwave reheating if you want to keep the crunch.
- **Rice & Sauce:** Reheat the rice and any leftover sauce mixture gently in the microwave or a small saucepan.
We hope you enjoy these **easy katsu recipes**!
FAQ
What is katsu?
Katsu refers to a piece of meat (most commonly pork or chicken) that has been pounded thin, breaded with panko, and deep-fried until golden brown and crispy. It’s a popular dish in Japanese cuisine, often served as part of a meal set or in a rice bowl (Katsudon).
Can I make Katsu Bowls gluten-free?
Yes, you can! Substitute regular flour with a gluten-free all-purpose flour blend and use gluten-free panko breadcrumbs. Ensure your soy sauce is also gluten-free (tamari is a good option) and check other sauce ingredients for hidden gluten.
What’s the difference between Tonkatsu and Katsudon?
Tonkatsu specifically refers to the breaded and deep-fried pork cutlet itself, usually served with shredded cabbage and tonkatsu sauce. Katsudon, on the other hand, is a rice bowl dish where a fried tonkatsu (or chicken katsu) is simmered with egg and onion in a savory-sweet dashi broth, then served over a bed of rice.