
")
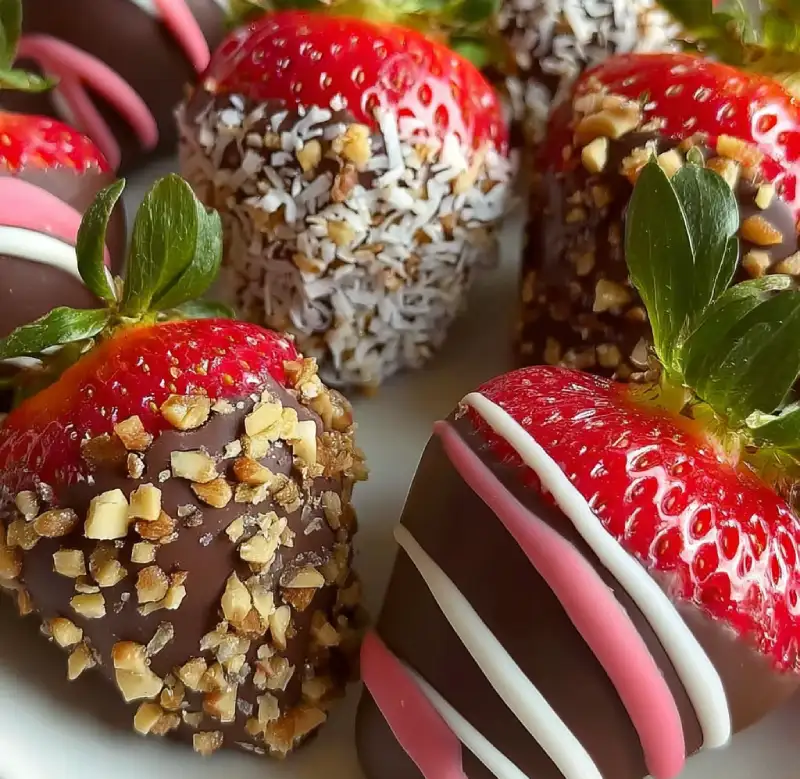
Table of Contents
- Why This Chocolate Covered Strawberries Recipe Works
- Ingredients and Smart Substitutions
- Your Step-by-Step Guide to Perfect Chocolate Covered Strawberries
- Expert Tips for Success
- What to Serve With Your Chocolate Covered Strawberries
- Storing and Reheating (Spoiler: No Reheating Here!)
- Frequently Asked Questions About Chocolate Covered Strawberries
Oh, the sheer delight of biting into a perfectly ripe, juicy strawberry enveloped in a crisp, decadent shell of chocolate! It’s a symphony of textures and flavors – the sweet, tangy burst of fruit meeting the smooth, rich embrace of chocolate, finishing with that satisfying snap. If you’ve ever dreamt of creating these delightful confections at home that rival any gourmet shop, you’re in the right place. Today, we’re diving deep into the art and science of making the most exquisite Chocolate Covered Strawberries you’ve ever tasted. This isn’t just a recipe; it’s your definitive guide to mastering this classic treat, ensuring every berry is a miniature masterpiece. And for more easy recipes and baking inspiration, be sure to see more easy recipes on my blog!
Why This Chocolate Covered Strawberries Recipe Works
Forget everything you thought you knew about finicky chocolate dipping. This method for Chocolate Covered Strawberries is designed for foolproof success, making you look like a pastry pro with minimal fuss. Here’s why this particular approach stands out and guarantees stunning results every single time:
- Perfect Chocolate-to-Strawberry Ratio Every Time: We use a technique that ensures just the right amount of chocolate coats each berry, giving you that ideal balance of fruitiness and rich chocolate flavor without being overwhelming.
- Smooth, Crack-Free Chocolate Coating: Our secret to a glossy, unbroken chocolate shell lies in careful melting and a touch of a special ingredient (coconut oil!) that prevents seizing and creates a beautiful, stable finish.
- Balanced Sweetness: Not Too Fussy: This recipe focuses on enhancing the natural sweetness of the strawberries with high-quality chocolate, ensuring a sophisticated dessert that isn’t cloyingly sweet. You’ll truly taste both components.
- Quick Set for Immediate Enjoyment: With our chilling method, your chocolate-covered strawberries will set up beautifully and quickly, meaning less waiting and more indulging!
Ingredients and Smart Substitutions
Here is what you need and why each component is crucial for truly exceptional Chocolate Covered Strawberries:
Strawberries: Choosing the Best and Why Size Matters: Peak season strawberries are your best friend here. Look for berries that are bright red, firm, plump, and have fresh green caps. Avoid any that are bruised, soft, or have white shoulders, as these won’t be as sweet or visually appealing. Medium to large strawberries are ideal for dipping, offering a good surface area for coating and a satisfying bite. Small berries can be fiddly, and extra-large ones might overwhelm the chocolate.
Chocolate: Types (Dark, Milk, White) and Tempering Basics: The quality of your chocolate makes all the difference! I highly recommend using good quality chocolate chips or, even better, chocolate bars chopped into small pieces. Compound chocolate (often labeled as ‘candy melts’) is easier to work with as it doesn’t require tempering, but it lacks the rich flavor of true chocolate. For an extra glossy, snap-worthy finish with real chocolate, you can gently temper it. However, with our coconut oil trick, we can achieve a great finish without a full tempering process. Dark Chocolate (60-70% cacao) offers a sophisticated bitterness that beautifully contrasts the strawberry’s sweetness. Milk Chocolate provides a classic, creamy sweetness. White Chocolate is lovely for decorating or for those who prefer a sweeter, milder flavor. You can find excellent quality chocolate from brands like Ghirardelli, Callebaut, or Valrhona. For those who want to learn more about chocolate techniques, King Arthur Baking has an excellent guide on how to temper chocolate.
Coconut Oil (Optional, But Recommended): For Smoothness and Shine: A small amount of virgin or refined coconut oil (make sure it’s neutral in flavor if you don’t want a coconut hint) is a game-changer! It thins out the melted chocolate slightly, making it smoother and easier to dip, and contributes to that beautiful, glossy, crack-free finish when set. It also helps the chocolate set a bit faster and more firmly.
Toppings & Decorations: Sprinkles, Nuts, Drizzle (Creative Ideas): This is where you can truly make your Chocolate Covered Strawberries shine! Think beyond the basic: colorful sprinkles, finely chopped nuts (pecans, walnuts, pistachios, almonds), shredded coconut, a drizzle of contrasting white chocolate, or even a dusting of cocoa powder. Get creative – chili flakes for a kick, edible glitter for sparkle, or crushed freeze-dried raspberries for an extra fruity punch!
Your Step-by-Step Guide to Perfect Chocolate Covered Strawberries
Follow these step-by-step photos (mental images for now!) for making your delicious Chocolate Covered Strawberries:
1. Prep the Strawberries: Wash, Dry, and Chill
Gently wash your strawberries under cool running water, leaving the green caps intact. This prevents water from soaking into the berry. Lay them out on a few layers of paper towels and allow them to air dry completely, or gently pat them dry. This step is absolutely crucial – any moisture can cause your chocolate to seize! Once dry, place the strawberries on a plate or baking sheet lined with parchment paper and chill them in the refrigerator for at least 15-20 minutes. Cold strawberries help the chocolate set faster and create a beautiful, even coating.
2. Melt the Chocolate: Double Boiler vs. Microwave
Double Boiler Method (Recommended for control): Place your chocolate (and coconut oil, if using) in a heatproof bowl set over a saucepan of barely simmering water. Ensure the bottom of the bowl does not touch the water. Stir frequently until the chocolate is smooth and completely melted. Remove from heat immediately once melted. Microwave Method (Quicker): Place chocolate and coconut oil in a microwave-safe bowl. Microwave in 30-second intervals, stirring well after each, until mostly melted. Stir until completely smooth. Be careful not to overheat!
3. Dip and Coat: The Best Technique for Full Coverage
Hold a chilled strawberry by its green cap. Dip it into the melted chocolate, tilting the bowl if necessary to get good coverage. Swirl it gently to coat about three-quarters of the berry, letting any excess chocolate drip back into the bowl. You can use a spoon or a dipping tool to help if you prefer. For a cleaner look, gently scrape the bottom of the berry against the rim of the bowl before placing it on your parchment-lined baking sheet.
4. Decorate Instantly: Before Chocolate Sets
If you’re adding sprinkles, nuts, or other toppings, do so immediately after dipping each strawberry, while the chocolate is still wet. This ensures the decorations adhere properly. Gently sprinkle or roll the dipped berry in your chosen toppings.
5. Chill to Set: The Patience Pays Off
Once all your Chocolate Covered Strawberries are dipped and decorated, transfer the baking sheet back to the refrigerator. Chill for at least 30 minutes, or until the chocolate is completely firm and has a glossy finish. This brief chill time is essential for a beautiful presentation and perfect snap.
Expert Tips for Success
- Ensure Strawberries are Bone Dry: I can’t stress this enough! Water is chocolate’s enemy. Even a tiny drop can cause your beautifully melted chocolate to seize and become thick and grainy.
- Don’t Overheat Your Chocolate: Chocolate burns easily, especially in the microwave. Low and slow is the way to go, whether using a double boiler or short bursts in the microwave. Overheated chocolate will be thick, dull, and may even taste burnt.
- Use Quality Chocolate for Best Flavor and Texture: This is a two-ingredient dessert, so each ingredient needs to shine. Opt for a good baking chocolate rather than cheap candy melts for superior taste and a smooth finish.
- Work Quickly, Especially with Thin Coatings: Once the chocolate is melted, it will start to cool and thicken. Have everything prepped and ready to go so you can dip your strawberries efficiently before the chocolate sets too much.
- Mastering the Drizzle Technique: For a professional look, melt a contrasting chocolate (e.g., white chocolate over dark). Transfer it to a piping bag with a tiny snipped corner or a Ziploc bag. Drizzle quickly back and forth over the set strawberries in a zig-zag pattern.
What to Serve With Your Chocolate Covered Strawberries
Chocolate Covered Strawberries are inherently elegant, making them perfect on their own, but they also pair beautifully with a few complementary elements to elevate the experience:
- Champagne or Sparkling Wine: The crisp effervescence and celebratory notes of bubbly complement the sweet and tart flavors of the berries and chocolate wonderfully. It’s a classic pairing for a reason!
- Coffee or Espresso: A rich, dark roast coffee or a shot of intense espresso cuts through the sweetness and enhances the chocolate notes, creating a sophisticated after-dinner treat.
- As Part of a Dessert Platter: Group your strawberries with other small bites like mini cheesecakes, macarons, or small tarts for an impressive and varied dessert spread.
- A Simple Vanilla Ice Cream Scoop: For a delightful textural contrast, serve a few berries alongside a scoop of high-quality vanilla bean ice cream. The cold creaminess is a perfect foil to the firm chocolate and fresh fruit.
Storing and Reheating (Spoiler: No Reheating Here!)
Let’s be clear: Chocolate Covered Strawberries are best enjoyed fresh! Reheating is not an option as it would completely ruin the delicate texture of the fruit and the chocolate coating. Here’s how to keep them at their peak freshness:
- How to Store for Freshness: Store your chocolate covered strawberries in a single layer in an airtight container in the refrigerator. If you must stack them, place a layer of parchment paper between the layers to prevent sticking.
- Best Practices for Keeping Them Firm: Avoid leaving them at room temperature for extended periods, especially in warm environments, as the chocolate will soften and the berries may start to weep.
- Shelf Life and When to Enjoy: For the absolute best taste and texture, consume your Chocolate Covered Strawberries within 1-2 days. After that, the strawberries may start to release moisture, which can make the chocolate coating soggy or cause it to ‘bloom’ (develop white streaks).
Frequently Asked Questions About Chocolate Covered Strawberries
Why is my chocolate seizing?
How do I prevent blooming (white streaks)?
Can I use frozen strawberries?
How long do they last at room temperature?
What’s the best way to transport them?
Decadent Chocolate Covered Strawberries
- Total Time: 30 minutes
- Yield: Approx. 12-18 strawberries
Description
Unlock the secret to perfectly glossy, crack-free chocolate covered strawberries that taste as amazing as they look. This easy-to-follow recipe ensures sweet success every time.
Ingredients
- 1 lb (approx. 18-24) fresh, ripe strawberries, firm with green caps
- 10–12 oz (280-340g) good quality chocolate (dark, milk, or white), chopped or chips
- 1–2 teaspoons virgin or refined coconut oil (optional, but recommended)
- Optional toppings: sprinkles, chopped nuts, shredded coconut, contrasting chocolate for drizzle
Instructions
- 1. Prepare Strawberries: Gently wash strawberries under cool water, leaving green caps on. Pat them completely dry with paper towels; moisture can ruin the chocolate. Chill for 15-20 minutes in the refrigerator.
- 2. Melt Chocolate: In a heatproof bowl over a saucepan of simmering water (double boiler method) or in 30-second intervals in the microwave, melt the chocolate with coconut oil (if using), stirring until smooth. Do not overheat.
- 3. Dip Strawberries: Holding a chilled strawberry by its cap, dip it into the melted chocolate, coating about three-quarters of the berry. Allow excess chocolate to drip off, gently scraping the bottom against the bowl rim.
- 4. Add Toppings: Immediately after dipping, if desired, add sprinkles, nuts, or other desired toppings while the chocolate is still wet.
- 5. Set and Chill: Place dipped strawberries on a parchment-lined baking sheet. Refrigerate for at least 30 minutes, or until the chocolate is completely firm and glossy.
- Prep Time: 20 mins
- Cook Time: 10 mins