
")
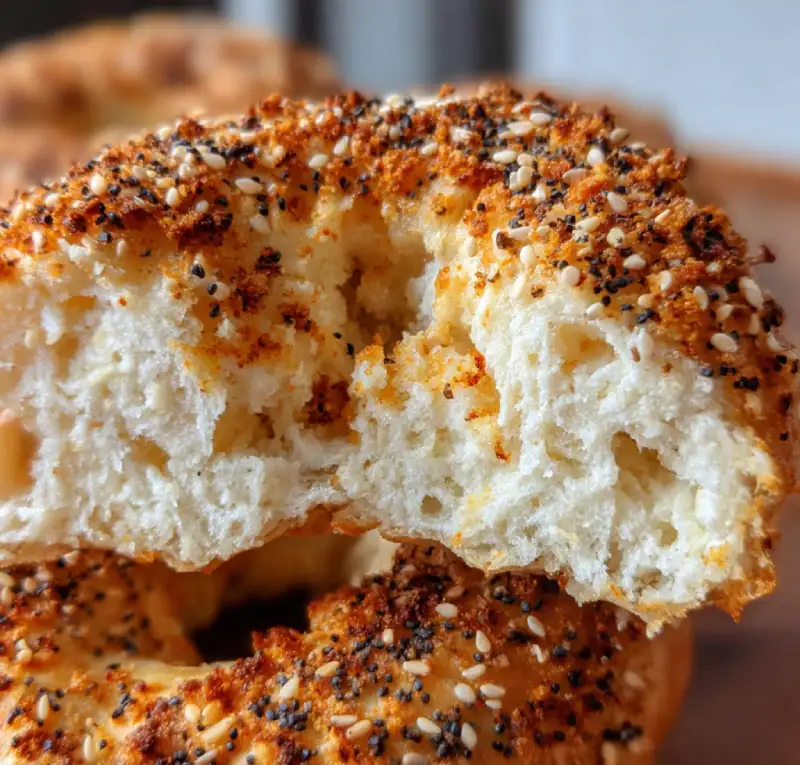
Table of Contents
- Introduction: Why These Gluten-Free Greek Yogurt Bagels?
- Why This Recipe Works: Texture and Flavor Defined
- Ingredients and Smart Substitutions
- How to Make Gluten-Free Greek Yogurt Bagels
- Expert Tips for Success
- What to Serve With Your Gluten-Free Bagels
- Storing and Reheating Your Homemade Bagels
- Frequently Asked Questions About Gluten-Free Greek Yogurt Bagels
Introduction: Why These Gluten-Free Greek Yogurt Bagels?
Prepare to fall in love with the ultimate breakfast experience! Imagine biting into a bagel that’s perfectly chewy on the inside, wonderfully crisp on the outside, and brimming with that authentic bagel tang, all while being completely gluten-free. Sounds like a dream, right? Well, it’s about to become your delicious reality with these incredible gluten-free Greek yogurt bagels! After years of tirelessly searching for that elusive, perfect gluten-free bagel recipe, I finally cracked the code, and let me tell you, it was a journey filled with many dense, crumbly, and frankly, disappointing attempts. But through perseverance and a little culinary magic, I landed on this recipe, which not only delivers on texture and taste but is also remarkably easy to make right in your home kitchen. For more easy-to-follow recipes that deliver big on flavor, you can See more easy recipes and explore a world of culinary delights.
Every ingredient chosen for this recipe plays a crucial role in achieving the delightful results you’re about to experience. From the specific gluten-free flour blend to the type of Greek yogurt, each component is selected to ensure maximum flavor and the ideal bagel texture. We’re talking trusted ingredients that work together harmoniously to create a bagel that even the most discerning bagel connoisseurs will adore. Get ready to transform your breakfast routine!
Why This Recipe Works: Texture and Flavor Defined
This isn’t just another gluten-free recipe; it’s a breakthrough! These gluten-free Greek yogurt bagels are designed for success, delivering on all the crucial bagel characteristics. Here’s why this recipe stands head and shoulders above the rest:
- Chewy Interior, Golden Crust: The secret lies in the precise ratio of ingredients and the critical water bath step, which gelatinizes the starch on the surface, creating that signature chew and a beautiful, golden-brown crust.
- Subtle Tang from Greek Yogurt: The Greek yogurt does more than just bind; it imparts a delicate, authentic tang similar to traditional sourdough bagels, adding a depth of flavor that’s often missing in gluten-free versions.
- Simple Ingredients, Incredible Taste: You won’t find obscure, hard-to-source ingredients here. This recipe champions simplicity, proving that incredible taste and texture can be achieved with accessible items from your local grocery store.
- No Yeast Required: That’s right! The Greek yogurt and baking powder work in tandem to give these bagels their lift and perfect texture, eliminating the need for any yeast activation or proofing time.
Ingredients and Smart Substitutions
Here is what you need and why each component is vital for creating the best gluten-free Greek yogurt bagels:
Gluten-Free All-Purpose Flour Blend: This is the foundation of our bagels! I highly recommend using a reputable cup-for-cup gluten-free all-purpose flour blend that contains xanthan gum. Brands like King Arthur Gluten-Free Measure for Measure Flour or Bob’s Red Mill 1-to-1 Baking Flour work exceptionally well because their blend of flours (rice, tapioca, sorghum, etc.) creates the right structure. The xanthan gum acts as a binder, mimicking gluten’s elasticity, which is crucial for that characteristic bagel chew. Different blends can yield different results, so sticking to one with xanthan gum is key. For more in-depth information on gluten-free baking, check out resources like King Arthur Baking’s Gluten-Free Guide.
Greek Yogurt: Why 0% or 2% Fat is Best: The star ingredient alongside our flour blend! Using 0% or 2% fat plain Greek yogurt is paramount. It’s thick, high in protein, and low in water content compared to regular yogurt, which is essential for creating the correct dough consistency. The acidity also reacts with the baking powder, aiding in leavening. Avoid full-fat Greek yogurt, as the extra fat can interfere with the dough’s structure, making it softer and less chewy, which isn’t what we want in a bagel. Flavored yogurts, of course, are a no-go.
Baking Powder: The Leavening Agent: This is our quick-acting leavening agent that works with the yogurt’s acidity to create lift and a tender crumb. Ensure your baking powder is fresh for the best results; old baking powder can lead to flat, dense bagels.
Salt: For Flavor Balance: Salt isn’t just for seasoning; it’s essential for enhancing all the other flavors in the bagel. It also plays a small role in strengthening the gluten-free structure. Don’t skip it!
Egg Wash (Optional): For Shine and Seeds: A simple egg wash (one egg beaten with a tablespoon of water) brushed on before baking gives your bagels a beautiful, glossy, golden crust. It also acts as the perfect glue for securing any toppings you desire.
Toppings: Sesame Seeds, Everything Bagel Seasoning, Poppy Seeds: This is where you can truly customize your bagels! Classic sesame seeds add a nutty crunch, while everything bagel seasoning brings a burst of savory flavor. Poppy seeds offer a subtle texture. Feel free to experiment with dried minced garlic, dried onion flakes, or even some coarse sea salt.
How to Make Gluten-Free Greek Yogurt Bagels
Follow these step-by-step photos (imagine them here!) to create your perfect gluten-free Greek yogurt bagels:
1. Prepare Your Dough: Mixing and Kneading
In a large mixing bowl, combine the gluten-free all-purpose flour blend, baking powder, and salt. Whisk them together thoroughly to ensure the leavening is evenly distributed. Create a well in the center and add the Greek yogurt. Using a sturdy spatula or your hands, mix until a shaggy dough forms. Turn the dough out onto a lightly floured (with gluten-free flour) surface and knead gently for 5-7 minutes. The dough should come together and feel cohesive, slightly sticky but manageable. Avoid over-kneading, as this can make gluten-free dough tough.
2. Shape Your Bagels: The Easy Way
Divide the dough into 6-8 equal portions (about 2.5-3 ounces each for standard-sized bagels). Roll each portion into a smooth ball. To create the classic bagel hole, you can either poke a hole through the center with your thumb and gently stretch it to about 1 inch in diameter, or roll the dough into a 6-inch rope and pinch the ends together to form a circle. Place the shaped bagels on a parchment-lined baking sheet.
3. The Water Bath: Why It’s Crucial
Preheat your oven to 400°F (200°C). Bring a large pot of water to a rolling boil. Carefully lower 2-3 bagels into the boiling water at a time (don’t overcrowd the pot). Boil for 60 seconds on one side, then gently flip them with a slotted spoon and boil for another 60 seconds on the other side. This critical step gelatinizes the starch on the exterior, giving the bagels their signature chewy crust and helps them keep their shape during baking. Remove the boiled bagels with the slotted spoon, allowing excess water to drain, and place them back on the parchment-lined baking sheet.
4. Bake to Golden Perfection
If using, brush the tops of the boiled bagels with the egg wash and sprinkle generously with your chosen toppings (sesame seeds, everything bagel seasoning, poppy seeds). Transfer the baking sheet to the preheated oven and bake for 20-25 minutes, or until the bagels are beautifully golden brown and sound hollow when tapped on the bottom. Let them cool slightly on a wire rack before slicing and enjoying.
Expert Tips for Success
- Don’t Over-Knead the Dough: Unlike traditional gluten-containing doughs, gluten-free doughs don’t develop gluten. Over-kneading can actually make them tough. Knead just until the ingredients are combined and the dough is cohesive.
- Ensure Proper Water Bath Boil: The water bath is non-negotiable for that authentic bagel chew. Make sure the water is at a rolling boil and boil each side for the full 60 seconds.
- Preheat Your Oven Thoroughly: A fully preheated oven ensures even baking and helps the bagels achieve that beautiful golden crust. Give your oven at least 15-20 minutes to reach temperature after the preheat signal.
- Use Quality Gluten-Free Flour Blend: The type of gluten-free flour blend makes a significant difference. Opt for a reputable brand designed for baking that includes xanthan gum.
- Measure Accurately: Especially for gluten-free baking, precise measurements are key. Use a kitchen scale for flour and yogurt if possible, as volume measurements can vary.
What to Serve With Your Gluten-Free Bagels
Now that you have these glorious gluten-free Greek yogurt bagels, the possibilities are endless! Here are some delectable serving suggestions:
- Classic Cream Cheese Spreads: Smear them with your favorite plain, chive, or strawberry cream cheese. Don’t forget a sprinkle of everything bagel seasoning for an extra flavor boost!
- Savory Sandwich Fillings: These bagels make an excellent base for a breakfast sandwich! Think scrambled eggs, bacon or sausage, and a slice of cheese. They’re also fantastic for lunch with smoked salmon, capers, and red onion, or turkey and avocado.
- Sweet Topping Ideas: For a sweeter treat, try them with butter and jam, honey, or a drizzle of maple syrup. A dollop of ricotta cheese with fresh berries is also divine.
- Pair with Coffee: There’s nothing quite like a freshly toasted bagel with your morning coffee.
Storing and Reheating Your Homemade Bagels
To keep your homemade gluten-free Greek yogurt bagels tasting their best, proper storage is essential:
- Airtight Storage for Freshness: Once completely cooled, store bagels in an airtight container or a large zip-top bag at room temperature for up to 2-3 days. They tend to dry out more quickly than traditional bagels, so airtight storage is crucial.
- Freezing for Longer Shelf Life: For longer storage, bagels freeze beautifully! Once completely cool, slice them in half (this makes toasting easier later) and place them in a single layer on a baking sheet to freeze for about an hour. Once firm, transfer them to a freezer-safe bag or container. They will last for up to 2-3 months.
- Reheating for Best Texture: To enjoy frozen bagels, take them directly from the freezer and pop them into your toaster for a few minutes until warmed through and slightly crisp. For refrigerated bagels, a quick toast will bring back their freshness and chew. You can also warm them in a preheated oven at 350°F (175°C) for about 5-7 minutes for a softer texture.
Frequently Asked Questions About Gluten-Free Greek Yogurt Bagels
Can I make these dairy-free?
What’s the best gluten-free flour blend to use?
Why do I need a water bath for bagels?
Can I add mix-ins to the dough?
Gluten-Free Greek Yogurt Bagels
- Total Time: 27 minute
- Yield: 6-8 bagels
Description
Bake the best gluten-free Greek yogurt bagels with this easy recipe. Enjoy step-by-step instructions for delicious homemade bagels with a perfect chewy texture.
Ingredients
- 1 ½ cups (180g) gluten-free all-purpose flour blend (with xanthan gum)
- 2 teaspoons baking powder
- ¾ teaspoon salt
- 1 cup (240g) plain 0% or 2% fat Greek yogurt
- For egg wash (optional): 1 large egg, beaten with 1 tbsp water
- Optional toppings: Sesame seeds, everything bagel seasoning, poppy seeds
Instructions
- Prepare Your Dough: In a large bowl, whisk together gluten-free flour, baking powder, and salt. Add Greek yogurt and mix until a shaggy dough forms. Knead gently on a lightly floured surface for 5-7 minutes until cohesive.
- Shape Your Bagels: Divide dough into 6-8 equal portions. Roll each into a ball, then poke a hole in the center with your thumb and gently stretch to 1 inch, or roll into a rope and pinch ends. Place on a parchment-lined baking sheet.
- The Water Bath: Preheat oven to 400°F (200°C). Bring a large pot of water to a rolling boil. Boil 2-3 bagels at a time for 60 seconds per side. Remove with a slotted spoon, drain, and return to baking sheet.
- Bake to Golden Perfection: Brush boiled bagels with egg wash (if using) and sprinkle with desired toppings. Bake for 20-25 minutes, or until golden brown. Cool on a wire rack before serving.
- Prep Time: 15 mins
- Cook Time: 20-25 mins