
")
{
“blog_html”: ”
Table of Contents
\n
\n
\n
\n
\n
\n
\n
\n
\n
\n
\n
Make Delicious Greek Yogurt Bagels at Home (No Boiling Required!)
\n
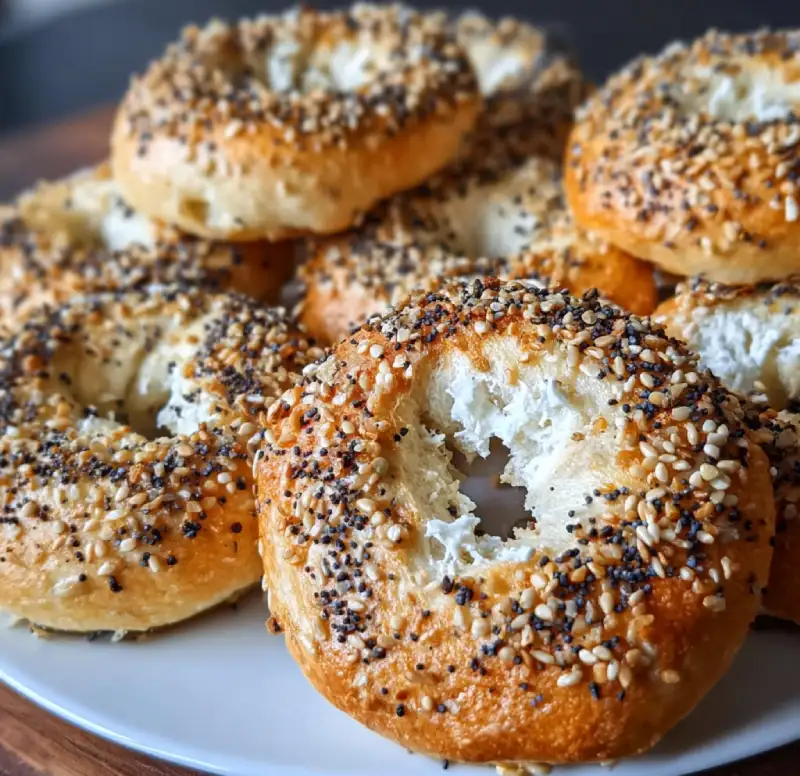
Imagine sinking your teeth into a warm, chewy bagel, perfectly golden on the outside with a tender, satisfying interior. Now, imagine baking that bagel yourself, right in your own kitchen, with minimal fuss and absolutely no boiling involved! That’s the magic we’re unlocking today with these incredible Greek yogurt bagels. They deliver that classic bagel satisfaction—crisp crust, delightful chew, and comforting flavor—without the traditional complexities. If you’ve been hesitant to venture into bread making, this recipe is your perfect entry point. It’s surprisingly simple, incredibly rewarding, and yields results that will have everyone asking for your secret. For more easy and delicious home baking projects, be sure to see more easy recipes right here!
\n
Why I Love Baking My Own Bagels
\n
There’s an unparalleled joy in pulling fresh, still-warm bagels from the oven. The aroma alone is enough to brighten any morning. Beyond the sensory experience, baking my own bagels allows me to control the quality of ingredients, experiment with unique toppings, and savor a truly superior taste and texture that store-bought options often can’t match. It transforms breakfast from a routine into a celebrated, albeit simple, occasion.
\n
What Makes This Recipe Different (and Easier!)
\n
The traditional bagel-making process often involves two distinct and somewhat time-consuming steps: boiling and then baking. While boiling contributes to that signature chewy crust, it can intimidate many home bakers. This Greek yogurt bagels recipe ingeniously bypasses the boiling step entirely, thanks to the unique properties of Greek yogurt. It creates a beautifully pliable dough that bakes up with an amazingly crisp exterior and a wonderfully chewy interior, all with a single baking stage. It’s truly a game-changer for homemade bagels!
\n\n
How This Greek Yogurt Bagel Recipe Works
\n
This recipe for Greek yogurt bagels isn’t just about simplicity; it’s about smart ingredient science that delivers fantastic results.
\n
Achieving a Crispy Exterior and Chewy Interior with Simple Ingredients
\n
The magic starts with just two primary ingredients: self-rising flour and Greek yogurt. Self-rising flour comes pre-mixed with baking powder and salt, providing the needed lift and seasoning without extra steps. When combined with Greek yogurt, these ingredients create a dough that’s both easy to handle and robust enough to develop a beautiful crust. The high heat of the oven quickly sets the outside of the bagel, leading to that desirable crispness, while the moisture from the yogurt helps keep the interior tender and chewy.
\n
The Magic of Greek Yogurt in Bagel Dough
\n
Greek yogurt plays a starring role here. Its acidity activates the leavening agents in the self-rising flour, contributing to a good rise. More importantly, its high protein content and thick consistency add incredible structure and moisture to the dough. This results in a bagel that isn’t just dense and dry, but delightfully springy and substantial. The yogurt also imparts a subtle tanginess that enhances the overall flavor profile, mimicking some of the nuanced flavors developed in traditional, yeast-leavened doughs.
\n\n
Essential Ingredients & Smart Substitutions
\n
Getting amazing Greek yogurt bagels starts with understanding your ingredients. Here is what you need and why:
\n
\n
Greek Yogurt: Opt for full-fat, plain Greek yogurt for the best texture and flavor. The higher fat content contributes to a richer, more tender crumb and prevents the bagels from drying out. Its thickness is also crucial for the dough’s consistency. If you need a dairy-free option, a thick, plain, unsweetened plant-based yogurt (like almond or oat yogurt) can work, just ensure it’s very thick and has a similar consistency to traditional Greek yogurt to maintain the dough’s structure. Look for brands without added starches or gums if possible for the cleanest flavor.
\n
Egg Wash vs. Milk Wash: For that beautiful, appetizing golden crust and to help toppings adhere, an egg wash is highly recommended. A simple whisked egg (or egg yolk for extra shine) with a splash of water creates a glossy, rich brown finish. If you prefer to avoid eggs, a milk wash (any type of milk) will still give a nice golden color, though perhaps slightly less shine. For a vegan option, a brushing of plant milk or simply water before baking can work, though the browning will be less pronounced.
\n
Toppings That Elevate Your Bagels: This is where you can truly customize your Greek yogurt bagels! Classic Everything Bagel Seasoning is a perennial favorite, offering a delightful blend of garlic, onion, poppy seeds, and sesame seeds. Other fantastic choices include toasted sesame seeds, poppy seeds, flaky sea salt, dried onion flakes, or even cinnamon sugar for a sweeter take. Don’t be afraid to get creative!
\n
\n\n
Step-by-Step Guide: Baking Your Own Greek Yogurt Bagels
\n
Follow these simple steps for perfectly baked Greek yogurt bagels:
\n
1. Mixing the Dough: Don’t Overwork It!
\n
In a large bowl, combine the self-rising flour and Greek yogurt. Start mixing with a spoon, then switch to your hands once it becomes too stiff. Gently knead the dough in the bowl for just 2-3 minutes until it comes together into a cohesive, slightly sticky ball. The key here is not to overwork it, as this can make your bagels tough. It should be soft but manageable, not crumbly nor excessively wet. If it feels too sticky, add a tiny bit more flour, a teaspoon at a time. If too dry, add a touch more yogurt.
\n
\n
2. Shaping Your Bagels: The Easy Way
\n
Divide your dough ball into equal portions (usually 4-6, depending on your desired bagel size). Roll each portion into a smooth, even rope about 6-8 inches long. Bring the ends of the rope together and pinch them firmly to form a secure circle, ensuring the seam is sealed. Alternatively, you can roll each portion into a ball, then use your thumb or the back of a wooden spoon to poke a hole in the center, gently stretching it to create the classic bagel shape with a hole about 1-1.5 inches in diameter.
\n
\n
3. Preparing for Baking: Wash and Top!
\n
Preheat your oven to 400°F (200°C) and line a baking sheet with parchment paper. In a small bowl, whisk together one egg with a tablespoon of water for your egg wash. Place your shaped bagels on the prepared baking sheet. Brush the tops and sides of each bagel generously with the egg wash. This is crucial for achieving that beautiful golden-brown crust and helping your toppings adhere. Sprinkle your chosen toppings evenly over the wet surface of each bagel. Be generous with your favorite seeds or seasonings!
\n
\n
4. Baking for Perfection: Golden Brown and Fully Cooked
\n
Transfer the baking sheet to your preheated oven. Bake your Greek yogurt bagels for 20-25 minutes, or until they are deeply golden brown and sound hollow when tapped on the bottom. The exact baking time can vary depending on your oven and bagel size, so keep an eye on them. For an even bake, you might rotate the baking sheet halfway through. Once baked, remove them from the oven and transfer them to a wire rack to cool slightly before serving. Enjoy the incredible aroma!
\n
\n\n
Expert Tips for Perfect Greek Yogurt Bagels Every Time
\n
-
- \n
- Dough Consistency: What to Look For: Your dough should be soft, pliable, and slightly tacky but not stick excessively to your hands. If it’s too dry, it will crack; if it’s too wet, it’ll be unmanageable. Adjust with tiny amounts of flour or yogurt as needed.
\n
-
- Preventing Stickiness: Flour Smartly: Lightly flour your hands and work surface, but resist the urge to add too much flour to the dough itself. Excessive flour will make your bagels dense and dry. A little stickiness is normal and indicates a well-hydrated dough.
\n
-
- Baking Temperature and Time: Calibrating for Your Oven: Ovens can vary wildly! While 400°F (200°C) for 20-25 minutes is a good starting point, get to know your oven. If your bagels are browning too quickly, lower the temperature slightly. If they’re pale after 25 minutes, give them a few more minutes until golden.
\n
-
- Getting a Shiny Crust: The Egg Wash Trick: Don’t skip the egg wash! It’s the secret to that coveted shiny, deep golden-brown crust. For an extra glossy finish, use only the egg yolk mixed with a tiny bit of water.
\n
-
- Don’t Be Afraid to Experiment: Once you’ve mastered the basic technique, feel free to play with different flavor additions to the dough (like a pinch of garlic powder or dried herbs) or a wider variety of toppings.
\n
\n
\n\n
Delicious Ways to Serve Your Homemade Bagels
\n
Your freshly baked Greek yogurt bagels are incredibly versatile! Here are some delightful ways to enjoy them:
\n
Classic Cream Cheese Pairings
\n
Nothing beats the classic! A generous schmear of plain cream cheese is always a winner. But why stop there? Experiment with flavored cream cheeses like chive and onion, strawberry, or even a spicy jalapeño cream cheese. For an extra treat, whip your cream cheese with a little honey and cinnamon.
\n
Savory Sandwiches and Spreads
\n
Turn your bagels into satisfying meals! They make excellent breakfast sandwiches with eggs, bacon or sausage, and cheese. For lunch, try a turkey and provolone melt, a caprese bagel with fresh mozzarella, tomato, and basil, or a delicious smoked salmon and cream cheese bagel with capers and red onion. Hummus, avocado, or a fried egg with everything bagel seasoning are also fantastic savory options.
\n
Sweet Toppings and Accents
\n
Don’t forget the sweet side! A warm bagel slathered with butter and a drizzle of honey, maple syrup, or a sprinkle of cinnamon sugar is pure comfort. Nut butters like peanut butter or almond butter, perhaps with sliced bananas or berries, also make for a wholesome and delicious treat.
\n\n
Storing and Reheating Your Greek Yogurt Bagels
\n
To keep your delicious Greek yogurt bagels tasting their best, proper storage and reheating are key!
\n
Best Storage Methods for Freshness
\n
Once your bagels have cooled completely, store them at room temperature in an airtight container or a large zip-top bag. They’ll remain fresh and delicious for 2-3 days. For longer storage, bagels freeze beautifully! Slice them first, then place them in a freezer-safe bag, removing as much air as possible. They can be frozen for up to 2-3 months.
\n
How to Reheat for That ‘Just Baked’ Taste
\n
To revive
freshness, simply slice your bagel in half and toast it in a toaster, toaster oven, or under the broiler until golden and warmed through. If reheating from frozen, you can often toast them directly from frozen, though they may take a minute or two longer. The result will be a wonderfully crisp exterior and a warm, chewy interior, just like they came out of the oven!
\n\n
Frequently Asked Questions About Greek Yogurt Bagels
\n
Can I make these bagels gluten-free?
\n
\n
\n
What if I don’t have self-rising flour?
\n
\n
\n
Can I prepare the dough ahead of time?
\n
\n
\n
Why are my bagels dense or flat?
\n
\n
“,
“recipe_card”: {
“title”: “Delicious Greek Yogurt Bagels”,
“description”: “These amazing Greek yogurt bagels are incredibly easy to make at home with just two main ingredients and no boiling required! Enjoy a perfectly crisp exterior and wonderfully chewy interior in every bite.”,
“prep_time”: “10 mins”,
“cook_time”: “25 mins”,
“yield”: “4-6 bagels”,
“ingredients”: ”
-
- \n
- 1.5 cups (180g) self-rising flour (plus more for dusting)
\n
-
- 1 cup (227g) plain, full-fat Greek yogurt
\n
-
- 1 large egg, whisked with 1 tbsp water (for egg wash)
\n
-
- Optional toppings: Everything bagel seasoning, sesame seeds, poppy seeds, flaky sea salt, cinnamon sugar, etc.
\n
“,
“instructions”: ”
-
- \n
- Preheat Oven & Prep: Preheat your oven to 400°F (200°C). Line a baking sheet with parchment paper.
\n
-
- Mix the Dough: In a medium bowl, combine the self-rising flour and Greek yogurt. Mix with a spoon until a shaggy dough forms, then gently knead with your hands for 2-3 minutes until a cohesive ball forms. Do not overwork the dough.
\n
-
- Shape the Bagels: Divide the dough into 4-6 equal portions. Roll each portion into a rope about 6-8 inches long. Bring the ends together and firmly pinch to form a bagel shape, or roll into a ball and poke a hole through the center, stretching gently.
\n
-
- Egg Wash & Top: Place the shaped bagels on the prepared baking sheet. Brush generously with the egg wash, then sprinkle with your desired toppings.
\n
-
- Bake: Bake for 20-25 minutes, or until deeply golden brown and cooked through.
\n
-
- Cool: Transfer bagels to a wire rack to cool slightly before serving.
\n
”
}
}
“`