
")
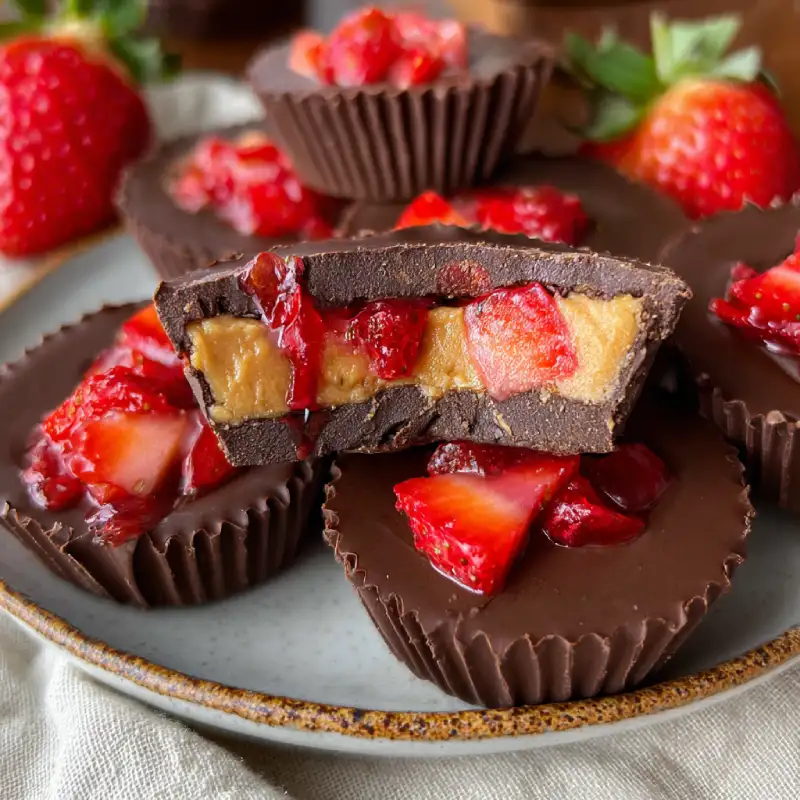
Table of Contents
Intro: My Twist on a Classic Treat
Oh, the humble peanut butter cup! A classic for a reason, right? That irresistible balance of salty peanut butter and sweet chocolate just hits different. But what if we took that nostalgic perfection and elevated it to something truly extraordinary? Enter my latest obsession: Strawberry Peanut Butter Cups. Imagine a silky chocolate shell, yielding to a creamy, dreamy peanut butter center, all kissed with a vibrant, fruity strawberry layer that cuts through the richness beautifully. It’s a symphony of textures and flavors – smooth, fudgy, a little chewy, and utterly divine. These aren’t just a dessert; they’re an experience, a little bite of pure joy that brings a smile to everyone’s face. If you love discovering new dessert ideas, you can See more easy recipes and elevate your baking game!
My inspiration for this flavor combination came from a childhood memory of peanut butter and jelly sandwiches, but reimagined in a sophisticated, grown-up dessert form. I wanted to capture that comfort but add an unexpected pop of fruitiness that makes these cups stand out. They’re dangerously easy to make, and trust me, once you try them, you’ll wonder where they’ve been all your life!
How This Recipe Works
- Balancing Creamy and Fruity: By layering the vibrant strawberry jam between the rich peanut butter and smooth chocolate, we achieve a harmonious blend where no single flavor overpowers the other. The fruitiness provides a welcome counterpoint to the richness.
- Achieving Distinct Layers: The secret lies in chilling each layer properly. This creates beautiful, well-defined stripes that are not only visually appealing but also contribute to a delightful textural journey with every bite.
- No-Bake Simplicity: Forget turning on the oven! This recipe utilizes the magic of the freezer and refrigerator to set perfectly, making it incredibly accessible for bakers of all skill levels and perfect for hot days.
- Expert Texture Control: We use specific ratios of coconut oil and powdered sugar in the fillings to ensure they are firm enough to hold their shape yet melt-in-your-mouth soft at room temperature, never too hard or crumbly.
Ingredients and Smart Substitutions
Here is what you need and why:
Chocolate Selection: Type Matters for Texture: For the best results, I highly recommend using a high-quality baking chocolate or chocolate chips. Semi-sweet or dark chocolate (around 60-70% cacao) works beautifully here, providing a rich, deep base that isn’t overly sweet. Milk chocolate can be used if you prefer a sweeter profile, but be aware it can be a bit softer at room temperature. Avoid standard candy melts unless you are solely focused on ease of melting, as the flavor often isn’t as rich. For an exceptional melt and snap, consider a couverture chocolate from brands like Callebaut.
Peanut Butter Choices: Creamy vs. Crunchy: For the classic smooth, melt-in-your-mouth experience of a peanut butter cup, creamy all-natural peanut butter is your best friend. Look for brands with minimal ingredients – just peanuts and salt. If you’re feeling adventurous and love a textural surprise, a finely ground crunchy peanut butter could add an interesting element, but I’d stick to creamy for your first batch. Avoid heavily sweetened or conventional peanut butter with added oils, as these can affect the setting and flavor profile significantly.
Strawberry Jam/Preserves: The Fruit Factor: This is where the magic happens! A good quality strawberry jam or preserves with real fruit pieces will give you the best flavor and texture. Preserves tend to have larger fruit chunks, offering a more rustic feel, while jam is smoother. You could even use a strawberry fruit spread with no added sugar if you prefer, but ensure it’s thick enough not to bleed into the other layers too much. Homemade strawberry jam would be absolutely divine here!
Coconut Oil: For Setting and Gloss: Unrefined or refined coconut oil is crucial for both layers. In the chocolate, a small amount helps to create a smoother, shinier finish and prevents it from being too brittle once set. In the peanut butter layer, it acts as a binder and helps it firm up perfectly in the fridge without becoming rock hard. It also adds a subtle richness. If you don’t like coconut flavor, refined coconut oil is completely neutral.
Powdered Sugar (Confectioners’ Sugar): This fine sugar is essential for achieving that silky-smooth, no-grainy-texture in your peanut butter filling. It dissolves easily and contributes to the perfect fudge-like consistency. Granulated sugar will not work as a substitute here.
Salt: Enhancing Sweetness: Just a pinch of fine sea salt in both the chocolate and peanut butter layers is non-negotiable. It balances the sweetness, intensifies the chocolate and peanut butter flavors, and truly makes all the other ingredients sing. Don’t skip it!
Baking Cups: Essential Setup: Standard mini or regular-sized paper baking cups (cupcake liners) are necessary to form your peanut butter cups. Silicone liners also work wonderfully, making for easy removal and reusability. A muffin tin makes the process easier for filling and chilling, keeping your cups perfectly round.
Step-by-Step Instructions: Your Visual Guide
Follow these step-by-step photos:
1. Prepare the Muffin Tin and Liners
Line a mini muffin tin (or a regular 12-cup muffin tin for larger cups) with paper or silicone baking cups. This setup is crucial for easy assembly and removal of your finished Strawberry Peanut Butter Cups. Place them neatly to avoid any leaning or slipping during the filling process.
2. Melt the Chocolate Base
In a microwave-safe bowl, combine your chocolate chips (or chopped chocolate) and 1 teaspoon of coconut oil. Microwave in 30-second intervals, stirring well after each, until the chocolate is mostly melted and smooth. Be careful not to overheat. Stir in a pinch of salt. Drop about 1-2 teaspoons of the melted chocolate into the bottom of each prepared baking cup, swirling slightly to coat the bottom evenly. You want a thin but complete layer. Chill in the freezer for 5-10 minutes, or until fully set.
3. Prepare the Peanut Butter Filling
While the chocolate base is chilling, combine the creamy peanut butter, remaining coconut oil, powdered sugar, and a pinch of salt in a medium bowl. Mix thoroughly with a spatula or electric mixer until completely smooth and creamy. It should be a pliable, fudge-like consistency that holds its shape. If it seems too sticky, add a touch more powdered sugar; if too dry, a tiny bit more coconut oil.
4. Add the Peanut Butter and Strawberry Layers
Remove the chilled chocolate bases from the freezer. Spoon about 1-2 teaspoons of the peanut butter filling over each chocolate base. Gently flatten it slightly with the back of the spoon, leaving a small well in the center. Now, spoon about 1/2-1 teaspoon of strawberry jam or preserves into the center of the peanut butter layer. Be careful not to go all the way to the edges to avoid bleeding.
5. Top with Remaining Chocolate and Chill to Set
Re-melt any remaining chocolate in the microwave if it has solidified. Carefully spoon about 1-2 teaspoons of the melted chocolate over the strawberry layer, ensuring it completely covers the jam and seals the cup. You can gently tap the muffin tin on the counter to help the chocolate settle and smooth out any air bubbles. Return the muffin tin to the freezer and chill for at least 30 minutes, or until the Strawberry Peanut Butter Cups are completely firm. The firmer they are, the easier they will be to unmold.
Expert Tips for Success
- Avoiding Chocolate Seizing: Always ensure your bowl and utensils are completely dry when melting chocolate. Even a tiny drop of water can cause chocolate to seize and become clumpy. For best results, use a double boiler or microwave in short bursts, stirring frequently.
- Achieving Clean Layers: The key to distinct layers is patience and proper chilling. Ensure each chocolate layer is fully set before adding the next component. This prevents the layers from mixing and creating a muddy appearance.
- Temperature Control for Setting: For quick setting, use the freezer for 5-10 minutes between layers. For the final set, the freezer for 30 minutes works best, but then store them in the refrigerator to maintain optimal texture without becoming too hard.
- Troubleshooting Common Issues: If your chocolate is too thick, stir in 1/2 teaspoon of coconut oil at a time until it reaches a pourable consistency. If your peanut butter filling is too soft, add a bit more powdered sugar. If it’s too crumbly, add a tiny bit more coconut oil or peanut butter.
- Easy Removal: Once completely chilled, the paper liners should peel off easily. If using silicone, they’ll pop out beautifully. If you’re having trouble, let them sit at room temperature for just a minute or two – sometimes slightly softening helps.
What to Serve With Strawberry Peanut Butter Cups
These delightful Strawberry Peanut Butter Cups are already a star on their own, but here are some ideas to make them even more special:
- Coffee or Tea Pairings: A rich, dark roast coffee or a robust black tea complements the sweetness and richness of the cups beautifully. For something lighter, a berry herbal tea could highlight the strawberry notes.
- Dessert Platter Ideas: Serve them alongside other small treats like mini brownies, chocolate-dipped strawberries, or shortbread cookies for an impressive dessert spread. Their vibrant color makes them a standout!
- Simple Garnishes: A light dusting of powdered sugar, a tiny sprinkle of sea salt flakes (especially Maldon or Fleur de Sel) for an extra pop, or even a small fresh strawberry slice on top can elevate their presentation. For a little crunch, finely chopped roasted peanuts can be sprinkled on the top chocolate layer before it sets.
Storing and Reheating
To keep your Strawberry Peanut Butter Cups fresh and delicious:
- Optimal Storage Conditions: Store them in an airtight container in the refrigerator. This prevents them from softening too much and keeps the chocolate firm and the flavors vibrant.
- Shelf Life Recommendations: When stored properly in the refrigerator, these cups will maintain their best quality for up to 1 week. Beyond that, the textures might start to slightly diminish, though they will still be safe to eat.
- Freezing for Longer Storage: For longer storage, you can freeze the cups in an airtight container for up to 1-2 months. Layer them with parchment paper to prevent sticking.
- Bringing to Room Temperature: If you prefer a slightly softer, fudgier texture, remove the cups from the refrigerator about 10-15 minutes before serving to allow them to come closer to room temperature. If frozen, thaw them in the refrigerator overnight or for a few hours.
Strawberry Peanut Butter Cups FAQ
Can I use fresh fruit?
How can I make them dairy-free?
What if my chocolate doesn’t set?
Strawberry Peanut Butter Cups
- Total Time: 20 minutes
- Yield: 12-24 cups (depending on size)
Description
These delightful no-bake Strawberry Peanut Butter Cups combine rich chocolate, creamy peanut butter, and a vibrant strawberry jam layer. They’re an easy-to-make, irresistible treat perfect for any occasion.
Ingredients
- 1 cup (approx. 6 oz) semi-sweet or dark chocolate chips (or chopped baking chocolate)
- 2 tsp coconut oil, divided
- 1 cup creamy all-natural peanut butter
- 1/2 cup powdered sugar (confectioners’ sugar)
- 1/4 tsp fine sea salt, divided
- 1/2 cup strawberry jam or preserves
Instructions
- Prepare Muffin Tin: Line a mini (for 24) or standard (for 12) muffin tin with paper or silicone baking cups.
- Melt Chocolate Base: In a microwave-safe bowl, combine chocolate chips and 1 tsp coconut oil. Microwave in 30-second intervals, stirring, until smooth. Stir in 1/8 tsp salt.
- First Chocolate Layer: Spoon 1-2 tsp melted chocolate into each liner, swirling to coat the bottom. Chill in the freezer for 5-10 minutes until set.
- Prepare Peanut Butter Filling: In a separate bowl, combine peanut butter, powdered sugar, remaining 1 tsp coconut oil, and 1/8 tsp salt. Mix until smooth and creamy.
- Add Fillings: Spoon 1-2 tsp peanut butter filling over each chilled chocolate base. Gently flatten, leaving a small well. Spoon 1/2-1 tsp strawberry jam into the well.
- Top with Chocolate: Re-melt any remaining chocolate if needed. Spoon 1-2 tsp chocolate over the strawberry layer, ensuring it fully covers and seals the cup. Tap the tin gently to smooth.
- Chill to Set: Return the muffin tin to the freezer for at least 30 minutes, or until the cups are completely firm.
- Serve and Store: Remove from liners. Serve immediately or store in an airtight container in the refrigerator for up to 1 week.
- Prep Time: 20 mins
- Cook Time: 0 mins