
")
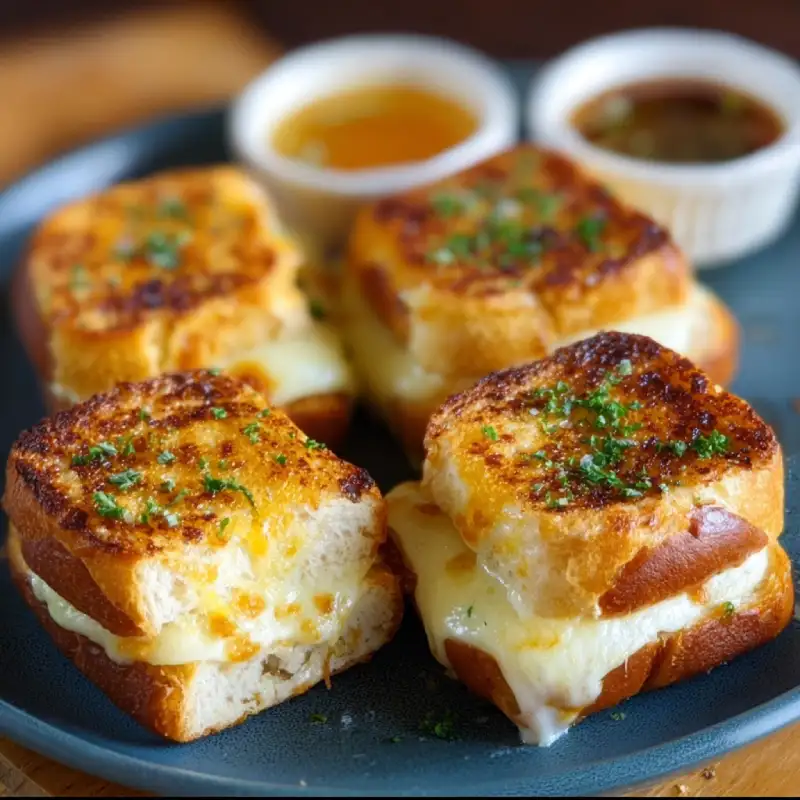
Table of Contents
- Our Favorite Mini Grilled Cheese Hawaiian Rolls
- How This Recipe Works
- Ingredients and Substitutions for Mini Grilled Cheese Hawaiian Rolls
- Step-by-Step Instructions: Making Your Mini Grilled Cheese
- Expert Tips for Success
- What to Serve With Mini Grilled Cheese Hawaiian Rolls
- Storing and Reheating Your Grilled Cheese
- Frequently Asked Questions About Mini Grilled Cheese Hawaiian Rolls
Our Favorite Mini Grilled Cheese Hawaiian Rolls
Oh, the sheer delight of biting into a perfectly crafted Mini Grilled Cheese Hawaiian Roll! It’s an experience that’s a symphony of textures and flavors – that sweet, tender Hawaiian roll exterior giving way to a savory, gooey, perfectly melted cheese interior. The edges are crisp, golden, and kissed with butter, offering just the right amount of crunch before you hit that soft, sweet bread. It’s truly a miniature masterpiece, bursting with comfort in every bite. If you’re looking for incredibly satisfying and easy recipes, See more easy recipes right here on my blog!
Why I love making Mini Grilled Cheese Hawaiian Rolls
As a food blogger and baking enthusiast, I’m always looking for recipes that deliver big on flavor with minimal fuss, and these mini grilled cheeses absolutely fit the bill. They are incredibly versatile, perfect for a quick snack, an appetizer for a party, or even a fun, light lunch. The joy of seeing people’s faces light up when they discover this sweet and savory combination is just heartwarming.
What makes this recipe reliable and delicious
This recipe isn’t just reliable; it’s practically foolproof. The secret lies in the simplicity and the quality of ingredients. The Hawaiian rolls provide a unique, slightly sweet foundation that elevates the classic grilled cheese. Coupled with carefully selected cheese and a precise cooking method, you’re guaranteed a consistently delicious result every single time.
How This Recipe Works
- Sweet and Savory Balance: The inherent sweetness of the Hawaiian rolls perfectly counteracts the salty, sharp notes of the cheddar cheese, creating an irresistible flavor profile.
- Perfectly Toasted Exterior: We employ a buttering technique that ensures every surface gets evenly golden and delightfully crisp, whether you choose the stovetop or oven method.
- Melty, Creamy Interior: By using a good melting cheese and allowing gentle heat, the cheese achieves that coveted gooey, stretchy dreaminess that is the hallmark of any great grilled cheese.
- Quick Assembly: Designed for efficiency, this recipe comes together in minutes, making it ideal for impromptu cravings or last-minute entertaining.
Ingredients and Substitutions for Mini Grilled Cheese Hawaiian Rolls
Here is what you need and why:
Hawaiian Sweet Rolls: These are truly the star and the irreplaceable sweet base of this recipe. Their unique sweetness and pillowy texture are what differentiate these from any other mini grilled cheese. While other slider buns might work, they won’t offer that distinctive sweet-and-savory magic.
Cheddar Cheese: I recommend a medium or sharp cheddar for its robust flavor and excellent melting properties. It provides that classic, tangy grilled cheese taste. Shredded cheese melts faster and more evenly, which is why I prefer it here.
Butter: Essential for achieving that gorgeous, golden-brown crust and imparting a rich, savory flavor. Use unsalted butter so you can control the salt content, though salted butter works too if that’s what you have on hand.
Garlic Powder (Optional): A small pinch of garlic powder mixed with the butter can elevate the savory notes, adding an extra layer of flavor without being overpowering. It’s a game-changer if you’re a garlic lover!
Other Cheese Options: Feel free to experiment! Provolone offers a mild, creamy melt. Muenster is fantastic for its superb melt and subtle flavor. Gruyere adds a sophisticated, nutty aroma and incredible melt. A blend of cheeses can also create a more complex flavor profile. Just ensure they are good melting cheeses.
Step-by-Step Instructions: Making Your Mini Grilled Cheese
Follow these step-by-step photos:
1. Prep the Rolls: Slice without fully separating
Take your block of Hawaiian sweet rolls and, using a sharp serrated knife, slice the entire block horizontally. Be careful not to separate the individual rolls or cut all the way through the bottom crust. You want to create a hinge, keeping the top and bottom halves connected for easier assembly. This ensures all your grilled cheeses cook as one unit.
2. Butter the Rolls: For even crisping
Melt your butter. Using a pastry brush, generously butter the cut sides of both the top and bottom halves of the rolls. This step is crucial for achieving that irresistible golden-brown crust and adds rich flavor. If using, mix a pinch of garlic powder into the melted butter before brushing.
3. Add the Cheese: Distribute evenly
Lay the bottom half of the buttered rolls in your cooking vessel (whether it’s a baking sheet or skillet). Evenly distribute your shredded cheddar cheese (or other chosen cheeses) over the entire surface of the bottom half. Don’t be shy with the cheese; aim for a good, thick layer for maximum melty goodness.
4. Assemble and Press: Ensure good contact
Carefully place the top buttered half of the rolls over the cheese-covered bottom half. Gently press down on the rolls to encourage good contact between the cheese and both bread layers. This helps the cheese melt uniformly and adhere to the bread.
5. Cook Until Golden: Stove-top or oven method
Stovetop: Place the entire block of assembled rolls into a large skillet over medium-low heat. Cook for 5-7 minutes per side, placing a heavy lid or another pan on top to gently press down, until deeply golden brown and the cheese is beautifully melted.
Oven: If baking, preheat your oven to 350°F (175°C). Place the assembled rolls on a baking sheet. Bake for 10-15 minutes, or until the rolls are golden and the cheese is bubbling and melted. For extra crispness, a quick broil at the end can be magical (watch carefully!).
6. Slice and Serve: Individual portions
Once cooked, remove the block of grilled cheese rolls from the heat. Using your serrated knife, cut along the pre-scored lines to separate them into individual mini grilled cheese sandwiches. Serve immediately while hot and the cheese is perfectly gooey!
Expert Tips for Success
- Use room temperature butter for easy spreading: If you’re not melting it, softened butter will spread more smoothly without tearing the delicate rolls.
- Don’t overcrowd the pan if pan-frying: Cook in batches if necessary to ensure even browning and melting. Overcrowding lowers the pan temperature.
- Broil briefly for extra crispness if baking: For that ultimate golden-brown sheen and added crunch, pop them under the broiler for 1-2 minutes. Keep a very close eye, as broilers can toast quickly!
- Use a heavy pan for even heat distribution: A cast iron skillet or a good quality heavy-bottomed pan will distribute heat more evenly, preventing hot spots and ensuring uniformly cooked grilled cheeses. For more expert baking advice, check out resources like King Arthur Baking’s tips on grilled cheese.
- Pre-shredded cheese vs. Block cheese: While pre-shredded cheese is convenient, block cheese that you shred yourself often melts more smoothly because it lacks the anti-caking agents found in packaged shredded cheese.
What to Serve With Mini Grilled Cheese Hawaiian Rolls
These delightful mini grilled cheeses are fantastic on their own, but they also pair wonderfully with a variety of accompaniments:
- Tomato Soup: The ultimate classic pairing! A warm, creamy tomato soup is the perfect dipping companion, offering a comforting contrast to the sweet and savory rolls.
- Simple Green Salad: For a fresh and light contrast, a simple green salad with a bright vinaigrette cuts through the richness of the cheese.
- Dipping Sauces: Get creative! Classic ketchup, a rich marinara sauce, or a light garlic aioli can all add an extra layer of flavor for dipping.
- Fruit Salad: A bowl of fresh fruit, like berries or melon, adds a sweet and refreshing complement, especially if serving these as part of a brunch spread.
Storing and Reheating Your Grilled Cheese
While these are best enjoyed fresh, you can absolutely store and reheat them:
- Cool completely before storing: This is crucial! Placing warm grilled cheese in an airtight container will create condensation, leading to soggy rolls. Let them cool completely on a wire rack first.
- Store in an airtight container for up to 2 days: Refrigerate any leftovers in a sealed container within two hours of cooking.
- Reheat in a toaster oven or air fryer for best texture: For that almost-fresh crispness, a toaster oven or air fryer are your best friends. Reheat at 325-350°F (160-175°C) for 5-10 minutes, or until warmed through and crisp.
- Avoid microwave reheating for crispness: While a microwave will heat them up, it will inevitably make the rolls soft and potentially soggy, losing that delicious crispy exterior.
Frequently Asked Questions About Mini Grilled Cheese Hawaiian Rolls
Can I make these ahead of time?
What other cheeses work well?
How do I prevent the rolls from getting soggy?
Can I use regular slider buns instead?
Mini Grilled Cheese Hawaiian Rolls
- Total Time: 23 minute
- Yield: 12 servings
Description
These delightful mini grilled cheese Hawaiian rolls offer a perfect harmony of sweet and savory flavors. They are quick to prepare and incredibly satisfying, perfect for any occasion.
Ingredients
- 1 (12-count) package Hawaiian Sweet Rolls
- 1 cup shredded Cheddar cheese (or other good melting cheese like Provolone, Muenster, Gruyere)
- 4 tablespoons unsalted butter, melted
- 1/4 teaspoon garlic powder (optional)
Instructions
- Prep the Rolls: Slice the entire block of Hawaiian sweet rolls horizontally, being careful not to cut all the way through the bottom, keeping the halves connected.
- Butter the Rolls: In a small bowl, combine the melted butter and optional garlic powder. Brush generously over the cut sides of both the top and bottom halves of the rolls.
- Add the Cheese: Place the bottom half of the buttered rolls into a large skillet over medium-low heat or onto a baking sheet. Evenly distribute the shredded cheese over the bottom half.
- Assemble: Carefully place the top buttered half of the rolls over the cheese-covered bottom half and gently press down.
- Cook (Stovetop Method): Cover the skillet with a lid or another heavy pan to gently press down on the rolls. Cook for 5-7 minutes per side, or until golden brown and the cheese is melted and bubbling.
- Cook (Oven Method): If baking (on a baking sheet), bake at 350°F (175°C) for 10-15 minutes, or until rolls are golden and cheese is melted. Broil for 1-2 minutes at the end for extra crispness, watching carefully.
- Slice and Serve: Remove from heat and, using a serrated knife, slice along the original roll lines to separate into individual mini grilled cheeses. Serve immediately.
- Prep Time: 10 mins
- Cook Time: 10-15 mins