
")
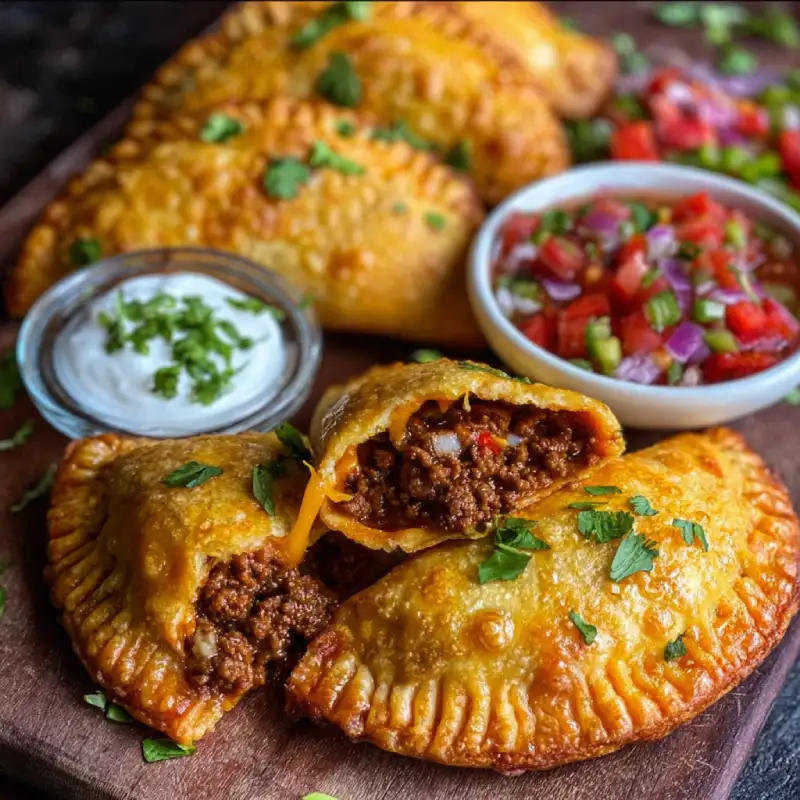
Table of Contents
- Introduction: Your Go-To for Flavorful Pockets
- How This Recipe Works: The Science of Sizzle
- Ingredients and Smart Substitutions
- Step-by-Step Instructions: Your Visual Walkthrough
- Expert Tips for Success
- What to Serve With Your Spicy Crispy Mexican Taco Pockets
- Storing and Reheating Your Taco Pockets
- FAQ: Your Questions Answered
Introduction: Your Go-To for Flavorful Pockets
Are you craving an explosion of flavor and a satisfying crunch that makes every bite an adventure? Look no further! These Spicy Crispy Mexican Taco Pockets are about to become your new culinary obsession. Imagine perfectly seasoned, spicy ground meat and melted cheese, all encased in a flaky, golden-brown crust, fresh from your oven. It’s the perfect handheld meal, snack, or party appetizer that’s guaranteed to disappear moments after you put it on the table. My journey to perfecting these pockets involved countless hours in the kitchen, meticulously tweaking spice blends and dough textures, all driven by a desire for that ultimate, irresistible crispiness without the guilt of deep-frying. And now, I’m thrilled to share my tried-and-true recipe with you. If you love baking and exploring new, exciting flavors, See more easy recipes and get ready to add this showstopper to your repertoire!
How This Recipe Works: The Science of Sizzle
- Baked, Not Fried Perfection: We achieve ultimate crispiness without a deep fryer. The secret lies in a precisely formulated dough and strategic baking temperatures that encourage a golden, bubbly exterior, making these taco pockets light and satisfyingly crunchy, never greasy.
- Layered Flavor Bomb: This recipe isn’t just spicy; it’s a symphony of authentic Mexican-inspired flavors. Each ingredient, from the aromatic sautéed vegetables to the robust spice blend, builds upon the last, ensuring every bite is complex and deeply satisfying.
- The Perfect Balance: We’ve meticulously calibrated the heat level. It’s a delightful warmth that excites your palate without overpowering the rich, savory goodness of the filling. You get that signature Mexican kick, perfectly harmonized with cheese and meat.
- Homemade Dough Advantage: Crafting your own dough allows for superior texture control. It’s pliable enough to seal beautifully around the generous filling, yet bakes up into a delightfully flaky and sturdy shell that holds up to every delicious mouthful.
Ingredients and Smart Substitutions
Here is what you need and why:
For the Dough:
All-Purpose Flour: This forms the foundational structure of our crispy pockets. I recommend unbleached AP flour for a slightly better texture. While not ideal for this specific crispy shell, you could experiment with a 1:1 gluten-free flour blend if absolutely necessary, but be aware the texture will differ significantly. For a slightly richer dough, a small amount of cornflour can be added, but this recipe is optimized for standard AP.
Cold Butter: Crucial for flakiness! Just like pie crust, cold butter creates pockets of steam that lift the dough layers. Ensure your butter is ice-cold, straight from the fridge and cut into small pieces. For a dairy-free option, a good quality vegan butter substitute will work.
Ice Water: Keeps the butter cold and helps bind the dough without overworking the gluten, which leads to tough pockets. Adjust the amount as needed – a little goes a long way!
Salt: Essential for flavor balance in the dough itself.
For the Filling:
Ground Meat: Lean ground beef (80/20) is my top choice for flavor and texture. Lean ground turkey or chicken can also be used for a lighter option, but you might need a touch more oil to prevent dryness. Vegetarian? Crumbled plant-based ground meat substitutes work wonderfully here.
Onion, Garlic, and Bell Pepper: These aromatics are the irreplaceable flavor foundation of our filling. Feel free to use any color of bell pepper you prefer. For an extra kick, a small amount of finely diced jalapeño (seeds removed for less heat) or serrano pepper can be added.
Tomato Paste: Adds a concentrated umami depth and a touch of tang, essential for that rich, slow-simmered flavor. Don’t skip it!
Spices: A powerful blend of chili powder, cumin, smoked paprika, oregano, and a pinch of cayenne pepper creates that signature spicy Mexican profile. Adjust the cayenne to your heat preference – more for a fiery punch, less for a milder warmth. For a quick alternative, a good quality taco seasoning mix can be used, but my custom blend offers superior flavor control.
Beef Broth: Adds moisture and richness to the filling, preventing it from being dry and allowing the flavors to meld beautifully. Vegetable broth works fine as a substitute.
Shredded Cheese: A blend of Monterey Jack and sharp cheddar melts beautifully and offers a fantastic flavor contrast to the spicy filling. Mexican blend cheeses are also excellent. For a dairy-free version, use your favorite melting vegan cheese shreds.
For Assembly and Baking:
Egg Wash: An egg mixed with a splash of water gives our pockets that desirable golden-brown, shiny finish and helps the dough become extra crispy. For an egg-free wash, milk or even water can be used, though the color won’t be as vibrant.
Olive Oil or Vegetable Oil: Used sparingly for sautéing the filling ingredients and ensuring even crisping.
How to Make Spicy Crispy Mexican Taco Pockets
Follow these step-by-step instructions for perfect results:
1. Prepare the Spicy Filling
In a large skillet over medium-high heat, brown the ground meat, breaking it up with a spoon. Drain any excess grease. Add the diced onion, garlic, and bell pepper, and sauté until softened, about 5-7 minutes. Stir in the tomato paste and cook for 1 minute until fragrant. Add all the spices (chili powder, cumin, smoked paprika, oregano, cayenne) and cook for another minute, allowing them to bloom. Pour in the beef broth, bring to a simmer, then reduce heat to low and let it cook for 10-15 minutes, allowing the flavors to meld and the liquid to reduce slightly. Taste and adjust seasoning as needed. Let the filling cool completely before assembling – this is crucial to prevent soggy dough.
2. Make the Flaky Dough
In a large bowl, whisk together the flour and salt. Cut in the very cold butter using a pastry blender, your fingertips, or a food processor until the mixture resembles coarse crumbs with some pea-sized pieces of butter remaining. Gradually add the ice water, one tablespoon at a time, mixing until the dough just comes together. Be careful not to overmix! Form the dough into a disc, wrap it tightly in plastic wrap, and refrigerate for at least 30 minutes (or up to 2 days). This resting time is vital for gluten relaxation and eases rolling.
3. Assemble the Taco Pockets
Preheat your oven to 400°F (200°C) and line a baking sheet with parchment paper. On a lightly floured surface, roll out the chilled dough to about 1/8-inch thickness. Using a 4-5 inch round cutter (or a knife to cut squares), cut out circles (or squares) of dough. Place 1-2 tablespoons of the cooled filling onto one half of each dough circle, leaving a small border. Top with a sprinkle of shredded cheese. Moisten the edges of the dough with a little water or egg wash, then fold the other half over to create a semicircle (or triangle if using squares). Press the edges firmly to seal, then use a fork to crimp the edges tightly, ensuring no filling leaks during baking.
4. Bake to Golden Perfection
Arrange the assembled taco pockets on the prepared baking sheet, leaving some space between each. Whisk the egg with a tablespoon of water to create an egg wash, and lightly brush the tops of each pocket. This will give them that beautiful golden-brown sheen. If desired, you can cut a small slit or two in the top of each pocket to allow steam to escape. Bake for 18-25 minutes, or until the crust is deeply golden brown and puffed. The exact time will depend on your oven and the thickness of your dough. Keep an eye on them!
5. Achieving Ultimate Crispiness
Once your taco pockets emerge from the oven, resist the urge to dive in immediately! Transfer them to a wire rack. While they are still hot, the crust might seem somewhat soft. As they cool for 5-10 minutes on the rack, residual heat will continue to cook them slightly, and the steam will dissipate, allowing the crust to crisp up beautifully. This brief resting period also helps the filling set, preventing it from spilling out when you take that glorious first bite.
Expert Tips for Success
- Don’t Overfill: This is the golden rule! Too much filling will make sealing difficult and can lead to messy blow-outs during baking. Allow enough space around the edges to create a secure seal.
- Sealing Them Shut: A good seal is key for leak-proof pockets. After moistening the edges with water or egg wash, press firmly with your fingers, then use the tines of a fork to crimp all the way around. This not only looks great but creates a strong barrier.
- Even Browning: For uniform crispiness, ensure your pockets are spaced out on the baking sheet so hot air can circulate around them. If your oven has hot spots, rotate the baking sheet halfway through baking.
- Adjusting Heat: Tailor the spice to your preference! If you love heat, increase the cayenne pepper or add finely diced jalapeños to the filling. For a milder version, omit the cayenne completely.
- Resting Time for Dough: Don’t skip chilling the dough! It relaxes the gluten, making it easier to roll out without shrinking back, and keeps the butter cold, which is essential for that flaky texture. A minimum of 30 minutes is good, but an hour is even better.
What to Serve With Your Spicy Crispy Mexican Taco Pockets
- Classic Toppings: Elevate your taco pockets with a dollop of fresh salsa (pico de gallo or a roasted salsa verde are fantastic), creamy guacamole, or a cooling sour cream/Greek yogurt drizzle to balance the spice.
- Refreshing Sides: A crisp cabbage slaw with a lime vinaigrette, a vibrant corn and black bean salad, or a simple side of cilantro-lime rice makes for a well-rounded meal.
- Beverage Pairings: Cool down the spice with a refreshing horchata, a zesty margarita, a crisp Mexican lager, or even just some ice-cold water or sparkling limeade.
Storing and Reheating Your Taco Pockets
Refrigeration: Leftover Spicy Crispy Mexican Taco Pockets can be stored in an airtight container in the refrigerator for up to 3-4 days. For best results, place a paper towel at the bottom of the container to absorb any condensation and prevent sogginess.
Freezing: These pockets freeze beautifully! To freeze baked pockets, allow them to cool completely, then arrange them in a single layer on a baking sheet and flash freeze for about an hour until solid. Transfer them to a freezer-safe bag or container, separating layers with parchment paper, and freeze for up to 2-3 months. You can also freeze unbaked pockets: assemble them as directed, flash freeze them, then transfer to a freezer bag. When ready to bake unbaked pockets, add an extra 5-10 minutes to the baking time and monitor closely.
Reheating: To reheat refrigerated pockets, bake them in a preheated oven or toaster oven at 350°F (175°C) for 10-15 minutes, or until heated through and crispy again. Avoid the microwave, as it will make the crust soggy. For frozen baked pockets, you can reheat them directly from frozen in a 375°F (190°C) oven for about 20-25 minutes, or until hot and crispy.
Frequently Asked Questions
Can I air fry these taco pockets?
How do I make them gluten-free?
Can I prepare the filling ahead of time?
What if my dough is too sticky/dry?
Spicy Crispy Mexican Taco Pockets
- Total Time: 55 minutes
- Yield: 12 servings
Description
Crispy baked taco pockets bursting with spicy ground meat and melted cheese. A flavorful, handheld meal perfect for any occasion.
Ingredients
- For the Dough:
- 2 ½ cups all-purpose flour
- 1 teaspoon salt
- 1 cup (2 sticks) unsalted butter, very cold and cubed
- ½ – ¾ cup ice water
- For the Filling:
- 1 tablespoon olive oil
- 1 pound lean ground beef (or turkey/chicken)
- 1 medium onion, finely diced
- 3 cloves garlic, minced
- 1 bell pepper (any color), finely diced
- 2 tablespoons tomato paste
- 2 tablespoons chili powder
- 1 tablespoon ground cumin
- 1 teaspoon smoked paprika
- ½ teaspoon dried oregano
- ¼ – ½ teaspoon cayenne pepper (adjust to taste)
- ½ cup beef broth
- 1 ½ cups shredded Monterey Jack and cheddar cheese blend
- For Assembly:
- 1 large egg, whisked with 1 tablespoon water (for egg wash)
Instructions
- 1. Prepare the Spicy Filling: Brown ground meat, drain grease. Sauté onion, garlic, bell pepper. Stir in tomato paste and spices. Add beef broth and simmer until reduced. Cool completely.
- 2. Make the Flaky Dough: Combine flour and salt. Cut in cold butter. Gradually add ice water to form dough. Chill for at least 30 minutes.
- 3. Assemble the Taco Pockets: Roll out dough, cut circles. Place cooled filling and cheese on one half. Moisten edges, fold, and crimp to seal firmly with a fork.
- 4. Bake to Golden Perfection: Place on parchment-lined baking sheet. Brush with egg wash. Bake at 400°F (200°C) for 18-25 minutes, until deeply golden brown.
- 5. Achieve Ultimate Crispiness: Transfer to a wire rack and cool for 5-10 minutes to allow them to crisp up. Serve warm with your favorite toppings.
- Prep Time: 30 mins
- Cook Time: 25 mins