
")
Classic Fresh Pumpkin Pie: 5-Step Delicious Recipe
Welcome, fellow food lovers! As the leaves turn and a crispness fills the air, there’s one dessert that truly captures the essence of autumn: a perfectly spiced, beautifully baked Classic Fresh Pumpkin Pie. This recipe is more than just a dessert; it’s a warm hug, a sweet memory, and a delightful centerpiece for any gathering. Get ready to create a masterpiece that will have everyone asking for seconds!
I’m thrilled to share my tried-and-true method for making this iconic treat. Forget store-bought; homemade is always best, especially when it’s this simple and rewarding. We’ll guide you through each of the five easy steps to ensure your pie turns out absolutely delicious every single time.
Table of Contents
- 1. Indulge in the Best Classic Fresh Pumpkin Pie
- 2. Why You’ll Love This Classic Fresh Pumpkin Pie: 5-Step Delicious Recipe
- 3. Essential Ingredients for Your Homemade Pumpkin Pie
- 4. How to Make Classic Fresh Pumpkin Pie: Step-by-Step Guide
- 5. Tips and Tricks for the Perfect Pumpkin Pie
- 6. Serving Suggestions for Your Delicious Pumpkin Pie
1. Indulge in the Best Classic Fresh Pumpkin Pie
There’s nothing quite like the aroma of cinnamon, nutmeg, and ginger wafting from your oven, signaling that a delightful treat is underway. This homemade pumpkin pie brings comfort to your kitchen and joy to your table, perfect for cozy evenings or festive celebrations.
Imagine a velvety smooth filling nestled in a flaky, golden crust, each bite bursting with autumnal flavor. It’s the ultimate classic dessert that never goes out of style, and with my guidance, you’ll master it in no time!
2. Why You’ll Love This Classic Fresh Pumpkin Pie: 5-Step Delicious Recipe
You’ll adore this particular recipe for its simplicity and the incredible depth of flavor it achieves. It’s designed to be an easy pumpkin pie recipe, approachable for bakers of all skill levels, ensuring a rewarding experience from start to finish. This guide for a Classic Fresh Pumpkin Pie makes the process enjoyable and stress-free.
This isn’t just any pumpkin pie; it’s a celebration of fresh ingredients and well-balanced spices. You’ll be proud to serve this impressive yet straightforward fall baking delight, earning you rave reviews from friends and family alike. It’s truly the best pumpkin pie you’ll ever make.
3. Essential Ingredients for Your Homemade Pumpkin Pie
Quality ingredients are the secret to an outstanding pie. Fresh pumpkin puree makes a significant difference, but a good quality canned puree works beautifully too. Here’s what you’ll need for this truly amazing fresh pumpkin pie.
3.1. For the Crust:
While you can use a store-bought pie crust, I highly recommend making your own for an unparalleled flaky texture. It’s easier than you think!
- 1 ½ cups all-purpose flour
- ½ teaspoon salt
- ½ cup (1 stick) unsalted butter, very cold and cut into cubes
- ¼ cup ice water (or more, as needed)
3.2. For the Filling:
The heart of our pie! These ingredients combine to create that signature creamy, spiced filling we all adore.
- 1 (15-ounce) can pumpkin puree (or 1 ¾ cups homemade fresh pumpkin puree)
- 1 cup heavy cream or evaporated milk
- ½ cup granulated sugar
- ¼ cup packed light brown sugar
- 2 large eggs, lightly beaten
- 1 teaspoon ground cinnamon
- ½ teaspoon ground ginger
- ¼ teaspoon ground nutmeg
- ⅛ teaspoon ground cloves (optional, but highly recommended for depth)
- ½ teaspoon salt
- 1 teaspoon vanilla extract
4. How to Make Classic Fresh Pumpkin Pie: Step-by-Step Guide
Let’s dive into the fun part: baking! Follow these detailed steps to create your magnificent Classic Fresh Pumpkin Pie. You’ll be amazed at how simple it is to achieve bakery-quality results right in your own kitchen.
4.1. Step 1: Prepare the Pumpkin Puree
- If using fresh pumpkin, preheat your oven to 400°F (200°C). Cut a small pie pumpkin (about 2-3 pounds) in half, scoop out seeds and stringy bits.
- Place pumpkin halves cut-side down on a baking sheet. Roast for 45-60 minutes, or until very tender.
- Once cool enough to handle, scoop out the flesh and blend until completely smooth in a food processor. Measure 1 ¾ cups for the recipe.
- If using canned pumpkin, simply open the can and proceed!
4.2. Step 2: Mix the Filling
- In a large bowl, whisk together the pumpkin puree, heavy cream (or evaporated milk), granulated sugar, brown sugar, eggs, cinnamon, ginger, nutmeg, cloves, salt, and vanilla extract.
- Whisk until the mixture is completely smooth and well combined. Ensure no lumps remain, creating a velvety texture.
4.3. Step 3: Prepare the Pie Crust
A good crust is key to a truly fantastic pie! For extra tips on achieving a perfectly flaky crust, you might want to check out King Arthur Baking’s Pie Crust Tips.
- If making homemade crust: In a large bowl, whisk together flour and salt. Cut in the cold butter using a pastry blender or your fingertips until the mixture resembles coarse crumbs with some pea-sized pieces of butter remaining.
- Gradually add ice water, one tablespoon at a time, mixing until the dough just comes together. Do not overmix.
- Form the dough into a disk, wrap it in plastic wrap, and refrigerate for at least 30 minutes.
- On a lightly floured surface, roll out the chilled dough into a 12-inch circle. Carefully transfer it to a 9-inch pie plate. Trim and crimp the edges as desired.
- For a perfectly crisp crust, I recommend blind baking. Prick the bottom of the crust with a fork, line it with parchment paper, and fill with pie weights or dried beans. Bake at 375°F (190°C) for 15 minutes. Remove weights and parchment, then bake for another 5-7 minutes, until lightly golden.
4.4. Step 4: Assemble and Bake the Pie
- Reduce oven temperature to 350°F (175°C).
- Pour the prepared pumpkin filling into the pre-baked pie crust.
- Carefully transfer the pie to the preheated oven.
- Bake for 50-60 minutes, or until the edges are set and lightly puffed, but the center still has a slight jiggle. A knife inserted near the edge should come out clean.
4.5. Step 5: Cool and Serve
- Once baked, remove the pie from the oven and place it on a wire rack to cool completely. This is a crucial step!
- Allow the pie to cool for at least 2-3 hours, or preferably longer, before slicing. This allows the filling to fully set.
- Serve your magnificent Classic Fresh Pumpkin Pie chilled or at room temperature.
5. Tips and Tricks for the Perfect Pumpkin Pie
Achieving the perfect pumpkin pie doesn’t have to be daunting. Here are a few expert tips to ensure your pie is a smashing success. These small adjustments can make a big difference in the final outcome of your thanksgiving dessert.
- Don’t Overbake: Overbaking can lead to cracks in the filling and a dry texture. Look for that slight jiggle in the center when you gently shake the pie.
- Tent with Foil: If your crust edges are browning too quickly, gently tent the edges with aluminum foil during the last 20-30 minutes of baking.
- Chill Thoroughly: Patience is a virtue here! A fully chilled pie will slice beautifully and taste even better, allowing the flavors to meld perfectly.
- Use Fresh Spices: Older spices lose their potency. Freshly ground or recently purchased spices will elevate your pumpkin pie spice blend to new heights.
6. Serving Suggestions for Your Delicious Pumpkin Pie
Your beautiful Classic Fresh Pumpkin Pie deserves to be served with flair! While it’s utterly delicious on its own, a few simple additions can take it from fantastic to unforgettable. Here are some of my favorite ways to enjoy this seasonal delight.
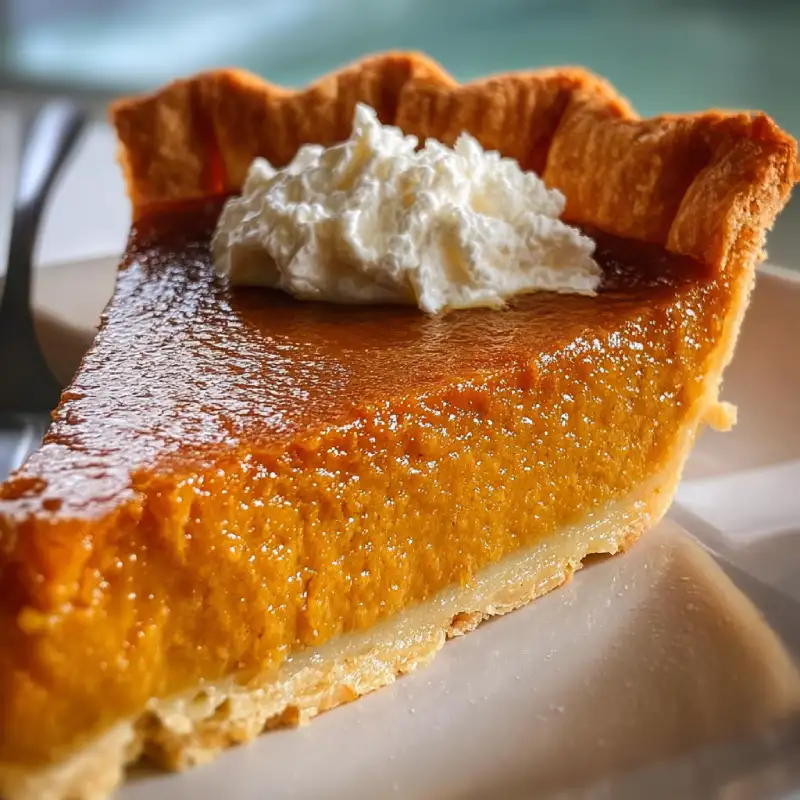
A dollop of freshly whipped cream is a classic pairing, its lightness perfectly complementing the rich filling. For an extra touch, you could sweeten the cream with a hint of maple syrup or vanilla extract. A scoop of vanilla bean ice cream also makes for a delightful contrast in temperatures and textures.
Consider sprinkling a pinch of cinnamon or nutmeg over each slice for an aromatic garnish. A drizzle of caramel sauce or a scattering of toasted pecans can add another layer of flavor and crunch. Enjoy your slice with a warm cup of coffee or a festive chai tea for the ultimate autumn experience. See others recipes here
Foire Aux Questions
Can I freeze this Classic Fresh Pumpkin Pie?
Yes, you absolutely can! To freeze a baked pumpkin pie, first ensure it’s completely cooled. Then, wrap it tightly in several layers of plastic wrap, followed by a layer of aluminum foil. You can store it in the freezer for up to 1-2 months. Thaw it overnight in the refrigerator before serving, and let it come to room temperature for the best flavor.
How can I prevent my pumpkin pie filling from cracking?
Cracking often occurs due to overbaking or sudden temperature changes. To prevent this, make sure not to overbake; the pie should have a slight jiggle in the center when removed from the oven. Also, allow the pie to cool gradually on a wire rack at room temperature, away from drafts, rather than placing it directly into the refrigerator or a cold environment.
What’s the best way to store leftover Classic Fresh Pumpkin Pie?
Leftover pumpkin pie should always be stored in the refrigerator due to its dairy and egg content. Cover the pie loosely with plastic wrap or aluminum foil, or place it in an airtight container. It will stay fresh and delicious for 3-4 days when properly refrigerated.