
")
Delicious Apple Fries Recipe: Your New Favorite Dessert
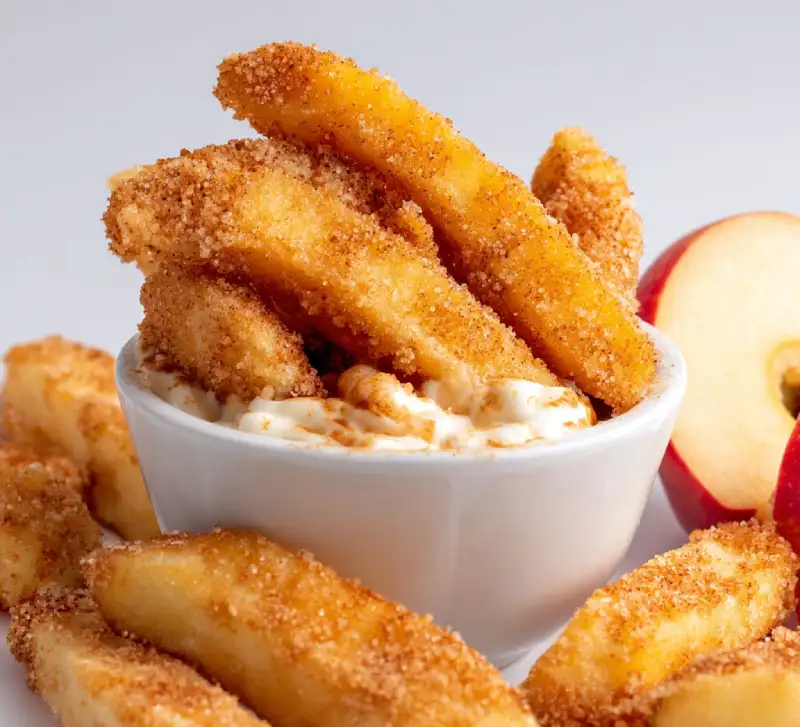
Get ready to discover your new dessert obsession! Imagine biting into a crispy, golden-brown exterior, giving way to a warm, tender, and subtly sweet apple interior. These aren’t just apple slices; these are Apple Fries, and they’re about to revolutionize your snack game. They’re comforting, utterly delightful, and ridiculously easy to make, hitting all the right notes for a perfect treat. See more easy recipes and you’ll find that sometimes, the simplest ideas lead to the most extraordinary flavors, and these apple fries are a testament to that. Prepare to be amazed at how quickly these become your most requested dessert!
Table of Contents
- Introduction: Your Next Dessert Obsession
- How This Apple Fries Recipe Works
- Ingredients and Smart Substitutions
- Step-by-Step Instructions: The Visual Walkthrough
- Expert Tips for Success with Apple Fries
- What to Serve With Your Apple Fries
- Storing and Reheating Apple Fries
- Apple Fries FAQ
Introduction: Your Next Dessert Obsession
Forget dry, crumbly apple crisps or heavy apple pies. Today, we’re diving into the brilliant world of Apple Fries! This innovative take on a classic fruit snack transforms simple apple slices into something truly spectacular. Picture this: a light, golden, crispy shell encasing a soft, sweet, and perfectly spiced apple. It’s comforting, it’s exciting, and it’s about to become your absolute go-to treat – whether for a quick dessert, a unique afternoon snack, or a fun party appetizer. Seriously, once you try these, you’ll wonder where they’ve been all your life!
How This Apple Fries Recipe Works
This recipe isn’t just about frying apples; it’s about a clever combination of textures and flavors that makes these Apple Fries sing:
- Crispy Exterior: A specially formulated light batter creates that irresistible crunch you crave, protecting the apple inside and locking in moisture.
- Tender Interior: The frying process gently cooks the apple, transforming it into a soft, melt-in-your-mouth perfection without it ever getting mushy.
- Sweet and Spiced: A balanced blend of sugar, cinnamon, and nutmeg permeates every bite, creating that quintessential comforting apple dessert flavor.
- Quick and Easy: From initial prep to a finished plate, you can have these delightful apple fries ready in under 30 minutes, making them ideal for spontaneous cravings!
Ingredients and Smart Substitutions
Here is what you need and why:
Apples: The foundation of our Apple Fries! Opt for firm, slightly tart varieties that hold their shape well when cooked. Gala, Fuji, Honeycrisp, or Granny Smith (if you like a tart edge) are excellent choices. Softer apples like Red Delicious tend to break down too quickly, leading to mushy results. King Arthur Baking offers a great guide on apple varieties for cooking if you want to explore more options.
All-Purpose Flour: This forms the base of our crispy batter. For a gluten-free alternative, a 1:1 gluten-free baking blend will work beautifully, ensuring everyone can enjoy these treats.
Spices: Cinnamon and Nutmeg: These are non-negotiable! They’re the dynamic duo that gives these Apple Fries that warm, inviting, classic apple pie flavor profile. Don’t skip them!
Sweetener (Granulated Sugar): Provides the perfect level of sweetness to balance the apples’ tartness and helps create that golden-brown crust. You can substitute with light brown sugar for a slightly deeper, more molasses-like flavor profile.
Liquid (Milk): Whole milk creates a rich batter, but any dairy-free milk (almond, soy, oat) can be used as a direct substitute without compromising the texture.
Fat for Frying (Vegetable Oil or Avocado Oil): Choose an oil with a high smoke point. Vegetable oil is economical and works well, while avocado oil is another excellent neutral-tasting option for high-heat frying.
Step-by-Step Instructions: The Visual Walkthrough
Follow these step-by-step instructions to create perfect Apple Fries:
1. Prepare the Apples
Begin by washing your chosen apples thoroughly. Using an apple corer is super helpful here to remove the core cleanly. Once cored, slice each apple into fry-like sticks, about 1/4 to 1/2 inch thick. Aim for uniformity so they cook evenly. You want them to resemble steak fries, not shoestring potatoes!
2. Mix the Dry Ingredients
In a medium-sized bowl, whisk together the all-purpose flour, granulated sugar, ground cinnamon, and ground nutmeg. Ensure there are no lumps and the spices are evenly distributed throughout the flour mixture. This fragrant dry mix is the flavor base!
3. Create the Batter
Gradually pour the milk into the dry ingredients, whisking continuously until you achieve a smooth, lump-free batter. The consistency should be thick enough to coat the apple slices but not so thick that it’s gluggy. If it’s too thick, add a tiny splash more milk; if too thin, a pinch more flour.
4. Coat the Apple Fries
Carefully drop the apple sticks into the batter, ensuring each piece is fully and evenly coated. Don’t overcrowd the bowl; you might need to do this in batches. Use tongs to gently lift them out, allowing any excess batter to drip off.
5. Fry to Perfection
Heat your chosen frying oil in a deep skillet or pot over medium-high heat to about 350-375°F (175-190°C). Carefully place the coated apple fries into the hot oil, frying in small batches to avoid overcrowding. Fry them for 2-4 minutes per side, or until they are golden brown and crispy. Use a slotted spoon to turn them.
6. Drain and Season
Once golden and cooked through, remove the apple fries from the oil with a slotted spoon and place them on a plate lined with paper towels to drain any excess oil. IMMEDIATELY after draining, while still hot, dust them generously with a mixture of extra granulated sugar and cinnamon. This ensures the seasoning adheres perfectly.
Expert Tips for Success with Apple Fries
- Apple Selection is Key: Always choose firm apples. Softer varieties will release too much moisture and turn mushy during frying, robbing you of that delightful tender-crisp texture.
- Maintain Oil Temperature: Consistent oil temperature is paramount for evenly cooked and crispy Apple Fries. If the oil is too cool, they’ll be greasy; too hot, and they’ll burn before cooking through. A thermometer is your best friend here!
- Don’t Overcrowd the Pan: Frying in small batches is essential. Crowding the pan lowers the oil temperature, leading to soggy, oily fries instead of crisp, golden ones. Give each apple fry space to sizzle.
- Season Immediately: Dust your Apple Fries with the sugar-cinnamon mix as soon as they come out of the oil. The heat helps the seasoning stick and melt slightly, creating a beautiful sugary coating.
- Serve Freshly Fried: While still delicious later, Apple Fries are undoubtedly at their absolute best when enjoyed piping hot, straight from the pan.
What to Serve With Your Apple Fries
These Apple Fries are fantastic on their own, but pair them with these delectable sauces and toppings to elevate the experience:
- Caramel Sauce: The ultimate pairing! A warm, gooey drizzle of caramel perfectly complements the apple and spice flavors.
- Vanilla Ice Cream: There’s nothing quite like the contrast of warm, crispy apple fries alongside a scoop of cold, creamy vanilla ice cream. Pure bliss!
- Whipped Cream: A light and airy dollop of freshly whipped cream adds a touch of elegance and balances the richness.
- Chocolate Dipping Sauce: For the chocolate lovers out there, a simple melted chocolate dip adds a decadent twist.
Storing and Reheating Apple Fries
While Apple Fries are best enjoyed fresh, you might find yourself with a few leftovers (a rare occurrence!). Store cooled apple fries in an airtight container at room temperature for up to 1 day. For longer storage, refrigerate for up to 2-3 days.
To regain some crispness, place them on a baking sheet in a preheated oven at 350°F (175°C) for about 5-7 minutes, or until warmed through and crispy. An air fryer also works wonderfully: cook at 350°F (175°C) for 3-5 minutes, shaking the basket halfway through.
Apple Fries FAQ
Can I bake or air fry these instead of deep frying?
While deep frying gives the best crispy exterior for these Apple Fries, you can certainly try baking or air frying for a lighter version. For baking, spray the coated fries with cooking spray and bake at 400°F (200°C) for 15-20 minutes, flipping halfway. For air frying, spray with oil and air fry at 375°F (190°C) for 8-12 minutes, shaking frequently, until golden and crisp. The texture won’t be identical to deep-fried, but still delicious! What other spices can I use?
Beyond cinnamon and nutmeg, you can experiment with a tiny pinch of ground ginger, allspice, or a ready-made pumpkin pie spice blend for a different flavor profile. A dash of cardamom can also add an exotic touch to your Apple Fries. How do I prevent the fries from being soggy?
Soggy Apple Fries usually result from oil that isn’t hot enough or overcrowding the pan. Ensure your oil is at the correct temperature (350-375°F/175-190°C) and fry in small batches. Also, thoroughly drain them on paper towels immediately after frying. Can I use different fruits?
Absolutely! While apples are classic, you could experiment with firm pears (like Bosc or Anjou), unripe bananas (for a plantain-like fry), or even slices of firm pineapple. Just ensure the fruit isn’t overly watery or too soft, as it might become mushy during frying. Each fruit will offer a unique flavor to your ‘fruit fries’!