


Table of Contents
- Introduction: Grilling Success Starts Here
- How This Recipe Works: Flavor & Texture Unlocked
- Ingredients and Smart Substitutions
- Step-by-Step: Grilling Your Best BBQ Chicken
- Expert Tips for Grilling Success
- What to Serve With Your Juicy Grilled BBQ Chicken
- Storing and Reheating Best Practices
- Frequently Asked Questions (FAQ)
Introduction: Grilling Success Starts Here
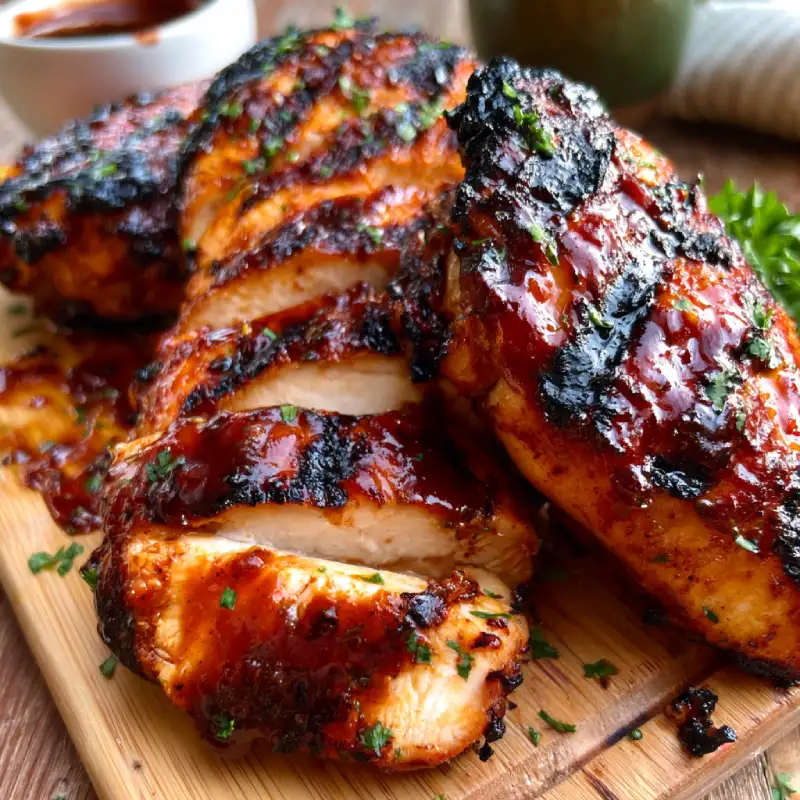
Imagine this: a warm summer evening, the sizzle of chicken on the grill, and that incredible aroma wafting through your backyard. Now, picture biting into that chicken – it’s not dry, overcooked, or lacking flavor. Instead, it’s bursting with sweet and smoky BBQ goodness, incredibly tender, and so juicy that the juices practically run down your chin. That, my friends, is the promise of this amazing juicy grilled BBQ chicken recipe. As someone who has spent countless hours perfecting the art of backyard grilling, I’ve had my share of triumph and… well, less than triumphant moments. But through it all, I’ve discovered the true secrets to achieving BBQ chicken perfection every single time. My journey from charcoal novice to grill master has led me to this foolproof method, and I’m so excited to share it with you!
If you’re anything like me, you love creating memorable meals, and a perfectly grilled BBQ chicken is a staple that deserves to be mastered. You can See more good recipes here but stick around to unlock the ultimate grilled BBQ chicken experience. The secret to truly juicy grilled BBQ chicken lies in a combination of smart preparation – yes, we’re talking about brining – and precise grilling techniques that ensure a crisp, flavorful skin and meat that stays incredibly moist. Forget everything you thought you knew about dry BBQ chicken; we’re about to change your grilling game forever!
How This Recipe Works: Flavor & Texture Unlocked
I know what you’re thinking: how can juicy grilled BBQ chicken be this good? It all comes down to a meticulously crafted process designed to deliver on every front: flavor, texture, and juiciness. We start by ensuring every piece of chicken is primed for success.
- Crisp Skin, Tender Meat: The Perfect Balance: We achieve this through a careful two-zone grilling method. The initial sear over direct heat crisps up the skin beautifully, rendering fat and locking in those delicious exterior flavors. Then, moving the chicken to indirect heat allows it to cook through gently, preventing the meat from drying out while the skin continues to crisp without burning. It’s the ultimate marriage of texture!
- Deep BBQ Flavor: Layering Sauces: Our approach isn’t just about slathering on sauce at the end. We build flavor layers. A good rub sets the stage, infusing the chicken with aromatic spices. Then, the BBQ sauce is applied strategically during the latter stages of grilling, allowing it to caramelize and create that irresistible sticky, sweet, and smoky glaze without charring.
- No Dry Chicken: Our Brining Advantage: This is the game-changer! Brining isn’t just a fancy step; it’s essential for truly juicy chicken. The salt solution helps the chicken retain moisture during cooking, ensuring every bite is succulent and tender. It’s what transforms good chicken into profoundly juicy grilled BBQ chicken.
Ingredients and Smart Substitutions
Here is what you need and why:
Chicken Cuts: While you can technically grill any cut, I highly recommend bone-in, skin-on chicken thighs and drumsticks for the best juicy grilled BBQ chicken. The skin protects the meat and crisps up beautifully, while the bones help conduct heat and keep the meat moist. If you’re using chicken breast, opt for bone-in with skin if possible, or brine boneless, skinless breasts for a shorter time and be extra vigilant with temperature to prevent drying out. Butterfly larger breasts to ensure even cooking.
The Importance of a Good BBQ Rub: A quality dry rub is the foundation of flavor. It penetrates the meat, adding a complex blend of savory, sweet, and sometimes spicy notes. You can use your favorite store-bought rub or make your own with paprika, garlic powder, onion powder, brown sugar, salt, and black pepper. This step significantly boosts the overall taste profile of your juicy grilled BBQ chicken.
Choosing Your BBQ Sauce: This is where your personal preference shines! Do you lean towards a thick, sweet and tangy Kansas City style? A vinegary, spicy Carolina BBQ? Or a smoky, robust Texas-style sauce? Choose one you adore, as it will be the dominant flavor. I often have a few on hand for guests to choose their own adventure.
Brining Essentials: Salt, Sugar, and Aromatics: For our brine, you’ll need kosher salt (never iodized!), brown sugar (for flavor and browning), and water. You can enhance the brine with aromatics like bay leaves, black peppercorns, garlic cloves (smashed), and even orange peels for an extra layer of subtle flavor. This simple solution is the magic bullet for incredibly juicy chicken.
Optional Flavor Boosters: Don’t be shy about adding a little extra goodness! A sprinkle of garlic powder, onion powder, or smoked paprika to your rub amplifies its complexity. A touch of cayenne pepper can add a subtle kick without overwhelming the dish. These small additions make a big difference in developing a truly memorable juicy grilled BBQ chicken.
Step-by-Step: Grilling Your Best BBQ Chicken
Follow these steps to achieve grilling perfection:
1. Prep Day 1: Brining for Maximum Juiciness
Begin by making your brine. In a large bowl or container large enough to submerge all your chicken, dissolve the salt and brown sugar in warm water. Add any optional aromatics like bay leaves or smashed garlic. Once dissolved, let the brine cool completely. Add the chicken pieces to the cooled brine, ensuring they are fully submerged. Cover and refrigerate for at least 4 hours, or ideally overnight (8-12 hours). This step is non-negotiable for truly juicy grilled BBQ chicken.
2. Prep Day 2: Seasoning and Setting Up Your Grill
Remove the chicken from the brine and pat each piece thoroughly dry with paper towels. This is crucial for crisp skin! Discard the brine. Lightly brush the chicken with a little oil, then generously apply your chosen BBQ rub to all surfaces. Don’t be shy! While the chicken comes to room temperature (about 30 minutes), set up your grill for two-zone cooking. For gas grills, light one side to medium-high and leave the other side off. For charcoal grills, pile your lit coals on one side of the grill. You want a direct heat zone and an indirect heat zone.
3. Grilling Method: Two-Zone Cooking is Key
Place the chicken pieces, skin-side down, over the direct heat to sear for 3-5 minutes per side, until the skin is golden brown and starting to crisp. Be careful of flare-ups! Once seared, move the chicken to the indirect heat side of the grill, arranging it so the skin side is up. Close the lid and maintain a grill temperature of around 350-375°F (175-190°C). This indirect cooking is what cooks the chicken through gently, keeping it incredibly juicy.
4. The Saucing Strategy: Building Layers of Flavor
Cook the chicken over indirect heat for about 20-30 minutes, or until the internal temperature reaches about 150-155°F (65-68°C). Now, it’s time to apply the BBQ sauce. Generously brush your chosen BBQ sauce onto all sides of the chicken. Close the lid and continue cooking, brushing with more sauce every 5-7 minutes, for another 10-15 minutes. This allows the sauce to caramelize and create that beautiful, sticky glaze without burning, ensuring intense flavor in every bite of your juicy grilled BBQ chicken.
5. Resting Your Chicken: Don’t Skip This Step!
Once the internal temperature of the thickest part of the chicken (avoiding the bone) reaches 165°F (74°C), remove it from the grill. Transfer the chicken to a clean cutting board or serving platter. Cover it loosely with foil and let it rest for at least 10 minutes. This resting period is critical! It allows the juices to redistribute throughout the meat, guaranteeing maximum juiciness. If you cut into it too soon, those precious juices will run out, leaving you with less tender chicken. Patience is a virtue here!
Expert Tips for Grilling Success
- Temperature Control: Direct vs. Indirect Heat: Master this. Direct heat is for searing and crisping, while indirect heat is for cooking through gently. Think of it like an oven on a grill.
- Avoiding Flare-Ups: Have a spray bottle filled with water handy to douse any sudden grease flare-ups, especially when searing chicken or applying sauce. This prevents charring and bitter flavors. You can also move the chicken to the indirect side temporarily if a flare-up occurs.
- Knowing When It’s Done: Internal Temperature Matters: Invest in a good instant-read thermometer. Chicken is safely cooked when it reaches an internal temperature of 165°F (74°C). This is the only reliable way to ensure doneness without overcooking.
- Marinating vs. Brining: Understand the Difference: Marinating adds flavor to the surface and tenderizes slightly, but brining adds moisture throughout the meat. For truly juicy grilled BBQ chicken, brining is superior for moisture retention.
- Achieving Grill Marks (Without Burning): For perfect grill marks, ensure your grates are clean and well-oiled before placing the chicken on direct heat. Let the chicken sit undisturbed for 2-3 minutes per side during the initial sear, then turn it 45 degrees for crosshatched marks.
What to Serve With Your Juicy Grilled BBQ Chicken
A plate of perfectly grilled BBQ chicken deserves equally stellar accompaniments! Here are some of my favorite pairings:
- Classic Sides: You can’t go wrong with creamy coleslaw, a hearty potato salad, or warm, buttery cornbread. These traditional choices complement the rich flavors of the chicken beautifully. Try Food Network’s Classic Coleslaw recipe for a reliable go-to.
- Fresh Salads & Grilled Vegetables: A crisp green salad with a light vinaigrette offers a refreshing contrast. Grilled corn on the cob, asparagus, or bell peppers are excellent choices that add color, nutrients, and that wonderful smoky char flavor.
- Beverage Pairings: For drinks, a cold iced tea, lemonade, or a crisp lager or IPA will cut through the richness of the BBQ sauce. For wine lovers, a fruity Zinfandel or a light-bodied Pinot Noir would be a fantastic match.
Storing and Reheating Best Practices
Proper storage ensures your delicious juicy grilled BBQ chicken stays fresh and tasty for days:
- Proper Storage: Once cooled, transfer any leftover chicken to an airtight container and refrigerate for up to 3-4 days. For longer storage, you can freeze individual portions for up to 3 months. Make sure it’s completely cooled before freezing to prevent ice crystals.
- Reheating Without Drying Out: To reheat, the best method is low and slow. Place the chicken in an oven-safe dish, add a tablespoon or two of water or chicken broth to the bottom, cover tightly with foil, and bake at 300°F (150°C) for 20-30 minutes, or until heated through. Alternatively, microwave in short 30-second bursts, covered, to prevent drying. Avoid high heat for reheating.
- Creative Leftover Ideas: Don’t let leftovers go to waste! Shredded BBQ chicken makes amazing sandwiches, wraps, tacos, or even a topping for a BBQ chicken pizza. You can also mix it into a salad or create BBQ chicken quesadillas for a quick and satisfying meal.
Frequently Asked Questions (FAQ)
Can I use boneless, skinless chicken?
How long should I brine the chicken?
What if I don’t have a grill?
Best BBQ sauce recommendations?
How to prevent chicken from sticking to the grill?
Delicious Juicy Grilled BBQ Chicken Recipe
- Total Time: 2 minute
- Yield: 4-6 servings
Description
Master the art of juicy grilled BBQ chicken with our step-by-step guide. Discover the best flavor and make your next backyard cookout a hit!
Ingredients
- 4–6 bone-in, skin-on chicken thighs and/or drumsticks (about 3–4 lbs total)
- For the Brine:
- 4 cups cold water
- 1/4 cup kosher salt
- 2 tablespoons brown sugar
- Optional: 2 bay leaves, 1 teaspoon black peppercorns, 2 smashed garlic cloves
- For the Rub:
- 1 tablespoon paprika (smoked paprika if desired)
- 1 teaspoon garlic powder
- 1 teaspoon onion powder
- 1 teaspoon brown sugar
- 1/2 teaspoon black pepper
- 1/4 teaspoon cayenne pepper (optional, for a kick)
- For Grilling:
- 1–2 tablespoons olive oil or high-smoke-point oil
- 1 cup of your favorite BBQ sauce
Instructions
- 1. Brine the Chicken: In a large container, combine cold water, kosher salt, brown sugar, and optional aromatics. Stir until dissolved. Add chicken, ensuring it’s fully submerged. Cover and refrigerate for 4-12 hours (overnight is best).
- 2. Prepare Chicken & Grill: Remove chicken from brine, pat thoroughly dry with paper towels (important for crispy skin!), and discard brine. Lightly brush chicken with oil, then generously rub with the spice mixture. Let chicken sit at room temperature for 30 minutes while you preheat your grill for two-zone cooking (one side high heat, one side off/low).
- 3. Sear the Chicken: Place chicken, skin-side down, over direct high heat. Sear for 3-5 minutes, until golden brown and crisp, carefully watching for flare-ups. Flip and sear on the non-skin side for another 2-3 minutes.
- 4. Cook Indirectly: Move chicken to the indirect heat side of the grill (skin-side up). Close the lid and cook at 350-375°F (175-190°C) for 20-30 minutes, or until internal temperature reaches 150-155°F (65-68°C).
- 5. Sauce & Finish: Generously brush BBQ sauce onto all sides of the chicken. Close the lid and continue cooking, brushing with more sauce every 5-7 minutes, for another 10-15 minutes, until the sauce caramelizes and the internal temperature reaches 165°F (74°C).
- 6. Rest & Serve: Remove chicken from grill, transfer to a platter, and cover loosely with foil. Let rest for at least 10 minutes before serving. Enjoy your incredibly juicy grilled BBQ chicken!
- Prep Time: 15 mins + Brine Time (4-12 hours)
- Cook Time: 40-55 mins