
")
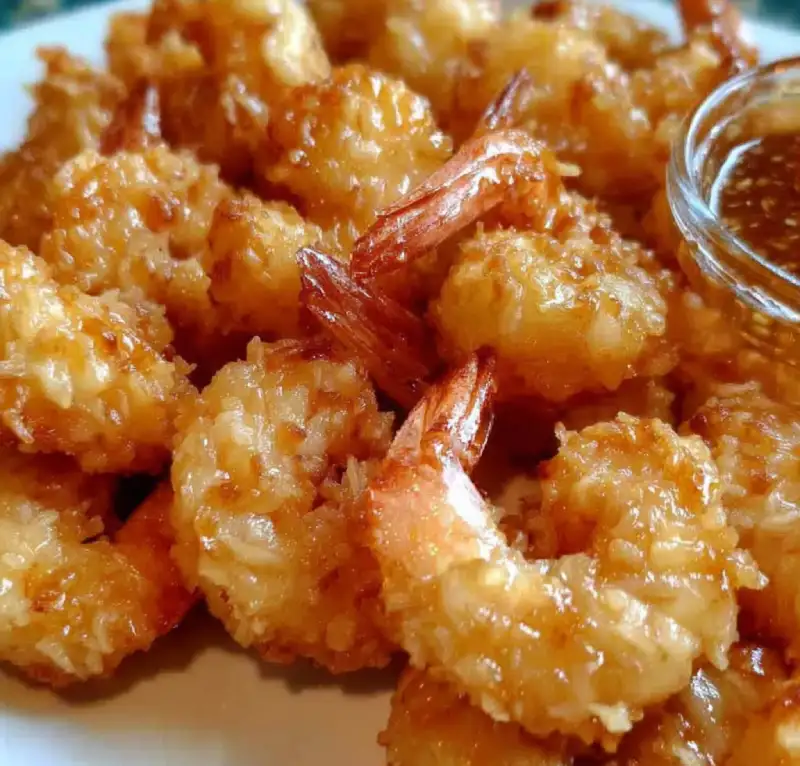
Table of Contents
- Introduction: Why This Chinese Coconut Shrimp Recipe is a Must-Try
- How This Recipe Works: Achieving Perfect Texture and Flavor
- Ingredients and Smart Substitutions for Chinese Coconut Shrimp
- Step-by-Step Instructions: Your Visual Guide to Crispy Perfection
- Expert Tips for Success with Chinese Coconut Shrimp
- What to Serve With Your Chinese Coconut Shrimp
- Storing and Reheating Coconut Shrimp
- Frequently Asked Questions About Chinese Coconut Shrimp
Introduction: Why This Chinese Coconut Shrimp Recipe is a Must-Try
Prepare your taste buds for an unforgettable culinary journey! There’s something truly magical about perfectly cooked Chinese Coconut Shrimp – that initial crunch of the golden, flaky coating, followed by the sweet, tender burst of shrimp, all harmonizing with a subtle coconut aroma. It’s a symphony of textures and flavors that brightens any meal, transforming a simple dinner into a special occasion. I’ve spent countless hours in my kitchen, experimenting with different ratios and techniques, and this recipe is the culmination of that passion, delivering shrimp that’s consistently crispy on the outside and wonderfully juicy within. For more culinary adventures beyond this delightful dish, you can always See more good recipes here on my blog.
My Journey to Perfecting Chinese Coconut Shrimp
My quest for the ultimate Chinese Coconut Shrimp began years ago after a particularly inspiring visit to a beloved Asian fusion restaurant. I was captivated by the unique balance of sweet and savory, the textural interplay, and the sheer deliciousness. What followed was a series of trials and (a few) errors in my own kitchen, meticulously adjusting flour, breading, and fry times. This recipe is the culmination of that dedication, ensuring every piece is a bite of pure bliss.
What Makes This Recipe Stand Out?
This isn’t just another coconut shrimp recipe. It’s engineered for excellence. We focus on specific techniques that guarantee superior crispness and flavor, going beyond basic instructions to explain the ‘why’ behind each step. You’ll find secrets to a perfectly adhered coating, optimal frying temperatures, and a dipping sauce that truly complements the dish, making this the last Chinese Coconut Shrimp recipe you’ll ever need.
How This Recipe Works: Achieving Perfect Texture and Flavor
- The Crispy Coating Secret: We use a double-dipping method combined with superfine Panko for an unparalleled crunch that holds up without becoming greasy.
- Balancing Sweet and Savory Notes: A subtle seasoning in the breading perfectly complements the natural sweetness of the coconut and shrimp, creating a harmonious flavor profile.
- Moist and Tender Shrimp Every Time: Precise frying times, coupled with properly prepared shrimp, ensure they remain succulent and never overcooked.
- A Versatile Dipping Sauce: Our sweet chili sauce recipe hits all the right notes, offering a zesty, slightly spicy counterpoint that elevates the entire dish.
Ingredients and Smart Substitutions for Chinese Coconut Shrimp
Here is what you need and why:
The Essential Shrimp: Choosing the Right Size: For Chinese Coconut Shrimp, I recommend large (21/25 count) or jumbo (16/20 count) shrimp. These sizes offer a good meat-to-coating ratio, making them easier to handle and less prone to overcooking. Always buy raw, deveined shrimp. If they have tails on, keep them for a nice presentation and easy dipping!
Panko vs. Traditional Breadcrumbs: Why Panko Wins: This is non-negotiable for crispy Chinese Coconut Shrimp! Panko breadcrumbs are Japanese-style breadcrumbs that are coarser, flaky, and absorb less oil than traditional breadcrumbs, resulting in a much lighter, crispier, and less greasy coating. Trust me, it makes all the difference.
Coconut Flakes: Toasted vs. Untoasted: You’ll want unsweetened shredded coconut for the breading. Untoasted is perfectly fine as it will toast beautifully during frying. If you prefer a more intense coconut flavor, you can lightly toast a portion of the coconut flakes in a dry pan beforehand, but be careful not to burn them.
Egg Wash Alternatives: A simple beaten egg with a splash of milk or water works best for adhesion. If you have an egg allergy, a thin batter made from flour and water, or even a flax egg (1 tbsp ground flaxseed + 3 tbsp water, let sit for 5 minutes) can work as a binder, though it might alter the final texture slightly.
Sweet Chili Dipping Sauce Components and Variations: Our dipping sauce uses sweet chili sauce as a base, enhanced with a squeeze of fresh lime juice, a dash of rice vinegar for tang, and sometimes a tiny pinch of red pepper flakes for a subtle kick. For variations, you could add minced fresh ginger, a touch of soy sauce, or even a spoonful of apricot jam for extra sweetness and body. For more inspiration on sauces, check out reliable sources like Food Network’s sweet chili sauce recipes.
Step-by-Step Instructions: Your Visual Guide to Crispy Perfection
Follow these step-by-step photos:
1. Preparing Your Shrimp for Breading
Start by thawing your shrimp if frozen. Pat them thoroughly dry with paper towels. This is crucial for the breading to adhere. If desired, you can make a small incision along the inner curve of the shrimp to help them straighten out when frying, making them easier to dip and eat.
2. Setting Up Your Breading Station Efficiently
Prepare three shallow dishes or bowls. In the first, place all-purpose flour seasoned with salt and pepper. In the second, whisk eggs with a splash of milk or water. In the third, combine the Panko breadcrumbs and shredded coconut. Arrange them in a line for easy workflow: flour, egg, Panko/coconut.
3. The Art of Breading: Maximizing Coverage
Take one shrimp at a time. First, dredge it lightly in the seasoned flour, shaking off any excess. Next, dip it into the egg wash, ensuring it’s fully coated. Finally, press the shrimp firmly into the Panko and coconut mixture, making sure every surface is generously covered. Repeat for all shrimp and place them on a clean plate or baking sheet.
4. Frying Techniques: Achieving Golden Brown Crispness
Heat about 2-3 inches of neutral oil (like vegetable or canola) in a heavy-bottomed pot or deep skillet to 350-375°F (175-190°C). Use a thermometer to monitor the temperature. Carefully lower shrimp into the hot oil, frying in batches to avoid overcrowding. Fry for 2-3 minutes per side, or until golden brown and cooked through. The internal temperature of shrimp should reach 120°F (49°C).
5. Draining and Serving: The Final Touches
Once golden and crispy, remove the Chinese Coconut Shrimp from the oil using a slotted spoon or spider and transfer them immediately to a wire rack set over a baking sheet lined with paper towels. This allows excess oil to drain off, keeping them crisp. Serve hot with your sweet chili dipping sauce.
Expert Tips for Success with Chinese Coconut Shrimp
- Don’t Overcrowd the Pan: Frying too many shrimp at once will drop the oil temperature, leading to greasy, soggy results. Fry in batches for consistently crispy shrimp.
- Monitor Oil Temperature Closely: A thermometer is your best friend here. Too low, and the coating absorbs too much oil. Too high, and the outside burns before the inside cooks. Maintain that sweet spot of 350-375°F (175-190°C).
- Seasoning the Breading for Extra Flavor: Don’t just rely on the dipping sauce! Add a pinch of garlic powder, onion powder, or a tiny bit of cayenne pepper to your flour or Panko mixture for an extra layer of flavor.
- Serving Immediately for Best Texture: Chinese Coconut Shrimp are at their peak crispness right after frying. While they can be reheated, their texture is best enjoyed fresh from the oil.
- Use a Wire Rack for Draining: Never drain fried foods directly on paper towels if you want to maintain crispness. A wire rack allows air circulation, preventing the bottom from getting soggy.
What to Serve With Your Chinese Coconut Shrimp
Classic Rice Pairings
A simple side of steamed jasmine rice or fluffy coconut rice is perfect for soaking up any extra dipping sauce and offers a soothing counterpoint to the crispy shrimp. For something heartier, a light fried rice with vegetables would also be delightful.
Light Salad Options
A crisp Asian-inspired salad featuring mandarins, slivered almonds, and a ginger-sesame dressing provides a refreshing balance. A simple cucumber and tomato salad with a rice vinegar vinaigrette also works beautifully.
Complementary Side Dishes
Consider steamed or stir-fried Asian greens like bok choy or gai lan. Roasted broccoli or asparagus tossed with a hint of garlic and soy sauce can also make for a wonderful, healthy accompaniment to your Chinese Coconut Shrimp.
Storing and Reheating Coconut Shrimp
Best Practices for Leftovers
Store any leftover Chinese Coconut Shrimp in an airtight container in the refrigerator for up to 2-3 days. While they won’t be as crispy as fresh, they’ll still be delicious. The dipping sauce can be stored separately in the fridge for up to a week.
Reheating for Maximum Crispness
To revive the crispness, avoid the microwave! Preheat your oven or air fryer to 350°F (175°C). Spread the shrimp in a single layer and reheat for 5-8 minutes in the oven, or 3-5 minutes in the air fryer, until heated through and crisp again. Keep an eye on them to prevent burning the coconut.
Frequently Asked Questions About Chinese Coconut Shrimp
Can I Bake Instead of Fry?
Can I Use Frozen Shrimp?
How to Keep Shrimp From Getting Soggy?
Is This Recipe Spicy?
Chinese Coconut Shrimp
- Total Time: 7 minute
- Yield: 4 servings
Description
Indulge in the perfect crunch and sweet-savory flavor of homemade Chinese Coconut Shrimp. This recipe guarantees tender shrimp with an irresistible crispy coating.
Ingredients
- 1 lb large or jumbo shrimp (21/25 or 16/20 count), raw, peeled, deveined, tails on
- 1/2 cup all-purpose flour
- 1/2 tsp salt
- 1/4 tsp black pepper
- 2 large eggs, whisked
- 1 tbsp milk or water
- 1 cup Panko breadcrumbs
- 1/2 cup unsweetened shredded coconut
- 2–3 cups neutral oil for frying (vegetable, canola, or peanut)
- For the Sweet Chili Dipping Sauce:
- 1/2 cup sweet chili sauce
- 1 tbsp fresh lime juice
- 1 tsp rice vinegar (optional)
- Pinch of red pepper flakes (optional)
Instructions
- Prepare Shrimp: Thaw shrimp, if frozen. Pat completely dry with paper towels.
- Set Up Breading Station: In shallow dish 1, mix flour, salt, and pepper. In dish 2, whisk eggs and milk/water. In dish 3, combine Panko and shredded coconut.
- Bred Shrimp: Dredge each shrimp in flour (shaking off excess), then egg wash, then press firmly into Panko-coconut mixture until fully coated. Place on a clean plate.
- Heat Oil: Heat oil in a heavy-bottomed pot or deep skillet to 350-375°F (175-190°C).
- Fry Shrimp: Fry shrimp in batches for 2-3 minutes per side, until golden brown and cooked through.
- Drain: Remove with a slotted spoon and place on a wire rack over paper towels to drain.
- Make Dipping Sauce: Whisk together sweet chili sauce, lime juice, rice vinegar, and red pepper flakes (if using).
- Serve: Serve hot with the prepared dipping sauce.
- Prep Time: 20 mins
- Cook Time: 10-15 mins