
")
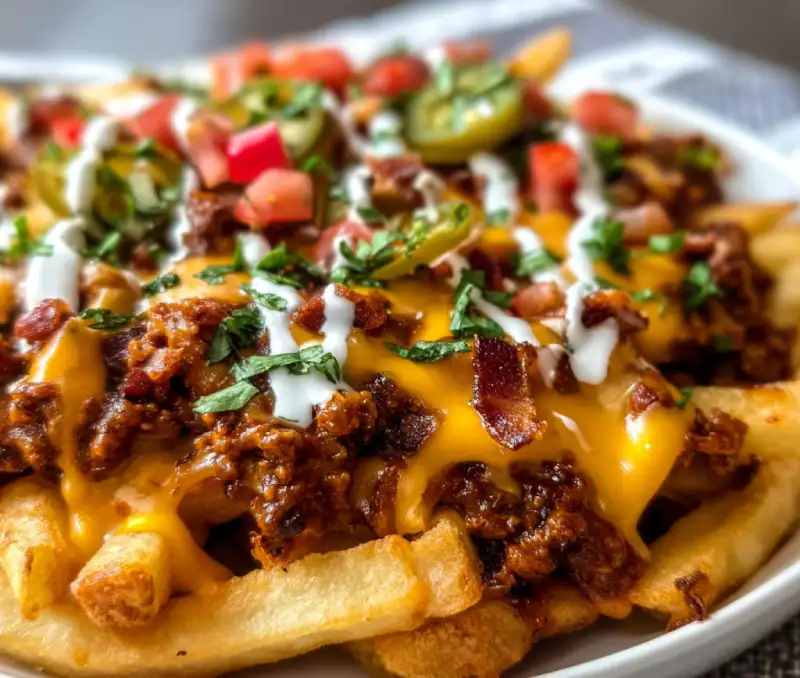
Table of Contents
Oh, the glorious symphony of flavors and textures in a plate of chili cheese fries! Imagine sinking your teeth into perfectly crispy fries, immediately followed by the rich, savory warmth of a well-seasoned chili, all enrobed in a blanket of lusciously melted cheese. Then, just when you think it can’t get any better, a fresh burst of bright, tangy toppings cuts through the indulgence, creating a truly unforgettable bite. This dish isn’t just food; it’s an experience, a hug in a bowl, and the ultimate comfort food champion. If you’re looking for more incredible recipes that bring joy to your kitchen, see more good recipes here. Get ready to elevate your snack game with these Easy Loaded Chili Cheese Fries that are simple enough for a weeknight but spectacular enough for a party!
Why You’ll Love These Easy Loaded Chili Cheese Fries
- Quick Comfort Food Fix: From pantry to plate, these chili cheese fries come together surprisingly fast, making them perfect for those sudden comfort food cravings.
- Customizable for Any Palate: Whether you love a spicy kick, extra veggies, or a specific type of cheese, this recipe is a fantastic canvas for your culinary creativity.
- Perfect for Entertaining or Solo Snacking: Scale it up for a crowd-pleasing appetizer or down for a decadent treat just for yourself – it’s always a winner!
How This Recipe Works
The magic of our Easy Loaded Chili Cheese Fries lies in its layers, each designed to deliver maximum flavor and texture. It’s a build-your-own masterpiece:
- Crispy Fries Base: The foundation is key! We focus on achieving perfectly golden, crunchy fries that stand up to the delicious toppings without getting soggy.
- Savory, Meaty Chili: A robust, flavorful chili forms the heart of this dish. It’s warm, comforting, and the perfect counterpoint to the crispy fries.
- Melted, Gooey Cheese Layer: What are chili cheese fries without an abundance of stretchy, bubbling, perfectly melted cheese? This is where the indulgence truly begins.
- Fresh, Bright Toppings: A sprinkle of fresh ingredients provides essential contrast, adding acidity, crunch, and a burst of freshness that balances the richness.
Ingredients and Smart Substitutions
Here is what you need and why:
The Best Fries to Use (Frozen vs. Homemade): For ultimate ease, frozen crinkle-cut or shoestring fries are your best friend here. They cook up quickly and provide excellent nooks and crannies to hold the chili and cheese. If you have extra time and want to make your own, Food Network has a great recipe for homemade french fries, but ensure they are very crispy before topping.
Choosing Your Chili (Canned vs. Homemade – Pros & Cons): A good quality canned chili (with or without beans, your preference!) is a fantastic shortcut, saving you significant time. Look for brands with hearty meat chunks and good seasoning. Homemade chili, of course, offers unparalleled flavor control. If using homemade, ensure it’s not too watery.
Cheese That Melts Perfectly (Shredded vs. Block): For the best melt and flavor, freshly shredded cheddar cheese (sharp or mild, based on your taste) and Monterey Jack are ideal. Pre-shredded cheese often contains anti-caking agents that can hinder a smooth, gooey melt. Consider adding a little pepper jack for a subtle kick!
Optional Toppings for Extra Flavor: This is where you can truly make it your own! Think sliced green onions, diced red onion, jalapeños (fresh or pickled), a dollop of sour cream or Greek yogurt, fresh cilantro, or even a drizzle of hot sauce.
Step-by-Step Instructions: Your Visual Guide
Follow these simple steps for the perfect Easy Loaded Chili Cheese Fries:
1. Prep and Bake the Fries
Preheat your oven according to the package directions for your chosen frozen fries (usually around 400-425°F or 200-220°C). Arrange the fries in a single layer on a baking sheet. Bake until they are golden brown and extra crispy, typically 20-30 minutes, flipping halfway through. This step is crucial for preventing soggy fries!
2. Prepare the Chili
While the fries are baking, heat your chili. If using canned chili, empty it into a saucepan and heat gently over medium-low heat, stirring occasionally, until hot and bubbling. If using homemade chili, ensure it’s hot and ready to go. You want it warm enough to melt the cheese effectively but not boiling.
3. Assemble the Chili Cheese Fries
Once the fries are perfectly crisp, remove them from the oven. You can either assemble them directly on the baking sheet (if serving family style) or transfer them to individual heat-safe plates. Evenly distribute the hot chili over the crispy fries, ensuring every fry gets some savory goodness.
4. Melt the Cheese to Perfection
Generously sprinkle your freshly shredded cheese over the chili-covered fries. Return the baking sheet (or plates, if oven-safe) to the preheated oven for 5-7 minutes, or until the cheese is completely melted, bubbly, and slightly browned on the edges. Alternatively, for a quicker melt, you can pop them under the broiler for 1-2 minutes, watching carefully to prevent burning.
Expert Tips for Success
- Preventing Soggy Fries: Always bake your fries until they are very crisp before adding toppings. Don’t overcrowd the baking sheet, as this steams the fries instead of crisping them.
- Even Cheese Melting: Use freshly shredded cheese for the best melt. For even coverage, sprinkle the cheese thinly and evenly over the hot chili.
- Balancing Chili Flavor: Taste your chili before adding it. If using canned, you might want to add a pinch of chili powder, cumin, or a dash of hot sauce to boost the flavor.
- Serving Immediately for Best Texture: Chili cheese fries are best enjoyed immediately after the cheese melts to retain the crispy texture of the fries.
- Pre-warm Serving Dishes: If serving on individual plates, pre-warming the plates slightly can help maintain the temperature of the dish longer.
What to Serve With Your Chili Cheese Fries
While an indulgence on their own, Easy Loaded Chili Cheese Fries can be part of a larger meal or paired with perfect complements:
- Classic Sides: A crisp, refreshing side salad with a vinaigrette dressing provides a nice counterpoint to the richness. Coleslaw is also an excellent choice.
- Beverage Pairings: A cold beer (lager or an amber ale works well), a fizzy soda, or even a glass of iced tea are perfect accompaniments to this savory dish.
- Making it a Full Meal: Serve alongside a simple grilled hot dog or a juicy burger for the ultimate diner-style experience.
Storing and Reheating Best Practices
- Refrigeration Guidelines: If you happen to have leftovers (a rare occurrence with these delicious fries!), store them in an airtight container in the refrigerator for up to 2-3 days.
- Optimizing Reheating for Crispy Results: Reheating chili cheese fries can be tricky due to potential sogginess. The best method is to spread them on a baking sheet and reheat in an oven or toaster oven at 350°F (175°C) until heated through and the fries re-crisp, about 10-15 minutes. Avoid the microwave if possible, as it will make the fries soggy.
- Freezing (Not Recommended): Freezing chili cheese fries is generally not recommended. The fries will become extremely mushy upon thawing and reheating, significantly diminishing the overall enjoyment of the dish.
Frequently Asked Questions (FAQ)
Can I use vegetarian chili?
What’s the best way to get crispy fries?
Can I make these ahead of time?
What cheeses work best for melting?
Easy Loaded Chili Cheese Fries
- Total Time: 40 minutes
- Yield: 4 servings
Description
Indulge in the ultimate comfort food with these Easy Loaded Chili Cheese Fries. Perfectly crispy fries are smothered in savory chili and gooey melted cheese for a truly satisfying experience.
Ingredients
- 1 (28 oz) bag frozen crinkle-cut or shoestring fries
- 1 (15 oz) can chili (beef or vegetarian, with or without beans)
- 1 ½ cups shredded cheddar cheese (or Monterey Jack, or a blend)
- Optional toppings: sliced green onions, diced red onion, pickled jalapeños, sour cream, fresh cilantro, hot sauce
Instructions
- Step 1: Prep and Bake the Fries. Preheat oven to 400-425°F (200-220°C) per package directions. Spread fries in a single layer on a baking sheet and bake for 20-30 minutes until golden and very crispy, flipping halfway.
- Step 2: Prepare the Chili. While fries bake, heat canned chili in a saucepan over medium-low heat until hot and gently bubbling, stirring occasionally.
- Step 3: Assemble the Chili Cheese Fries. Once fries are crispy, remove from oven. Evenly distribute the hot chili over the fries on the baking sheet or individual heat-safe plates.
- Step 4: Melt the Cheese to Perfection. Generously sprinkle shredded cheese over the chili. Return to oven for 5-7 minutes, or until cheese is completely melted and bubbly. Alternatively, broil for 1-2 minutes, watching carefully. Serve immediately with desired toppings.
- Prep Time: 10 mins
- Cook Time: 30 mins