
")
{
“blog_html”: “
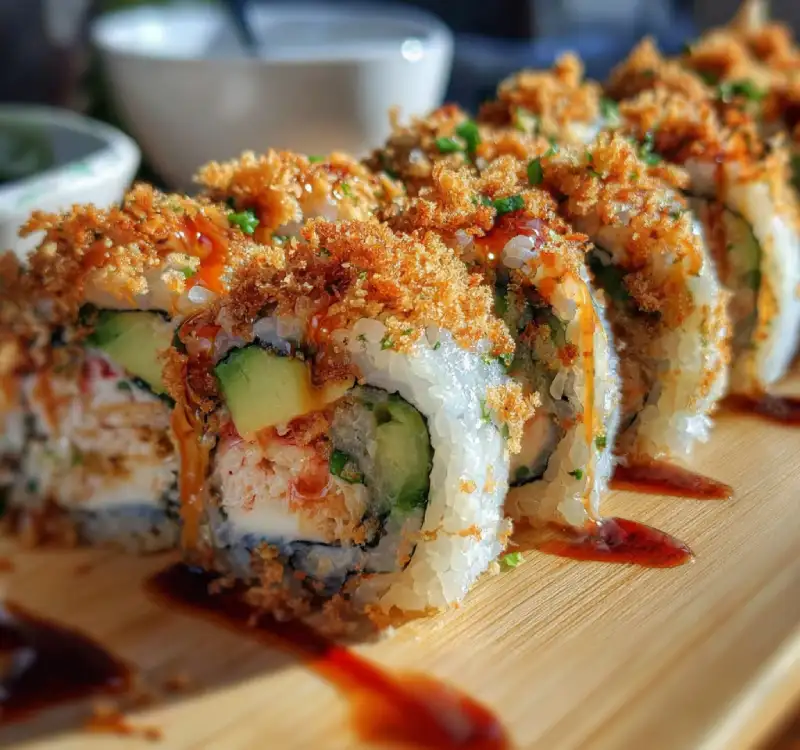
Mastering Homemade California Crunch Rolls
Ever crave that perfect sushi roll experience right in your own kitchen? That delightful crunch, the creamy avocado, the sweet crab, and that signature spicy mayo kick? If so, you’ve come to the right place because today we’re diving deep into crafting the ultimate Homemade California Crunch Roll Sushi. This isn’t just about putting ingredients together; it’s about creating a symphony of textures and flavors that will transport your taste buds straight to your favorite sushi bar, without ever leaving home. The best part? It’s incredibly achievable, even for beginners! Get ready to impress yourself and everyone you share these with. Don’t forget to check out more great recipes here for even more culinary adventures.
Your Go-To Guide for Perfect California Crunch Roll Sushi at Home
This comprehensive guide breaks down every step, ensuring your sushi-making journey is smooth, successful, and deliciously rewarding. From perfectly seasoned rice to mastering the roll, we’ve got you covered.
Why This Recipe Works: The Perfect Balance
- Flavor Harmony: We balance the sweetness of imitation crab with the richness of avocado, the crispness of cucumber, and the zing of spicy mayo for a truly satisfying bite.
- Textural Perfection: The recipe perfectly layers soft rice, supple nori, creamy avocado, crunchy cucumber, and those irresistible tempura flakes.
- Step-by-Step Clarity: Our instructions are meticulously detailed, making complex techniques simple and accessible for home cooks of all levels.
- Customizable Fun: We provide options for add-ins and substitutions, allowing you to tailor your sushi experience to your personal preferences.
Key Ingredients & Smart Substitutions
Here is what you need and why:
Nori Sheets: Essential for Structure and Umami: These dried seaweed sheets are what hold your roll together and contribute a wonderful, subtle umami flavor. Look for good quality, toasted nori. Ensure they are fresh and pliable to prevent cracking during rolling.
Imitation Crab (Surimi): The Classic Sweetness: Made from processed white fish (often pollock), surimi provides a sweet, slightly briny flavor and flaky texture that’s characteristic of a California roll. You can find it in the refrigerated seafood section. For a more premium experience, real lump crab meat can be substituted, but it will change the flavor profile slightly.
Avocado: Creaminess and Healthy Fats: A ripe, buttery avocado is non-negotiable! It adds a luxurious creaminess that balances the other ingredients. Choose one that yields slightly to gentle pressure. Always slice it just before use to prevent browning.
Cucumber: Fresh Crunch and Verdant Color: English cucumbers are best here as they have fewer seeds and thinner skins, eliminating the need for peeling. They provide a refreshing, crisp counterpoint to the richer ingredients.
Spicy Mayo: The Creamy, Zesty Kick: This essential sauce brings a creamy, savory, and slightly spicy element. It’s typically a mix of mayonnaise and Sriracha, though you can adjust the heat level to your liking. A touch of rice vinegar or lime juice can brighten it up.
Tempura Flakes: The Signature Crunch Element: These crispy fried batter bits are what give the ‘crunch’ in California Crunch Roll. You can buy them pre-made at Asian markets or online, or even make your own by drizzling tempura batter into hot oil. They are non-negotiable for that authentic crunch!
Optional Add-ins: Elevating Your Roll: Feel free to customize! Thin strips of cream cheese, a sprinkle of toasted sesame seeds, or a drizzle of unagi (eel) sauce can add another layer of flavor and complexity. Experiment and find your favorite combination!
Step-by-Step California Crunch Roll Assembly
Follow these step-by-step photos:
1. Preparing Perfect Sushi Rice
Rinse 2 cups of sushi rice under cold running water until the water runs clear. Cook the rice according to package directions (usually 2 cups rice to 2.5 cups water). Once cooked, transfer to a non-metallic bowl and gently fold in sushi vinegar (2 tablespoons rice vinegar, 1 teaspoon sugar, 1/2 teaspoon salt, warmed until dissolved). Fan the rice as you mix to cool it quickly and give it a glossy finish. It should be warm, not hot, when you’re ready to roll.
2. Assembling Your Workstation
Gather all your prepped ingredients: thinly sliced avocado, julienned cucumber, shredded imitation crab, spicy mayo, and tempura flakes. Have your bamboo rolling mat (makisu) covered in plastic wrap, a small bowl of water (tezuzu) for dipping your hands, and a sharp, damp knife ready. Organization is key for smooth rolling!
3. Laying Out the Nori and Rice
Place a sheet of nori, shiny side down, on your plastic-wrapped bamboo mat. Dip your hands in the tezuzu to prevent sticking. Grab about 3/4 cup of sushi rice and gently spread it evenly over the nori, almost to the edges, leaving a small 1/2-inch strip at the top edge clean. If making an inside-out roll, flip the nori so the rice side is down on the mat.
4. Adding Fillings with Precision
Arrange your fillings horizontally near the bottom edge of the rice (or nori, if making a traditional roll). Place a modest amount of imitation crab, a few slices of avocado, and some cucumber strips. Remember, less is more! Overfilling makes rolling difficult.
5. Rolling Like a Pro
Using the bamboo mat, gently lift the edge closest to you over the fillings, tucking it in with your fingers. Apply gentle, even pressure as you roll the mat forward, lifting it slightly as you go to avoid rolling it into the sushi. Continue rolling until you reach the far edge. Give the roll a final gentle squeeze to firm it up.
6. Adding the Crunch and Finishing Touches
If making a crunch roll, generously sprinkle tempura flakes onto a clean surface. Place your rolled sushi onto the flakes and gently roll it back and forth, pressing lightly so the flakes adhere to the rice. For extra flavor, drizzle with a bit more spicy mayo.
7. Slicing Your Rolls for Presentation
Dampen your sharp knife and very carefully slice the roll in half. Then cut each half into 3-4 even pieces (usually 6-8 pieces per roll). Wipe your knife clean and re-dampen between each cut for the cleanest slices. Arrange beautifully on a platter and serve immediately!
Expert Tips for California Crunch Roll Success
- The Art of Wet Hands: Preventing Stickiness: Dipping your hands in a bowl of water (tezuzu) before handling sushi rice is crucial. The starch in the rice makes it incredibly sticky, and wet hands prevent it from glomming onto your fingers. Don’t drench them, just lightly moisten.
- Don’t Overfill: Less is More: It’s tempting to load up your rolls with fillings, but this is a common pitfall. An overstuffed roll is much harder to close and slice neatly. Aim for a modest, even layer of fillings to ensure a firm, shapely roll.
- Sharp Knife, Clean Cuts: A very sharp, damp knife is your best friend when slicing sushi. It prevents tearing the nori and squishing the ingredients. Wipe the blade clean and re-dampen it between each cut for perfectly pristine pieces.
- Practice Makes Perfect: Don’t Be Afraid to Experiment: Your first roll might not be magazine-perfect, and that’s absolutely fine! Sushi making is a skill that improves with practice. Don’t be afraid to try different filling combinations or adjust the rolling technique until you find what works for you.
- Invest in a Good Bamboo Mat: While you can improvise, a good quality bamboo rolling mat (makisu) makes a significant difference. Cover it in plastic wrap for easy cleanup and hygiene.
- External Link Bonus: For more in-depth techniques on sushi rice, check out this fantastic guide from Food Network.
Serving Suggestions for Your Homemade Sushi Feast
Classic Pairings: Soy Sauce, Wasabi, and Pickled Ginger
These are the holy trinity of sushi condiments for a reason! A small dish of low-sodium soy sauce for dipping, a dab of potent green wasabi for a sinus-clearing kick, and a few slices of sweet, palate-cleansing pickled ginger between bites are essential for the full experience. Offer them on the side so everyone can customize their plate.
Beverage Buddies: What to Drink with Sushi
Keep your beverage choices clean and crisp to complement, not overpower, the delicate flavors of sushi. Green tea (hot or iced) is a traditional and excellent choice. Sake, especially a dry junmai, or a light, crisp craft beer also pairs wonderfully. For wine lovers, a dry Sauvignon Blanc or a sparkling rosé can be delightful.
Complete Your Meal: Side Dishes ideas
To turn your sushi into a full meal, consider some simple side dishes. A fresh seaweed salad, a bowl of edamame (steamed and lightly salted), or a light miso soup are perfect accompaniments. For something a little more substantial, a small portion of gyoza (pan-fried dumplings) would be a fantastic addition.
Storing and Reheating Your Crunch Rolls
Best Storage Practices for Leftovers
Sushi is best enjoyed fresh, but if you have leftovers, properly storing them is key to maintaining quality. Place leftover rolls in an airtight container, ensuring they are not tightly packed, to prevent them from drying out or absorbing other food odors in the refrigerator. Consume within 24 hours for the best taste and texture.
Can You Reheat Sushi? (Spoiler: Not Really)
Unlike many other foods, sushi, especially those with raw or fresh ingredients like avocado and cucumber, does not fare well when reheated. The rice can become hard, the nori can get chewy, and the fresh fillings will lose their desirable texture. It’s best to enjoy leftovers chilled.
Maximizing Freshness for Next-Day Enjoyment
If you anticipate having leftovers, consider preparing your crunch rolls with cooked ingredients only (like imitation crab and cooked vegetables) or assembling rolls without avocado, as avocado tends to brown quickly. When serving next day, let the rolls come to room temperature for about 15-20 minutes before eating to soften the rice slightly.
California Crunch Roll Sushi FAQ
Can I use real crab meat instead of imitation crab?
What if I don’t have a sushi mat?
How do I make my tempura flakes crispier?
Is it safe to eat raw fish in homemade sushi?
How long does homemade sushi last?
“,
“recipe_card”: {
“title”: “Homemade California Crunch Roll Sushi”,
“description”: “Craft these delicious and crunchy sushi rolls right in your kitchen with fresh ingredients. Perfectly balanced flavors and textures that will impress everyone!”,
“prep_time”: “30 mins”,
“cook_time”: “20 mins”,
“yield”: “4 rolls (24-32 pieces)”,
“ingredients”: “
- 2 cups uncooked sushi rice
- 2.5 cups water (for cooking rice)
- 2 tbsp rice vinegar
- 1 tsp granulated sugar
- 1/2 tsp salt
- 8 sheets nori (seaweed)
- 1 lb imitation crab meat, shredded
- 1 large avocado, thinly sliced
- 1/2 English cucumber, julienned
- 1/2 cup mayonnaise
- 2-3 tbsp Sriracha (adjust to taste)
- 1 cup tempura flakes
- Small bowl of water (for hands)
- Optional: Soy sauce, wasabi, pickled ginger for serving
“,
“instructions”: “
- Step 1: Prepare Sushi Rice. Rinse sushi rice until water runs clear. Cook with water according to package directions. Once cooked, transfer to a non-metallic bowl. Warm rice vinegar, sugar, and salt until dissolved, then gently fold into the warm rice, fanning as you mix to cool.
- Step 2: Prepare Fillings & Workstation. Shred imitation crab, slice avocado thinly, and julienne cucumber. Cover your bamboo rolling mat with plastic wrap. Have your bowl of water (tezuzu) ready for wetting hands.
- Step 3: Lay Rice on Nori. Place one nori sheet, shiny side down, on the plastic-wrapped mat. Wet hands and spread about 3/4 cup of sushi rice evenly over the nori, leaving a 1/2-inch border at the top. If making an inside-out roll, carefully flip the nori (rice side down) onto the mat.
- Step 4: Add Fillings. On the bottom 1/3 of the rice (or nori if rice is on the outside), place a strip of shredded crab, avocado slices, and cucumber strips.
- Step 5: Roll the Sushi. Using the mat, lift the edge closest to you over the fillings, tucking them in. Apply gentle pressure and continue rolling forward, lifting the mat as you go, until the roll is complete. Gently squeeze to firm up.
- Step 6: Add Crunch. Spread tempura flakes on a clean surface. Gently roll the sushi roll over the flakes, pressing lightly so they adhere. Drizzle with spicy mayo if desired.
- Step 7: Slice and Serve. Dampen a sharp knife. Slice the roll in half, then cut each half into 3-4 even pieces (6-8 total). Wipe and re-dampen the knife between cuts for clean slices. Serve immediately with soy sauce, wasabi, and pickled ginger if desired.
”
}
}
“`