
")
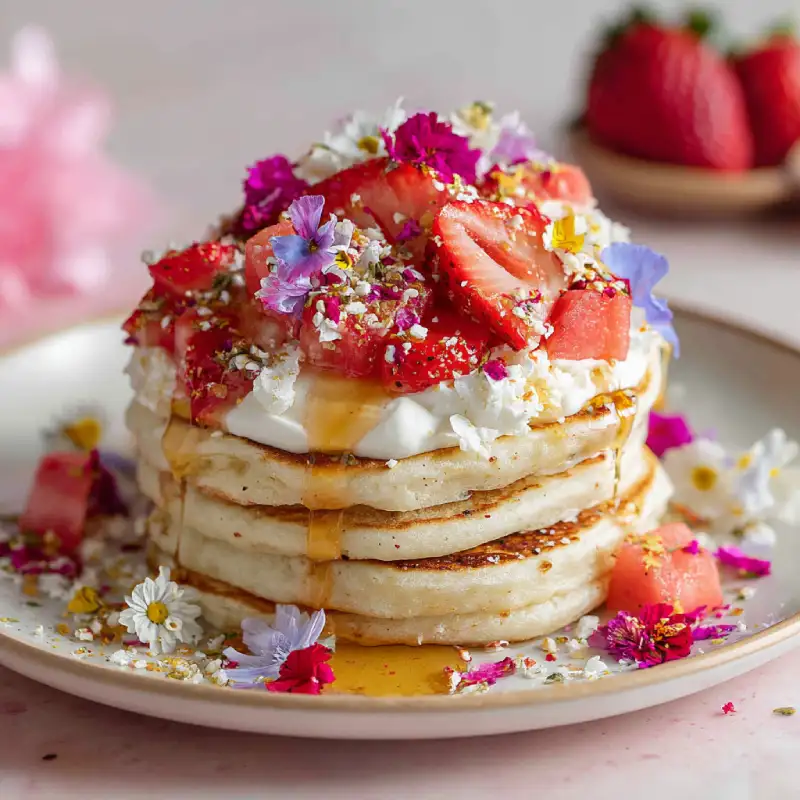
Table of Contents
- Your Go-To Pink and Red Galentine’s Day Brunch Recipe
- Why This Recipe Works
- Essential Ingredients & Smart Substitutions
- How to Make Your Galentine’s Brunch Masterpiece
- Expert Tips for a Flawless Galentine’s Brunch
- What to Serve Alongside Your Brunch Creation
- Storing and Reheating Your Brunch Leftovers
- Galentine’s Brunch Recipe FAQ
Your Go-To Pink and Red Galentine’s Day Brunch Recipe
Get ready to impress your best gal pals this Galentine’s Day with a brunch dish that’s as beautiful as it is delicious! Imagine sinking your teeth into a vibrant, fluffy baked good, each bite bursting with fresh fruit flavor, a delightful sweetness, and a tender, moist crumb that practically melts in your mouth. This isn’t just any recipe; it’s designed to bring joy and color to your celebration, making every moment feel special. If you’re looking for more easy and delicious baking ideas to celebrate, you can see more easy recipes right here. This Pink and Red Galentine’s Day Brunch dish promises an unbeatable texture and flavor profile that will have everyone reaching for seconds!
Why This Recipe Shines for Your Galentine’s Celebration
- Visually Stunning: The natural pinks and reds from berries create an effortlessly festive and inviting presentation, perfect for a photo-worthy brunch.
- Make-Ahead Friendly: Much of the prep can be done the night before, allowing you to relax and enjoy the company of your friends on Galentine’s Day itself.
- Crowd-Pleasing Flavors: The combination of sweet fruit and a subtly rich base is universally loved, ensuring there’s something for everyone.
- Customizable: Easily adapt the fruit and flavoring to suit different preferences or what’s seasonally available.
The Unbeatable Texture and Flavor of This Brunch Dish
This Galentine’s Day brunch offering is a masterclass in contrasts – a delightfully crispy, golden crust gives way to an incredibly soft, almost custardy interior. Each bite delivers a burst of tartness from the berries, perfectly balanced by a sweet, tender cake-like base. It’s a delightful interplay of textures and flavors that feels both comforting and elegant.
Essential Ingredients & Smart Substitutions
Here is what you need and why:
All-Purpose Flour: The foundation of our baked good, providing structure. I always recommend using a good quality, unbleached all-purpose flour for a consistent crumb. For a slightly lighter, more tender result, you could substitute up to a quarter of the all-purpose flour with cake flour.
Granulated Sugar: Sweetens the dish and aids in tenderizing the crumb. You can adjust the amount slightly based on the sweetness of your fruit. For a deeper, more caramel-like note, a small amount of light brown sugar can be swapped in, but avoid entirely replacing granulated sugar to maintain the desired texture.
Baking Powder & Baking Soda: Our leavening agents! Baking powder provides lift and a tender crumb, while baking soda reacts with acidic ingredients (like buttermilk or certain fruits) to give an additional boost and a finer texture. Always check that your leavening agents are fresh for optimal results!
Salt: A crucial ingredient that enhances all other flavors and balances the sweetness. Don’t skip it!
Unsalted Butter: Melted butter contributes to a tender, moist texture and rich flavor. Using unsalted butter allows you to control the total amount of salt in the recipe. If you only have salted butter, omit the added salt from the recipe.
Eggs: Act as binders, provide structure, and add richness and moisture. Ensure your eggs are at room temperature for better emulsification with other ingredients, leading to a smoother batter.
Buttermilk: Adds tang, moisture, and reacts with baking soda to create a beautifully tender crumb. If you don’t have buttermilk, you can easily make your own by adding 1 tablespoon of lemon juice or white vinegar to a liquid measuring cup, then filling the rest of the cup with dairy milk (dairy-free milk works too!) and letting it sit for 5 minutes until it curdles.
Fresh or Frozen Mixed Berries (Strawberries, Raspberries, Red Currants): These are key for our beautiful pink and red hues and burst of flavor. Fresh berries are wonderful, but high-quality frozen berries work just as well – just don’t thaw them before adding to the batter to prevent bleeding and a soggy outcome. You could also include chopped rhubarb or cherries for a different flavor profile.
Vanilla Extract: Enhances the overall flavor profile. A good quality pure vanilla extract makes a noticeable difference.
Lemon Zest (Optional but Recommended): A sprinkle of fresh lemon zest brightens the flavors and adds a subtle aromatic note that beautifully complements the berries. For another classic baking resource, check out King Arthur Baking’s recipe collection.
Step-by-Step: Crafting Your Galentine’s Brunch Masterpiece
Follow these step-by-step photos:
1. Prep Your Pan and Dry Ingredients
Prepare your baking dish: Lightly grease a 9×13 inch baking dish with butter or non-stick spray, then dust with flour, tapping out any excess. Preheat your oven to 375°F (190°C). Combine dry ingredients: In a large mixing bowl, whisk together the all-purpose flour, granulated sugar, baking powder, baking soda, and salt. Make sure there are no lumps and the leavening is evenly distributed.
2. Whisk Wet Ingredients Together
In a separate medium bowl, whisk together the melted unsalted butter, room-temperature eggs, buttermilk, and vanilla extract until well combined and smooth. The mixture should be uniform in color and consistency. If using, add the lemon zest here as well.
3. Combine and Fold in Berries
Pour the wet ingredients into the dry ingredients. With a rubber spatula or wooden spoon, gently mix until just combined. Be careful not to overmix, as this can lead to a tough crumb. A few streaks of flour are acceptable. Gently fold in your fresh or frozen berries. Try to distribute them evenly without mashing them. The batter will be thick.
4. Bake to Golden Perfection
Pour the batter into your prepared 9×13 inch baking dish and spread it evenly with your spatula. Bake for 30-35 minutes, or until the top is golden brown and a wooden skewer or toothpick inserted into the center comes out clean or with a few moist crumbs attached. The edges should be bubbly and lightly pulled away from the sides of the pan.
5. Cool and Serve
Once baked, remove the dish from the oven and let it cool on a wire rack for at least 15-20 minutes before slicing and serving. This allows the internal structure to set fully. A completely cooled dish will slice more cleanly, but warm is always delicious!
Expert Tips for a Flawless Galentine’s Brunch
- Room Temperature Ingredients: Ensure eggs and buttermilk are at room temperature. This helps them emulsify better with the melted butter, creating a smoother, more uniform batter and a finer crumb.
- Don’t Overmix: Mix your batter until *just* combined. Overmixing develops the gluten in the flour too much, resulting in a tough, dense baked good rather than a tender one.
- Use Quality Berries: Fresh, ripe berries will give the best flavor and vibrant color. If using frozen, don’t thaw them; add them directly to the batter to prevent them from bleeding too much.
- The Toothpick Test: For perfectly baked goods, insert a wooden skewer or toothpick into the center. If it comes out clean or with a few moist crumbs, it’s ready. If it comes out wet with raw batter, bake for a few more minutes.
- Enhance Color Naturally: For an even more intense pink, consider adding a tablespoon of beet powder into the dry ingredients, which provides a natural color boost without altering flavor.
What to Serve Alongside Your Brunch Creation
This Pink and Red Galentine’s Day Brunch masterpiece is delicious on its own, but here are some ideas to make your spread truly magnificent:
Complementary Beverages for the Occasion
- Sparkling Rosé or Mimosa Bar: Nothing says celebration like bubbly! Offer a selection of sparkling rosé, prosecco, and various fruit juices like cranberry, orange, and grapefruit for a build-your-own mimosa bar.
- Fresh Berry Smoothies: Blend fresh or frozen mixed berries with yogurt and a touch of honey for a refreshing, healthy, and perfectly themed drink.
- Gourmet Coffee & Tea: Offer a selection of artisanal coffees and various herbal teas to cater to all preferences.
Savory Sides to Balance the Sweetness
- Crispy Bacon or Sausage: A classic brunch pairing, offering a salty crispness that cuts through the sweetness beautifully.
- Mini Quiches or Frittatas: Individual savory egg bites with cheese and vegetables provide a substantial counterpoint.
- Avocado Toast Bar: Offer toasted artisanal bread with mashed avocado, flaky sea salt, red pepper flakes, and various toppings like everything bagel seasoning or cherry tomatoes for an interactive savory option.
Light Additions for a Full Spread
- Yogurt Parfaits: Layer Greek yogurt with granola and more fresh berries for a light, refreshing, and protein-packed option.
- Fruit Platter: A vibrant platter of seasonal fruits, especially those in pink and red hues like sliced watermelon, grapefruit, and additional berries, adds freshness and color.
- Light Green Salad: A simple salad with a light vinaigrette, perhaps garnished with candied pecans or goat cheese, can cleanse the palate.
Storing and Reheating Your Brunch Leftovers
Best Practices for Freshness
To keep your Pink and Red Galentine’s Day Brunch creation fresh, allow it to cool completely to room temperature. Once cooled, cover the baking dish tightly with plastic wrap or aluminum foil, or transfer individual slices to an airtight container. It will stay fresh at room temperature for up to 2 days, or in the refrigerator for up to 4-5 days. For longer storage, this dish freezes beautifully! Wrap individual slices tightly in plastic wrap, then aluminum foil, and place them in a freezer-safe bag or container. It can be frozen for up to 2-3 months.
Reheating Without Sacrificing Quality
From Room Temperature/Refrigerator: You can enjoy slices at room temperature, or gently warm them in the microwave for 20-30 seconds until just warm. For a crispier crust, reheat slices in a toaster oven or conventional oven at 300°F (150°C) for 10-15 minutes.
From Frozen: For best results, thaw frozen slices overnight in the refrigerator. Once thawed, reheat as you would from the refrigerator. You can also reheat directly from frozen in a preheated oven at 350°F (175°C) for 20-25 minutes, or until warmed through. Covering loosely with foil for the first part of baking can help prevent the edges from over-browning.
Galentine’s Brunch Recipe FAQ
Can I Make This Ahead of Time?
What If I Don’t Have X Ingredient?
How Do I Adjust for Dietary Restrictions?
Pink and Red Galentine’s Day Brunch Bake
- Total Time: 50 minutes
- Yield: 12 servings
Description
This delightful brunch bake features tender cake-like texture bursting with vibrant pink and red berries, perfect for celebrating friendship. It’s easy to make and guaranteed to be a crowd-pleaser.
Ingredients
- 2 cups (240g) All-Purpose Flour
- 1 cup (200g) Granulated Sugar
- 2 teaspoons Baking Powder
- 1/2 teaspoon Baking Soda
- 1/2 teaspoon Salt
- 1/2 cup (113g) Unsalted Butter, melted
- 2 large Eggs, room temperature
- 1 cup (240ml) Buttermilk, room temperature
- 1 teaspoon Pure Vanilla Extract
- 2 cups (approx. 300g) Mixed Berries (strawberries, raspberries, red currants), fresh or frozen
- 1 teaspoon Lemon Zest (optional)
Instructions
- 1. Prepare Oven and Pan: Preheat oven to 375°F (190°C). Grease and flour a 9×13 inch baking dish.
- 2. Combine Dry Ingredients: In a large bowl, whisk together flour, sugar, baking powder, baking soda, and salt.
- 3. Mix Wet Ingredients: In a separate bowl, whisk melted butter, eggs, buttermilk, and vanilla extract (and lemon zest, if using) until smooth.
- 4. Combine Wet and Dry: Pour wet ingredients into dry ingredients. Mix gently with a spatula until just combined; do not overmix. Fold in berries carefully.
- 5. Bake: Spread batter evenly in the prepared dish. Bake for 30-35 minutes, or until golden brown and a toothpick inserted into the center comes out clean.
- 6. Cool and Serve: Let cool on a wire rack for 15-20 minutes before slicing and serving.
- Prep Time: 15 mins
- Cook Time: 35 mins