
")
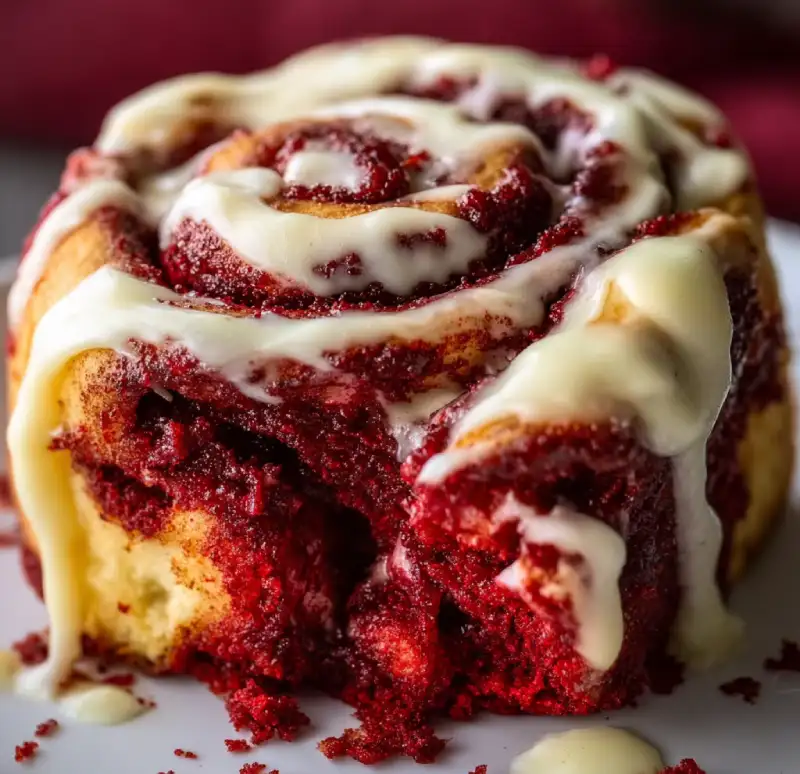
Table of Contents
- Introduction: My Love for Red Velvet Cinnamon Rolls
- How This Red Velvet Cinnamon Roll Recipe Works
- Ingredients and Smart Substitutions
- Step-by-Step Instructions: Your Visual Walkthrough
- Expert Tips for Success
- What to Serve With Your Red Velvet Cinnamon Rolls
- Storing and Reheating Your Rolls
- Frequently Asked Questions (FAQ)
Introduction: My Love for Red Velvet Cinnamon Rolls
There are some treats that just speak to your soul, and for me, it’s these incredible red velvet cinnamon rolls. Imagine biting into a swirl of tender, moist red velvet dough, perfectly spiced with cinnamon and a hint of cocoa, all smothered in a rich, tangy cream cheese frosting that literally melts in your mouth. This isn’t just a breakfast pastry; it’s an experience, a joyous explosion of flavor and texture that instantly transports you to a cozy, happy place. Every time I bake a batch, the intoxicating aroma fills my kitchen, promising something truly special. This recipe is a labor of love, perfected over countless attempts to bring you the ultimate indulgence. If you’re looking for an excuse to bring a little magic into your day, or impress your loved ones with a show-stopping treat, then you’ve found your recipe! For more delightful baking adventures, See more easy recipes and expand your culinary horizons with us. My personal journey with red velvet began years ago, a craving for something more luxurious than a classic cinnamon roll, something with that distinctive color and subtle cocoa note. After many trials and errors, I finally cracked the code to creating a red velvet dough that is not only visually stunning but also incredibly soft and flavorful. This recipe is the culmination of that quest, and I can’t wait for you to try it.
How This Red Velvet Cinnamon Roll Recipe Works
This isn’t just any cinnamon roll recipe; it’s engineered for perfection. Here’s why this recipe stands out and why you’ll absolutely adore it:
- Achieving incredibly soft, fluffy dough: We use a combination of warm milk, active dry yeast, and a specific kneading technique to develop excellent gluten structure, resulting in rolls that are unbelievably tender and airy. The milk and butter also contribute to a rich, soft crumb that stays fresh longer.
- The perfect balance of cocoa and tang: The secret to authentic red velvet lies in the subtle chocolate notes from unsweetened cocoa powder, beautifully contrasted with a touch of vinegar or buttermilk. This combination creates that signature red velvet flavor profile without being overtly chocolatey.
- Rich cream cheese frosting that melts just right: Our frosting is made with full-fat cream cheese, butter, and powdered sugar, creating a creamy, tangy topping that isn’t overly sweet. It’s designed to be easily spreadable and to subtly melt into the warm rolls, creating an irresistible glaze.
- Vibrant red color without artificial taste: We use a careful amount of red food coloring (gel for best results!) alongside the cocoa to achieve that iconic red hue, ensuring it enhances the visual appeal without imparting any artificial flavor. The cocoa powder deepens the color beautifully.
Ingredients and Smart Substitutions
Here is what you need and why:
Active Dry Yeast: This is our leavening agent! Ensure it’s fresh and active for a good rise. If using instant yeast, you can mix it directly into the flour without proofing, but proofing active dry is a good safety measure. You can find excellent quality yeast at King Arthur Baking.
Warm Milk: Crucial for activating the yeast. It needs to be between 105-115°F (40-46°C). Too hot and it kills the yeast; too cold and it won’t activate.
Granulated Sugar: Feeds the yeast and adds sweetness to the dough, contributing to its tenderness.
All-Purpose Flour: The structure of our rolls! I prefer unbleached all-purpose flour for consistency. You can substitute bread flour for a chewier roll, or a portion of cake flour for an even softer, more delicate crumb, but all-purpose works perfectly.
Unsweetened Cocoa Powder: Provides the subtle chocolate flavor and helps deepen the red color. Use good quality cocoa for the best results.
Red Food Coloring (Gel or Liquid): This is key for that vibrant red velvet color. Gel food coloring provides a much deeper color with less liquid, so I highly recommend it over liquid for a more intense hue without affecting dough consistency as much.
Unsalted Butter: Adds richness, flavor, and tenderness to both the dough and the filling. Softened butter is essential for the dough, and melted for the filling helps bind everything together warmly.
Large Egg: Provides richness, helps with structure, and contributes to the dough’s beautiful golden color.
Vanilla Extract: Enhances all the flavors in both the dough and the cream cheese frosting. Use pure vanilla extract for the best taste.
Brown Sugar (Light or Dark): The star of our filling! It provides a deep molasses flavor, moisture, and caramelization. Light brown sugar is fine, but dark brown sugar offers a richer, more pronounced flavor.
Ground Cinnamon: The classic spice for cinnamon rolls! Choose freshly ground, if possible, for the most aromatic experience. The balance with the cocoa is divine.
Full-Fat Cream Cheese: Absolutely essential for the rich, tangy cream cheese frosting. Avoid low-fat versions as they can make the frosting runny and lack flavor. Ensure it’s softened to room temperature for a smooth, lump-free frosting.
Powdered Sugar (Confectioners’ Sugar): Provides sweetness and body to the frosting. Sift it to avoid lumps and achieve a perfectly smooth texture.
Step-by-Step Instructions: Your Visual Walkthrough
Follow these step-by-step photos:
1. Activate the Yeast and Prepare the Dough Base
In a large bowl (or the bowl of a stand mixer), combine the warm milk, active dry yeast, and a tablespoon of granulated sugar. Stir gently and let it sit for 5-10 minutes until foamy. This bubbling action confirms your yeast is alive and ready to work! Once foamy, add the softened butter, remaining granulated sugar, egg, vanilla extract, red food coloring, and cocoa powder. Mix thoroughly until well combined.
2. Knead the Dough to Perfection
Gradually add the all-purpose flour to the wet ingredients, mixing until a shaggy dough forms. If using a stand mixer, attach the dough hook and knead on medium-low speed for 8-10 minutes. The dough should become smooth, elastic, and pull away from the sides of the bowl. If kneading by hand, turn the dough out onto a lightly floured surface and knead for 10-12 minutes until it’s smooth and springy. Don’t add too much extra flour, as this can make your rolls dry. The dough should be slightly tacky but not sticky.
3. First Rise: The Magic Begins
Lightly grease a large bowl with oil. Place the dough in the bowl, turning it once to coat. Cover the bowl with plastic wrap or a clean kitchen towel. Let it rise in a warm, draft-free place for 1 to 1.5 hours, or until doubled in size. A slightly warm oven (turned off, with the light on) is an excellent environment for rising. Test if it’s ready by gently poking it with two fingers; if the indent remains, it’s ready.
4. Roll, Fill, and Slice Your Rolls
Once risen, gently punch down the dough to release the air. Turn it out onto a lightly floured surface and roll it into a large rectangle, approximately 18×12 inches (45×30 cm). In a small bowl, combine the melted butter, brown sugar, and cinnamon for the filling. Spread this mixture evenly over the rolled-out dough, leaving a small border free on one long edge. Starting from the opposite long edge, carefully roll the dough tightly into a log. For clean cuts, use a piece of unflavored dental floss or a sharp, serrated knife. Slide the floss under the log, cross the ends over the top, and pull to slice. Cut into 12-15 equal rolls, about 1.5 inches thick.
5. Second Rise and Bake!
Arrange the sliced rolls in a lightly greased 9×13 inch baking dish, leaving a little space between them. Cover the dish with plastic wrap or a kitchen towel and let them rise again in a warm place for another 30-45 minutes, or until puffy and almost doubled. During the last 15 minutes of the second rise, preheat your oven to 375°F (190°C). Bake for 18-25 minutes, or until the rolls are golden brown around the edges and cooked through. If they start browning too quickly, you can lightly tent them with foil.
6. Prepare the Cream Cheese Frosting
While the rolls are baking, prepare your delicious cream cheese frosting. In a medium bowl, beat the softened full-fat cream cheese and softened butter together with an electric mixer until smooth and creamy, with no lumps. Gradually add the sifted powdered sugar and vanilla extract, beating on low speed until combined, then increase to medium-high and beat until light and fluffy. Taste and adjust sweetness if desired. Frost the warm red velvet cinnamon rolls as soon as they come out of the oven, allowing the frosting to melt slightly and seep into all the nooks and crannies. This creates an irresistible gooey texture!
Expert Tips for Success
- Don’t overmix the dough: Overmixing can lead to tough rolls. Mix just until the ingredients are combined and the dough is smooth and elastic.
- Use room temperature ingredients: Especially for the milk, butter, egg, and cream cheese. This ensures everything emulsifies correctly, leading to a smoother dough and frosting.
- Calibrate your oven: Ovens can vary widely. If your rolls are browning too fast or slow, your oven temperature might be off. An oven thermometer is a great investment.
- Achieving the perfect red color: Gel food coloring gives the best, most concentrated color. Add it gradually until you reach your desired vibrancy, remembering it will lighten slightly after baking.
- Adjusting sweetness to your preference: Feel free to adjust the amount of sugar in both the dough and the frosting. If you prefer a less sweet frosting, start with less powdered sugar and gradually add more to taste.
What to Serve With Your Red Velvet Cinnamon Rolls
These red velvet cinnamon rolls are a showstopper on their own, but they also pair wonderfully with other delights:
- Coffee and tea pairings: A strong cup of freshly brewed coffee, a creamy latte, or a robust black tea like Earl Grey would be excellent complements, cutting through the sweetness.
- Weekend brunch ideas: Serve them as the star of a decadent brunch spread alongside scrambled eggs, crispy bacon, fresh fruit salad, and mimosas for an unforgettable meal.
- Dessert companions: While typically a breakfast item, they make an incredible dessert! Pair them with a scoop of vanilla bean ice cream or a side of fresh berries for a truly indulgent finish to any meal.
Storing and Reheating Your Rolls
To enjoy your delicious red velvet cinnamon rolls for days, here’s how to store them:
- At room temperature vs. refrigeration: If frosted, these rolls are best stored in an airtight container at room temperature for up to 2 days. The frosting can make them slightly sticky when cold. If you need to keep them longer, store them in the refrigerator for up to 5 days. Ensure they are in an airtight container to prevent drying out.
- Freezing baked and unbaked rolls: You can freeze fully baked and frosted rolls by wrapping individual rolls tightly in plastic wrap, then aluminum foil, for up to 1 month. To freeze unbaked rolls, arrange them in your baking dish, cover tightly with plastic wrap and foil, and freeze for up to 3 weeks. Thaw overnight in the refrigerator, then let rise at room temperature for 1-2 hours before baking as directed.
- Best way to reheat for fresh-baked taste: To reheat, microwave individual rolls for 15-30 seconds until warm and soft. For multiple rolls, cover them loosely with foil and warm in a preheated oven at 300°F (150°C) for 10-15 minutes, or until heated through.
Frequently Asked Questions (FAQ)
Can I make these dairy-free?
What if my dough isn’t rising?
Can I use natural food coloring?
Why are my rolls dry?
Red Velvet Cinnamon Rolls
- Total Time: 50 minutes
- Yield: 12-15 rolls
Description
These glorious red velvet cinnamon rolls are incredibly soft, moist, and bursting with that signature cocoa tang, all smothered in rich cream cheese frosting. This recipe guides you to perfect, pillowy rolls every time.
Ingredients
- 1 cup warm milk (105-115°F)
- 2 ¼ teaspoons active dry yeast (1 standard packet)
- ½ cup granulated sugar, divided
- ½ cup (1 stick) unsalted butter, softened, plus 2 tbsp melted for filling
- 1 large egg
- 1 teaspoon vanilla extract
- 1–2 tablespoons red gel food coloring (or more, to preference)
- 2 tablespoons unsweetened cocoa powder
- 4–4 ½ cups all-purpose flour
- ½ teaspoon salt
- For the Filling:
- ½ cup (1 stick) unsalted butter, melted
- ¾ cup packed light brown sugar
- 2 tablespoons ground cinnamon
- For the Cream Cheese Frosting:
- 8 ounces full-fat cream cheese, softened
- ¼ cup (½ stick) unsalted butter, softened
- 3–4 cups powdered sugar, sifted
- 1 teaspoon vanilla extract
Instructions
- 1. Activate Yeast & Create Dough Base: In a large bowl, combine warm milk, yeast, and 1 tbsp granulated sugar. Let foam (5-10 mins). Stir in softened butter, remaining granulated sugar, egg, vanilla, red food coloring, and cocoa powder until combined.
- 2. Form & Knead Dough: Gradually add flour and salt. Mix until shaggy. Knead for 8-12 minutes (stand mixer or by hand) until smooth and elastic, slightly tacky.
- 3. First Rise: Place dough in a lightly oiled bowl, turn to coat, cover, and let rise in a warm place for 1-1.5 hours until doubled.
- 4. Roll, Fill & Slice: Punch down dough. Roll into an 18×12 inch rectangle. Mix melted butter, brown sugar, and cinnamon for filling; spread evenly. Tightly roll into a log. Slice into 12-15 rolls with dental floss or a knife.
- 5. Second Rise & Bake: Place rolls in a greased 9×13 inch baking dish. Cover and let rise for 30-45 minutes until puffy. Preheat oven to 375°F (190°C). Bake for 18-25 minutes until golden brown.
- 6. Make & Frost: While rolls bake, beat softened cream cheese and butter until smooth. Gradually add sifted powdered sugar and vanilla; beat until fluffy. Frost warm rolls immediately for a melty glaze.
- Prep Time: 30 mins
- Cook Time: 20 mins