


Table of Contents
- Why This Homemade Blackberry Butter Recipe is a Must-Try
- How This Recipe Works: Velvety, Fruity Perfection
- Essential Ingredients & Smart Substitutions for the Best Blackberry Butter
- Step-by-Step: Crafting Your Homemade Blackberry Butter
- Expert Tips for Perfect Homemade Blackberry Butter
- What to Serve With Your Homemade Blackberry Butter
- Storing and Reheating Homemade Blackberry Butter
- Homemade Blackberry Butter FAQs
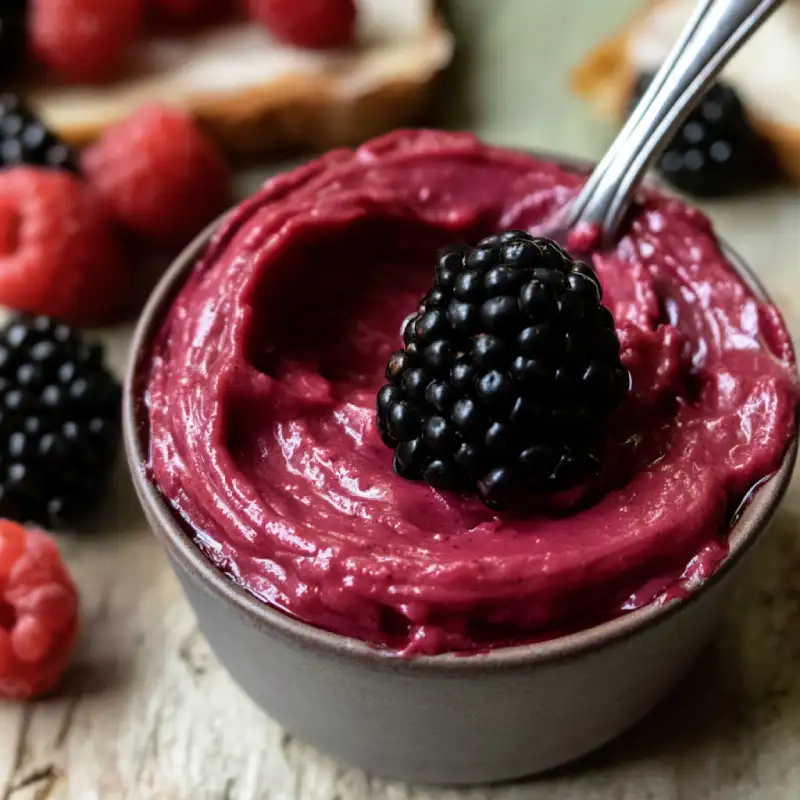
Imagine a spread so rich, so vibrant, and so utterly delicious that it transforms a simple piece of toast into a gourmet experience. That’s exactly what you get with this homemade blackberry butter recipe! It’s a velvety, fruit-infused spread that bursts with the sweet-tart goodness of fresh blackberries, whipped into a smooth, luxurious butter. This isn’t just jam; it’s a buttery dream. Whether slathered on warm scones or swirled into yogurt, its intense fruit flavor and silky texture are simply unparalleled. Looking for more easy recipes to elevate your kitchen game? You can see more easy recipes here!
Why This Homemade Blackberry Butter Recipe is a Must-Try
Forget store-bought spreads; making homemade blackberry butter is an experience in itself, yielding results that are infinitely more flavorful and satisfying. There’s a certain magic that happens when fresh, ripe blackberries transform into this rich, spreadable delight.
- Fresh Flavor, Simple Process: This recipe captures the peak flavor of blackberries with surprising ease. You’ll be amazed at how such a simple process can unlock such intense, natural sweetness and tang.
- A Taste of Summer, Anytime: Blackberries shine in this butter, allowing you to bottle up that glorious taste of sunny summer days and enjoy it year-round, even if you’re using frozen berries.
- Unbeatable Texture: Unlike many fruit spreads, the addition of real butter creates an incredibly smooth, almost custard-like texture that melts beautifully on anything it touches.
- Truly Customizable: From adjusting sweetness to adding subtle spice notes, this recipe is incredibly forgiving and adaptable to your personal preferences.
How This Recipe Works: Velvety, Fruity Perfection
The beauty of this homemade blackberry butter lies in its straightforward yet effective technique, which systematically builds layers of flavor and achieves that irresistible texture.
- Intense Blackberry Flavor Infusion: We start by cooking down the blackberries with a touch of sugar and lemon. This process concentrates their natural flavors, creating a deep, rich fruit base that is the heart of our butter.
- Smooth, Spreadable Texture: The key to its velvety consistency comes from two crucial steps: first, straining the cooked blackberries to remove any seeds or fibrous bits, and second, incorporating softened unsalted butter into the smooth fruit purée. This emulsion gives it that luxurious spreadability.
- Versatile Sweet and Tart Balance: Lemon juice isn’t just for brightness; it balances the sweetness of the blackberries and sugar, preventing the butter from being cloyingly sweet and enhancing its fresh, fruity notes.
Essential Ingredients & Smart Substitutions for the Best Blackberry Butter
Every great recipe starts with quality ingredients. Here’s what you’ll need, along with some helpful tips for substitutions.
Blackberries: The star of our show! You can use either fresh or frozen blackberries with equally delicious results. If using frozen, there’s no need to thaw them beforehand; just add them directly to the pot. Fresh berries should be ripe and plump for the best flavor.
Sweeteners: We use granulated sugar to sweeten and help preserve the butter. For a different flavor profile, you can experiment with a portion of honey or maple syrup, but be aware that they can alter the consistency slightly. Adjust to your taste preferences!
Acid: A squeeze of lemon juice is non-negotiable. It brightens the blackberry flavor, cuts through the sweetness, and helps with the overall balance of the butter. Don’t skip it – it makes a huge difference!
Fats: Unsalted butter is crucial for achieving that smooth, rich, and spreadable texture. Make sure it’s softened to room temperature for easier incorporation. Using unsalted allows you to control the overall saltiness.
Seasoning: A small pinch of salt (like fine sea salt) might seem odd in a sweet spread, but it actually enhances all the other flavors. It’s a secret ingredient that elevates the taste profile.
Step-by-Step: Crafting Your Homemade Blackberry Butter
Follow these simple steps to create your own luscious homemade blackberry butter.
1. Prepare the Blackberries
Wash your fresh blackberries gently. If using frozen, simply get them ready. Combine the blackberries, granulated sugar, and lemon juice in a medium saucepan. Stir lightly to coat the berries. This initial step sets the stage for flavor extraction.
2. Cook Down the Fruit Mixture
Place the saucepan over medium heat. Bring the mixture to a gentle boil, then reduce the heat to a simmer. Cook for about 10-15 minutes, stirring occasionally, until the blackberries have softened considerably and burst, and the mixture has thickened slightly. It should resemble a loose jam.
3. Strain for Silkiness
This is where the magic happens for that ultra-smooth texture! Pour the cooked blackberry mixture through a fine-mesh sieve set over a bowl. Use the back of a spoon or a rubber spatula to press firmly on the solids, extracting as much liquid and pulp as possible. Discard the seeds and any remaining fibrous material. You should be left with a beautiful, smooth blackberry purée.
4. Incorporate the Butter
While the blackberry purée is still warm (but not boiling hot), add the softened unsalted butter and the pinch of salt. Whisk vigorously or use an immersion blender until the butter is fully melted and completely emulsified into the blackberry purée. It should look smooth and slightly glossy. This creates the butter’s signature texture and richness.
5. Cool and Thicken
Pour the blackberry butter into clean jars or an airtight container. Allow it to cool completely to room temperature before transferring it to the refrigerator. As it chills, the butter will continue to thicken to a perfectly spreadable consistency. Give it a few hours in the fridge to fully set.
Expert Tips for Perfect Homemade Blackberry Butter
- Don’t Skip the Straining: I say it again because it’s that important! For the silkiest, most luxurious texture, straining is non-negotiable. It removes all seeds and tough bits, ensuring a perfectly smooth spread.
- Adjust Sweetness to Taste: Taste your blackberry purée before adding the butter. Blackberries vary in sweetness, so feel free to add a little more sugar if you prefer a sweeter butter, or a touch more lemon for extra tang.
- Achieve the Right Consistency: The butter will thicken considerably as it cools in the refrigerator. Don’t be alarmed if it seems a little thin when warm. Trust the process!
- Flavor Boosters: Vanilla or Spices: For an extra layer of flavor, consider adding a teaspoon of pure vanilla extract or a pinch of cinnamon or nutmeg at the same time you add the butter.
- Use Quality Butter: Since butter is a primary ingredient, opt for a good quality unsalted butter for the best flavor and texture.
What to Serve With Your Homemade Blackberry Butter
This homemade blackberry butter is incredibly versatile and shines in a multitude of culinary applications. Here are some of our favorite ways to enjoy it:
- Breakfast Favorites: Slather it generously on warm toast, fluffy pancakes, crispy waffles, or fresh-baked scones. It’s also divine stirred into hot oatmeal or yogurt.
- Dessert Pairings: Use it as a filling for layer cakes or cupcakes, dollop it onto vanilla ice cream, or spread it inside crêpes for an elegant dessert. It can also be brushed onto fruit tarts for a glossy finish.
- Savory Applications: Don’t limit yourself to sweet! Blackberry butter pairs surprisingly well with savory dishes. Try melting a spoonful over roasted pork loin or chicken, or add it to a cheese board alongside sharp cheddar or creamy brie.
- Baking Adventures: Swirl it into muffin batter, incorporate it into pie fillings, or even use it as a base for a unique glaze.
Storing and Reheating Homemade Blackberry Butter
Proper storage ensures your delicious blackberry butter stays fresh and enjoyable for as long as possible.
Refrigeration Guidelines
Once made and cooled, homemade blackberry butter should be stored in an airtight container or sealed jars in the refrigerator. It will keep well for up to 2-3 weeks. Always use a clean spoon each time you dip into the butter to prevent contamination.
Freezing for Longer Storage
For longer storage, blackberry butter freezes beautifully. Transfer it to freezer-safe containers or heavy-duty freezer bags, leaving a little headspace. It can be frozen for up to 3-4 months. Label with the date for easy tracking.
Reheating Instructions
If frozen, thaw the blackberry butter overnight in the refrigerator. To soften chilled butter for spreading, leave it at room temperature for about 30 minutes, or gently warm a small amount in a microwave in 10-second intervals until it reaches your desired consistency. Be careful not to overheat, as it can separate.
Homemade Blackberry Butter FAQs
Can I use other berries?
How long does homemade blackberry butter last?
Why is my blackberry butter too thin/thick?
Do I have to add butter?
Delicious Homemade Blackberry Butter Recipe
- Total Time: 35 minutes
- Yield: 1.5 cups (approx.)
Description
Discover how to make a luscious homemade blackberry butter with this easy, step-by-step recipe. It’s perfect for adding a burst of sweet-tart flavor to toast, pastries, and more.
Ingredients
- 4 cups fresh or frozen blackberries
- 1/2 cup granulated sugar (adjust to taste)
- 2 tbsp fresh lemon juice
- 1/2 cup (1 stick) unsalted butter, softened
- Pinch of salt
Instructions
- Step 1: Prepare the Blackberries: In a medium saucepan, combine blackberries, granulated sugar, and lemon juice. Stir gently.
- Step 2: Cook Down the Fruit: Bring mixture to a gentle boil over medium heat, then reduce to a simmer. Cook for 10-15 minutes, stirring, until berries are soft and burst.
- Step 3: Strain for Silkiness: Pour mixture through a fine-mesh sieve into a bowl, pressing solids to extract all liquid and pulp. Discard seeds.
- Step 4: Incorporate the Butter: While purée is still warm, add softened unsalted butter and salt. Whisk or blend with an immersion blender until smooth and emulsified.
- Step 5: Cool and Thicken: Transfer to clean jars. Cool completely to room temperature, then refrigerate for at least 2-3 hours to thicken to a spreadable consistency.
- Prep Time: 15 mins
- Cook Time: 20 mins