


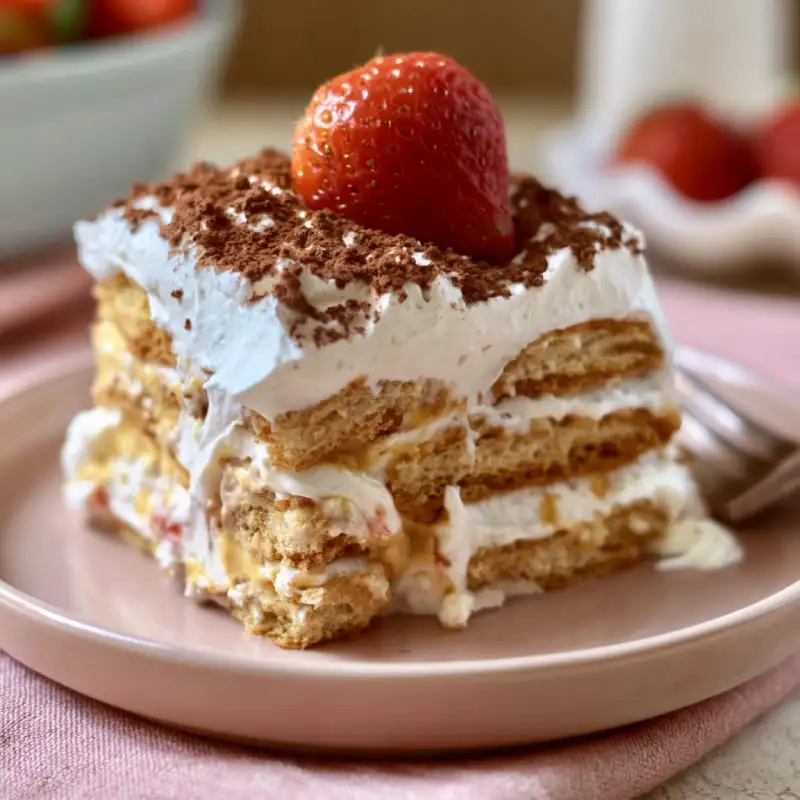
Your Go-To No-Bake Dessert: The Simple Icebox Cake
Table of Contents
Imagine a dessert that’s effortlessly elegant, divinely creamy, and ridiculously easy to make. No oven required, no complicated techniques, just pure, unadulterated bliss in every bite. That, my friends, is the magic of the Simple Icebox Cake. This humble yet magnificent dessert is composed of layers of rich, velvety whipped cream and crisp chocolate wafers that magically soften into a cake-like texture as they chill. The result? A dreamy, melt-in-your-mouth experience that feels far more decadent than its simple preparation implies. It’s light, airy, yet incredibly satisfying, with just the right balance of sweetness and a hint of deep cocoa. This is the perfect treat for hot summer days, busy weeknights, or whenever you crave something truly special without the fuss. For more delightful and easy-to-create recipes that will impress, be sure to See more easy recipes on my blog!
Why This Simple Icebox Cake Recipe Works
- Effortless Elegance: This recipe delivers a show-stopping dessert with minimal effort – perfect for impressing guests without breaking a sweat.
- No-Bake Brilliance: Forget turning on the oven! This recipe is ideal for warm weather or when you just don’t feel like baking.
- Simple Ingredient List: You only need a handful of readily available ingredients to create something truly delicious.
- Texture Transformation: The magic happens in the fridge as crisp wafers soften into a moist, cake-like consistency, creating an irresistible layered texture.
Ingredients for Your Icebox Cake (and Smart Swaps)
Here is what you need and why:
Heavy Cream: The Foundation of Fluffy: This is the star of our show! You’ll need a good quality heavy cream (also known as heavy whipping cream) with at least 36% milk fat. This high-fat content ensures it whips up beautifully into stable, fluffy peaks. For best results, make sure your cream is super cold before whipping.
Sweetener: Balancing the Richness: Powdered sugar (confectioners’ sugar) is my go-to for icebox cake filling. It dissolves instantly, ensuring a smooth, non-gritty cream. You can adjust the amount to your preference. If you’re watching sugar intake, a sugar-free powdered sweetener can be used, though note it might affect the texture slightly.
Vanilla Extract: A Touch of Warmth: A good quality pure vanilla extract adds a lovely aromatic depth that complements the chocolate perfectly. Don’t skimp here; it makes a difference! Vanilla bean paste is an excellent, more intense alternative if you have it.
Chocolate Wafers: The Key Layer: Classic chocolate wafer cookies are essential for their crisp texture and ability to soften perfectly into a cake-like consistency. Nabisco Famous Chocolate Wafers are the gold standard, but any thin, crisp chocolate cookie will work. King Arthur Baking has a fantastic recipe if you’re feeling ambitious and want to make your own!
Optional Add-ins: Elevate Your Cake: This is where you can get creative! A pinch of espresso powder can intensify the chocolate flavor. A tablespoon of cocoa powder can make the cream more chocolatey. Liqueurs like Kahlúa, crème de cacao, or a touch of rum can add sophisticated twists. Fresh berries, chocolate shavings, or a sprinkle of flaky sea salt are wonderful garnishes.
How to Assemble Your Easy Icebox Cake: Step-by-Step
Follow these step-by-step photos:
1. Whipping the Cream Base
In a large mixing bowl, combine the very cold heavy cream, powdered sugar, and vanilla extract. Using an electric mixer (handheld or stand mixer with a whisk attachment) on medium-high speed, whip the mixture until stiff peaks form. This means when you lift the beaters, the cream holds its shape firmly. Be careful not to over-whip, as it can turn granular.
2. Layering the Classic Icebox Cake
Spread a thin layer of whipped cream on the bottom of your serving dish (a 9×5 inch loaf pan or an 8×8 inch square dish works well). This acts as an anchor. Arrange a single layer of chocolate wafers over the cream, breaking them as needed to fit. Top the wafers with another generous layer of whipped cream, ensuring they are fully covered. Repeat this layering process with wafers and cream until you run out of ingredients, ending with a final layer of whipped cream on top. Aim for about 4-5 layers of wafers.
3. Chilling for Perfection
Once assembled, cover the icebox cake tightly with plastic wrap. This is the crucial step where the magic happens! Refrigerate for at least 6-8 hours, or ideally overnight. During this time, the moisture from the whipped cream will soften the chocolate wafers, transforming them into a tender, cake-like consistency. Patience is key for the best texture!
4. Garnishing and Serving
Before serving, remove the cake from the refrigerator and let it sit at room temperature for about 10-15 minutes to allow the cream to soften slightly. Garnish as desired – fresh berries, chocolate shavings, a dusting of cocoa powder, or a drizzle of chocolate sauce all make beautiful additions. Use a sharp knife to slice through the soft layers for clean pieces.
Expert Tips for Icebox Cake Success
- Don’t Overwhip the Cream: Watch the cream carefully. Once stiff peaks form, stop. Over-whipped cream can become grainy or even turn into butter, which won’t give you that silky smooth texture.
- Allow Adequate Chill Time: This isn’t just a suggestion, it’s a requirement! The extended chill time is what transforms the crisp wafers into a tender cake. Resist the urge to cut into it early.
- Experiment with Flavors: Don’t be afraid to innovate! Try adding a little almond extract, mint extract, or even a swirl of melted peanut butter to your whipped cream, or layer in different types of cookies like graham crackers or shortbread.
- Pre-Softening Wafers (Optional): If you’re short on chill time (though still aim for at least 4 hours), you can briefly dip each wafer in a little milk or coffee before layering to help them soften faster, but be quick – they get soggy quickly!
What to Serve With Your Simple Icebox Cake
This dessert is fantastic on its own, but a few accompaniments can make it even more special:
Fresh Berries: The tartness of fresh raspberries, strawberries, or blueberries provides a beautiful contrast to the rich sweetness of the cake. They also add a lovely pop of color.
A Mug of Coffee or Tea: A warm beverage, whether a robust coffee or a delicate tea, can perfectly complement the dessert, offering a comforting end to any meal.
Storing and Reheating Your Icebox Cake
Refrigeration Guidelines
Your Simple Icebox Cake is best enjoyed within 2-3 days when stored properly. Keep it tightly covered with plastic wrap or in an airtight container in the refrigerator to prevent it from drying out or absorbing other food odors. The wafers will continue to soften over time, making it even more cake-like.
Freezing for Longer Storage (Not Recommended)
While you theoretically *could* freeze an icebox cake, it’s generally not recommended for optimal texture. The whipped cream can become icy and separate upon thawing, and the wafers might turn mushy rather than soft and cake-like. This dessert truly shines when made fresh and consumed within a few days of refrigeration.
Simple Icebox Cake FAQs
Can I use other cookies?
How long does icebox cake last?
Can I make it ahead?
Why is my cream not whipping?
Simple Icebox Cake: No-Bake Dessert Perfection
- Total Time: 15 minutes
- Yield: 8 servings
Description
Unlock creamy, chocolatey bliss with this unbelievably easy no-bake icebox cake. Layers of sweetened whipped cream and chocolate wafers magically transform into a tender, cake-like dessert in your refrigerator.
Ingredients
- 2 cups (480ml) very cold heavy cream (or heavy whipping cream)
- 1/2 cup (60g) powdered sugar (confectioners’ sugar)
- 1 teaspoon pure vanilla extract
- 1 (9 oz) package chocolate wafer cookies (such as Nabisco Famous Wafers)
- Optional: Fresh berries or chocolate shavings for garnish
Instructions
- In a large, chilled bowl, combine the heavy cream, powdered sugar, and vanilla extract.
- Using an electric mixer, whip on medium-high speed until stiff peaks form. Be careful not to over-whip.
- Spread a thin layer of whipped cream on the bottom of a 9×5 inch loaf pan or 8×8 inch square dish.
- Arrange a single layer of chocolate wafers over the cream, breaking them to fit if necessary.
- Top with a generous layer of whipped cream, spreading evenly to cover the wafers.
- Repeat the layering process with wafers and cream, ending with a final layer of whipped cream.
- Cover the cake tightly with plastic wrap and refrigerate for at least 6-8 hours, or preferably overnight.
- Before serving, garnish with fresh berries or chocolate shavings, if desired. Slice with a sharp knife and serve chilled.
- Prep Time: 15 mins
- Cook Time: 0 mins