

Table of Contents
- Introduction: Your Go-To Homemade Pancake Recipe
- How This Recipe Works: The Science of Fluffy Pancakes
- Ingredients and Smart Substitutions
- Step-by-Step Instructions: Your Visual Guide to Homemade Pancakes
- Expert Tips for Pancake Success
- What to Serve With Your Homemade Pancakes
- Storing and Reheating Homemade Pancakes
- Frequently Asked Questions About Homemade Pancakes
Introduction: Your Go-To Homemade Pancake Recipe
Imagine waking up to the aroma of warm, golden-brown pancakes, light as clouds, with perfectly crisp edges and a tender, moist interior. That’s the dream, right? And today, we’re not just dreaming; we’re making it a delicious reality! As an expert food blogger with a serious passion for baking, I’ve spent countless mornings perfecting the art of the Homemade Pancake. This isn’t just any recipe; it’s the culmination of years of trial, error, and an unwavering commitment to achieving pancake perfection. Trust me, once you master these, your breakfast game will be forever changed. If you love discovering simple yet impactful recipes that elevate your culinary skills, you need to See more easy recipes and become a kitchen wizard!
Why This Recipe Delivers Perfect Pancakes Every Time
This recipe is engineered for excellence. We focus on specific techniques and ingredient ratios that guarantee consistent results, producing pancakes that are not only irresistibly fluffy but also burst with incredibly rich flavor. Prepare for rave reviews!
My Journey to the Best Fluffy Pancakes
From dense hockey pucks to overly thin crêpes, my early pancake attempts were, shall we say, character-building. But through persistence, research, and a lot of taste-testing (the best part!), I’ve unlocked the secrets to perfectly fluffy, consistently delicious homemade pancakes. And now, I’m sharing every bit of that knowledge with you.
How This Recipe Works: The Science of Fluffy Pancakes
Understanding the ‘why’ behind the ‘how’ is what truly empowers you in the kitchen. Let’s delve into the science that makes these Homemade Pancakes incredibly light and delicious.
Achieving Ultimate Lightness and Airiness
The magic for ultimate lightness comes from the interplay of fresh leavening agents and gentle mixing. When the wet and dry ingredients meet, a chemical reaction occurs, creating gas bubbles. Our goal is to develop and trap these bubbles, ensuring a delicate, airy crumb throughout the pancake.
Balancing Sweetness and Rich Flavor
It’s not just about adding sugar for sweetness. We use just enough to complement the natural flavors of the flour and dairy, creating a well-rounded and comforting taste experience without being cloying. The hint of salt is crucial for enhancing all other flavors.
The Role of Active Leavening
- Combination Leavening: We utilize both baking powder and baking soda. Baking powder provides the initial lift, while baking soda reacts with the acidic component (buttermilk or sour milk) for an extra boost of airy bubbles.
- Freshness is Key: Ensure your leavening agents aren’t expired! Old baking powder or soda will result in flat, heavy pancakes.
- Gentle Mixing: Overmixing develops gluten, leading to tough pancakes. A slightly lumpy batter is actually ideal because it preserves those precious gas bubbles.
Ingredients and Smart Substitutions
Here is what you need and why:
Flour: All-Purpose vs. Alternatives: I typically use unbleached all-purpose flour for a reliable, tender crumb. Its protein content hits the sweet spot for texture. For a slightly lighter pancake, you could try a cake flour blend, reducing the amount by about 2 tablespoons per cup. You could also experiment with a 50/50 blend of all-purpose and whole wheat flour for a nuttier flavor, though the texture will be slightly denser. For gluten-free, a good quality gluten-free all-purpose blend (with xanthan gum) can work, but you might need to adjust liquid slightly.
Leavening Agents: Baking Powder & Baking Soda Explained: These are the secret to fluffy pancakes! Baking powder (double-acting) reacts when mixed with liquid and again with heat, providing consistent lift. Baking soda needs an acid to react – in this recipe, that’s the buttermilk (or sour milk). Together, they create abundant carbon dioxide bubbles, making your pancakes rise beautifully. Always check their expiration dates!
Dairy: Milk, Buttermilk, and Non-Dairy Options: Buttermilk is my absolute favorite here. Its acidity reacts perfectly with baking soda, and it adds an incredible tang and tenderness. If you don’t have buttermilk, you can make a substitute: add 1 tablespoon of white vinegar or lemon juice to a measuring cup, then fill to 1 cup with regular milk. Let it sit for 5-10 minutes until it curdles. For non-dairy, unsweetened almond or soy milk can work, but consider adding 1 teaspoon of apple cider vinegar to it for that essential acidity.
Fat: Butter for Flavor and Texture: Melted butter is essential. It provides a richness that oil simply can’t match, and contributes to those lovely crisp edges. Make sure it’s cooled slightly before adding to the wet ingredients to avoid scrambling the eggs.
Sweeteners: Sugar’s Role Beyond Sweetness: Granulated sugar adds a touch of sweetness but also aids in browning, giving your pancakes that desirable golden hue. It also helps to keep the pancakes moist.
Eggs: Binding and Structure: Eggs act as a binder, holding everything together, and contribute to the structure and richness of the pancakes. They also add a bit of yolky color. Ensure they are at room temperature for better emulsification with the other wet ingredients.
Step-by-Step Instructions: Your Visual Guide to Homemade Pancakes
Follow these step-by-step photos (virtually!) to achieve pancake perfection:
1. Prepare Your Dry Ingredients
In a large mixing bowl, whisk together the all-purpose flour, granulated sugar, baking powder, baking soda, and salt. Whisking ensures all the leavening agents are evenly distributed, which is crucial for uniform fluffiness. Make sure there are no lumps of flour.
2. Mix Wet Ingredients Separately
In a separate medium bowl, whisk together the room-temperature buttermilk, melted and slightly cooled unsalted butter, and large eggs. Whisk until the mixture is smooth and thoroughly combined. Room temperature ingredients emulsify better, leading to a smoother batter.
3. The Gentle Fold: Combining Wet and Dry
Pour the wet ingredients into the dry ingredients. Using a spatula or wooden spoon, fold gently until just combined. Crucially: do not overmix! A few lumps are perfectly fine and even desired; overmixing develops gluten and will lead to tough, chewy pancakes. Stop mixing as soon as no pockets of dry flour remain.
4. Preheating Your Griddle or Frying Pan
Heat a lightly oiled (or buttered) non-stick griddle or large frying pan over medium heat. Test the temperature by flicking a few drops of water onto the surface; they should sizzle and evaporate immediately. If they instantly disappear without sizzling, it’s too hot. If they just sit there, it’s not hot enough. A consistent medium heat is essential for even cooking and golden-brown results.
5. Portioning and Cooking Your Pancakes
Using a 1/4 cup measure (for medium-sized pancakes), pour batter onto the hot griddle, leaving some space between each pancake. Cook for 2-3 minutes per side. Food Network offers great tips on pancake cooking.
6. Knowing When to Flip
Wait for the surface of the pancake to show bubbles breaking and the edges to look set and slightly dry. This indicates that enough heat has penetrated the pancake for it to hold its shape. A gentle peek underneath with a spatula should reveal a beautiful golden-brown color. Flip only once!
Expert Tips for Pancake Success
- Do Not Overmix the Batter: I can’t stress this enough! Lumps in your batter are a sign of a perfectly mixed, tender pancake. Overmixing activates gluten, making your pancakes dense and chewy.
- Resting the Batter: Why It Matters: Let the batter rest for 5-10 minutes after mixing. This allows the flour to fully hydrate and the leavening agents to begin working their magic, resulting in an even fluffier pancake.
- Temperature Control: Avoiding Burnt or Undercooked Pancakes: Maintain a consistent medium heat. Too high a heat will burn the outside before the inside cooks, too low will result in dry, flat pancakes. Adjust as needed throughout cooking.
- Adding Flavor Boosters (Vanilla, Zest, etc.): A teaspoon of vanilla extract in the wet ingredients elevates the flavor remarkably. For a bright, citrusy note, add a teaspoon of lemon or orange zest to the dry ingredients. Spices like cinnamon or a pinch of nutmeg also work wonders.
- Keeping Pancakes Warm: To keep pancakes warm while you cook the rest, place them in a single layer on a baking sheet in an oven preheated to its lowest setting (around 200°F / 90°C).
What to Serve With Your Homemade Pancakes
Now that you’ve mastered the art of the perfect Homemade Pancake, let’s talk about the delightful additions that elevate your breakfast experience!
Classic Toppings: Syrup and Butter
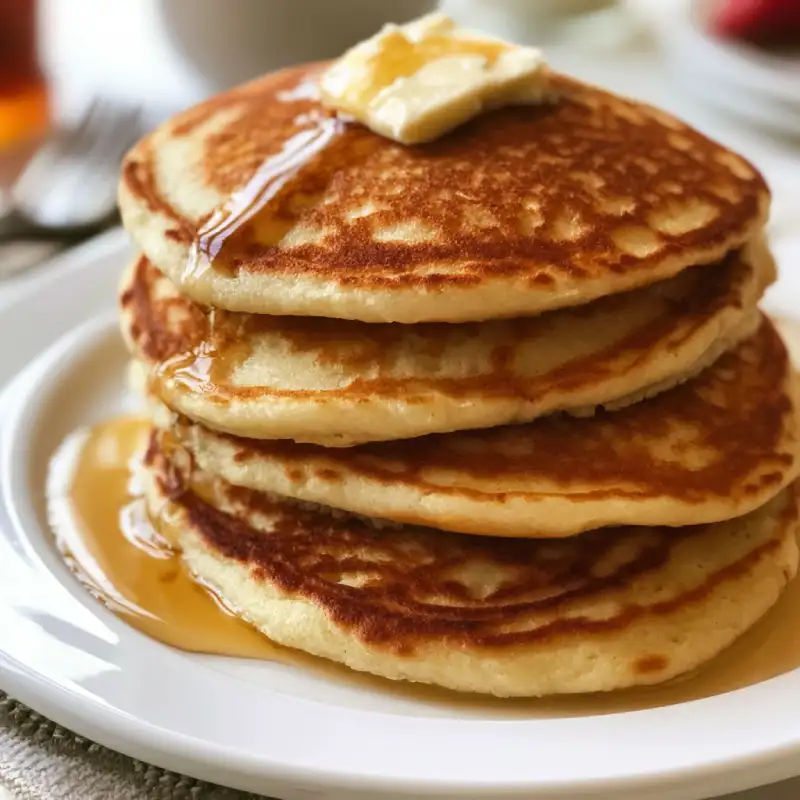
There’s a reason these are classics! A generous pat of good quality butter (salted or unsalted, your preference) slowly melting into a stack of warm pancakes, followed by a drizzle of pure maple syrup, is simply heaven. Don’t skimp on the real maple syrup – the flavor difference is immense.
Fresh Fruit Additions
Brighten up your stack with fresh berries (strawberries, blueberries, raspberries), sliced bananas, or even grilled peaches in the summer. A fruit compote made with seasonal fruits adds a lovely tartness and natural sweetness.
Savory Pairings and Sides
Don’t be afraid to go savory! Crispy bacon, savory sausage links, or a perfectly fried egg are fantastic alongside sweet pancakes, creating a well-balanced meal. A sprinkle of fresh chives can also add an unexpected pop.
Creative Syrup Alternatives
Beyond maple, consider other delightful drizzles: warm honey, chocolate sauce, caramel sauce, a berry coulis, or even a citrus glaze. For something unique, try a coconut milk caramel or a spiced pear syrup.
Storing and Reheating Homemade Pancakes
Having a batch of these glorious Homemade Pancakes ready to go means instant deliciousness any day of the week. Here’s how to ensure they stay fresh and fabulous.
Cooling Pancakes Properly
After cooking, transfer pancakes to a wire rack in a single layer to cool completely. Stacking them while warm will trap steam, making them soggy. Ensure they are fully cooled before storing to prevent condensation and spoilage.
Freezing for Future Enjoyment
Once completely cooled, stack the pancakes with parchment paper between each one. Place the stack in a freezer-safe zip-top bag or an airtight container. They will keep beautifully in the freezer for up to 2-3 months. This is a game-changer for quick breakfasts!
Best Reheating Methods (Oven, Microwave, Toaster)
- Oven (Best for multiple pancakes): Preheat oven to 350°F (175°C). Spread frozen pancakes in a single layer on a baking sheet and heat for about 8-10 minutes, or until warmed through and slightly crispy at the edges.
- Microwave (Quickest for one or two): Place 1-2 pancakes on a microwave-safe plate. Heat on high for 30-60 seconds, or until warm. Be careful not to overheat, as they can become rubbery.
- Toaster/Toaster Oven (Great for crispy edges): Pop a frozen pancake directly into a toaster or toaster oven on a medium setting until warm and lightly golden. This method yields wonderfully crispy edges!
Frequently Asked Questions About Homemade Pancakes
How do I make my pancakes fluffier?
Can I make pancake batter ahead of time?
What’s the difference between baking powder and baking soda in pancakes?
Why are my pancakes flat?
Can I use whole wheat flour for pancakes?
Perfectly Fluffy Homemade Pancakes
- Total Time: 35 minutes
- Yield: 12 servings
Description
Unlock the secret to the best homemade pancakes with this expert-approved recipe. Achieve ultimate fluffiness and rich flavor easily.
Ingredients
- 1 1/2 cups all-purpose flour
- 2 tbsp granulated sugar
- 1 tsp baking powder
- 1 tsp baking soda
- 1/2 tsp salt
- 1 1/4 cups buttermilk (or milk + 1 tbsp vinegar)
- 1/4 cup unsalted butter, melted and cooled
- 1 large egg, room temperature
- 1 tsp vanilla extract (optional)
- Oil or butter for greasing the griddle
Instructions
- In a large bowl, whisk together flour, sugar, baking powder, baking soda, and salt.
- In a separate medium bowl, whisk buttermilk, melted butter, egg, and vanilla (if using).
- Pour the wet ingredients into the dry. Mix gently with a spatula until just combined. Do not overmix; lumps are fine.
- Let the batter rest for 5-10 minutes.
- Heat a lightly oiled griddle or frying pan over medium heat until a drop of water sizzles.
- Pour 1/4 cup of batter per pancake onto the griddle.
- Cook for 2-3 minutes per side, until bubbles appear on the surface and edges are set. Flip once golden brown.
- Serve immediately with your favorite toppings.
- Prep Time: 15 mins
- Cook Time: 20 mins