
")
Delicious Maple Chicken and Bacon Sliders Recipe
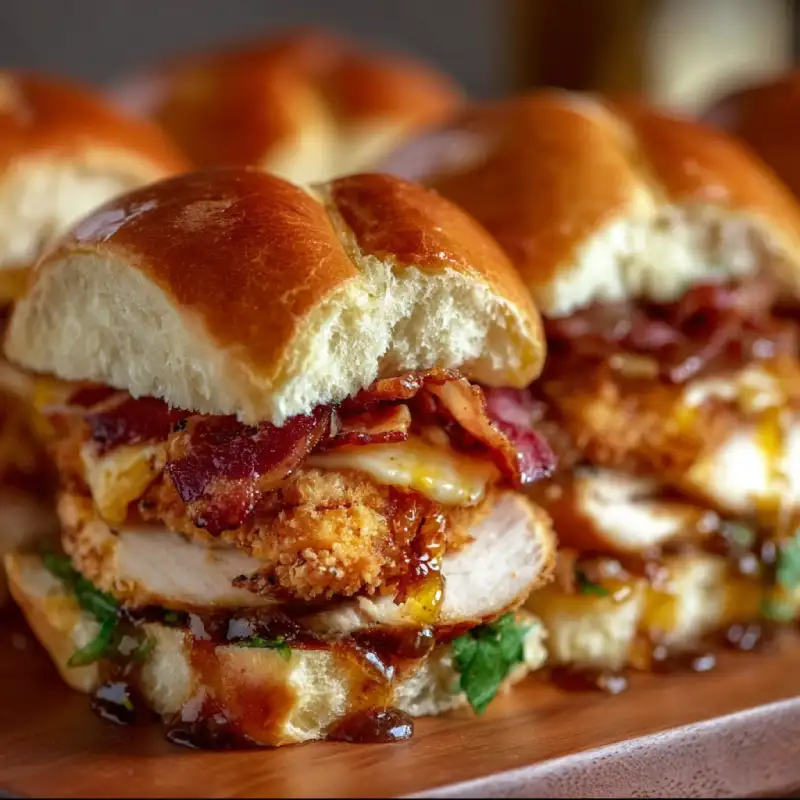
Get ready to tantalize your taste buds with these incredible Maple Chicken and Bacon Sliders! Imagine perfectly shredded, tender chicken, mingling with crispy, smoky bacon, all encased in a sweet and savory maple glaze, nestled in soft, pillowy Hawaiian rolls. Every bite offers a symphony of textures – from the juicy filling to the slightly crisp edges of the bun, culminating in an explosion of flavor that balances sweet, salty, and savory notes. These sliders aren’t just a meal; they’re an experience, and trust me, they’re about to become your new obsession! If you love easy, flavorful recipes like this, be sure to see more good recipes here.
Table of Contents
- Introduction: Why These Maple Chicken and Bacon Sliders Will Be Your New Favorite
- How This Recipe Works: Flavor & Texture Breakdown
- Ingredients and Smart Substitutions: What You Need & Why
- Step-by-Step Instructions: Your Visual Guide to Perfect Sliders
- Expert Tips for Success: Don’t Skip These!
- What to Serve With Your Maple Chicken and Bacon Sliders
- Storing and Reheating Your Sliders
- FAQ About Maple Chicken and Bacon Sliders
Introduction: Why These Maple Chicken and Bacon Sliders Will Be Your New Favorite
As a seasoned home baker and food blogger, I’m always on the hunt for recipes that deliver big on flavor without requiring hours in the kitchen. These Maple Chicken and Bacon Sliders are my secret weapon! They’re my go-to for easy weeknight meals when I want something utterly delicious but fuss-free. There’s just something magical about how the sweet maple glaze marries with the salty bacon and tender chicken – it’s comfort food elevated.
Beyond being a family favorite, these sliders are also the ultimate crowd-pleaser. Whether it’s a game day party, a casual get-together with friends, or a potluck, they disappear faster than I can put them out. They look impressive but are surprisingly simple to make, making them perfect for any occasion. Prepare for rave reviews!
How This Recipe Works: Flavor & Texture Breakdown
- Sweet & Savory Balance: Maple Glaze Meets Smoky Bacon: The real star here is the incredible interplay of flavors. Pure maple syrup creates a glaze that’s sweet and slightly sticky, perfectly complementing the salty, crisp bacon. This harmonious combination is what makes these sliders so uniquely addictive.
- Tender Chicken: Shredded for Easy Eating: Using pre-cooked, shredded chicken ensures every bite is tender and moist, easy to manage, and perfectly integrated into the creamy filling. No tough, chewy chicken here!
- Soft Buns, Crispy Edges: The Perfect Vehicle: Hawaiian rolls provide a wonderful sweetness and a soft, fluffy texture. Baking them with the buttered top creates a golden-brown, slightly crispy exterior that holds up beautifully to the rich filling.
- Quick Assembly, Big Flavor: Maximize Taste, Minimize Time: This recipe is designed for maximum flavor impact with minimal effort. With a few smart shortcuts, you can have these delicious sliders ready to bake in no time, proving that extraordinary taste doesn’t have to mean hours of cooking.
Ingredients and Smart Substitutions: What You Need & Why
Here is what you need and why:
Chicken: Cooked & Shredded (about 3 cups): I usually use leftover rotisserie chicken for ultimate convenience. If cooking fresh, chicken breasts or thighs work well. Thighs offer a richer flavor and stay moister, but breasts are leaner. Poach, boil, or bake them until easily shredded.
Bacon: Crispy, Crumbled (8-10 slices): Freshly cooked, thick-cut bacon is undoubtedly the best, offering that irresistible smoky crunch. If you’re really short on time, good quality pre-cooked bacon bits can work in a pinch, though they won’t have the same depth of flavor.
Slider Buns: Hawaiian Rolls Work Best (12-pack): The slightly sweet and incredibly soft texture of Hawaiian rolls is perfect for these sliders. Their size is also ideal. If you can’t find them, any soft, pull-apart dinner rolls or mini brioche buns will make a suitable substitute.
Maple Syrup: Pure Maple is Key (1/4 cup + 2 tbsp): This is NOT the place for pancake syrup! Pure maple syrup gives that authentic, deep, earthy sweetness that artificial syrups can’t replicate. It’s essential for the robust flavor of the glaze.
Cheese: Provolone or Havarti (6-8 slices): These cheeses melt beautifully and have a mild, creamy flavor that complements the other ingredients without overpowering them. Swiss, Muenster, or even a mild white cheddar are excellent melty alternatives.
Mayonnaise: Base for Creaminess (1/2 cup): Adds richness and binds the chicken filling together. For a lighter touch or a bit of tang, plain Greek yogurt or sour cream can be partially or fully substituted.
Dijon Mustard: Tangy Kick (1 tbsp): A little Dijon goes a long way in cutting through the richness and adding a lovely, subtle tang. If you only have yellow mustard, use slightly less as it can be more pungent. For something a little sweeter, honey mustard can also work.
Onion Powder & Garlic Powder: Essential Seasoning (1/2 tsp each): These pantry staples provide an aromatic background that enhances all the other flavors. Don’t skip them!
Butter: For a Golden Glaze (1/4 cup, unsalted): Melted butter helps create that irresistible golden-brown crust and carries the maple flavor beautifully over the buns. Unsalted is preferred so you can control the salt content yourself.
Step-by-Step Instructions: Your Visual Guide to Perfect Sliders
Follow these step-by-step instructions:
1. Prepare Your Chicken and Bacon
Preheat your oven to 350°F (175°C). If you haven’t already, ensure your chicken is cooked and shredded. Cook bacon until crispy, then crumble it into small pieces. Set aside a small amount of crumbled bacon for garnish if desired.
2. Mix the Creamy Chicken Filling
In a large bowl, combine the shredded chicken, crumbled bacon, mayonnaise, Dijon mustard, onion powder, and garlic powder. Mix thoroughly until all ingredients are well combined and the chicken is fully coated. This creates the rich and flavorful heart of your sliders.
3. Assemble the Sliders: Layering for Success
Keep your Hawaiian rolls attached and carefully slice them horizontally, separating the tops from the bottoms. Place the bottom half of the rolls in a 9×13 inch baking dish. Spread the creamy chicken and bacon mixture evenly over the bottom buns. Layer the cheese slices over the chicken mixture. Finally, place the top half of the rolls back on.
4. Prepare the Maple Butter Glaze
In a small microwave-safe bowl, melt the unsalted butter. Stir in the pure maple syrup. Whisk well until combined. Brush this glorious maple butter glaze generously over the tops of the slider buns. This is where the magic happens, creating a beautiful golden crust and imparting that signature sweet and savory flavor.
5. Bake to Golden Perfection
Cover the baking dish loosely with aluminum foil. Bake for 15 minutes. Then, remove the foil and bake for an additional 5-10 minutes, or until the tops are golden brown and the cheese is bubbly and melted. Garnish with any reserved crispy bacon and a sprinkle of fresh parsley if you like. Let them cool slightly before slicing and serving. For more baking insights, check out King Arthur Baking.
Expert Tips for Success: Don’t Skip These!
- Pre-Cooked Chicken: Time-Saving Hacks: Using a store-bought rotisserie chicken is a game-changer! You can also cook a batch of chicken breasts in your Instant Pot or slow cooker earlier in the week and shred them for quick assembly.
- Crispy Bacon Every Time: For perfectly crispy bacon, bake it on a rack over a foil-lined baking sheet at 400°F (200°C) until desired crispness is reached. This method results in evenly cooked, less greasy bacon perfect for crumbling.
- Preventing Soggy Buns: Ensure your chicken filling isn’t overly wet. If your mayo is particularly thin, start with slightly less and add more if needed. The initial foil cover also helps steam the sliders without prematurely browning them, allowing the filling to heat through first.
- The Importance of a Tight Seal (Foil Prep): When covering with foil, make sure it’s snug but not pressing directly on the buns. This traps the heat and moisture, allowing the cheese to melt wonderfully without burning the tops.
- Don’t Overbake: Look for Golden Brown: The final few minutes without foil are crucial. Watch them closely. You want gorgeous golden-brown tops and bubbly cheese, not dry, hard buns.
What to Serve With Your Maple Chicken and Bacon Sliders
These Maple Chicken and Bacon Sliders are hearty enough to be a meal on their own, but they also pair wonderfully with a variety of sides:
- Simple Salad Options: A fresh green salad with a light vinaigrette, or a crunchy chopped salad, provides a refreshing contrast to the richness of the sliders.
- Crispy Fries or Sweet Potato Fries: A classic pairing! The savory crunch of fries is always a hit.
- Coleslaw or Potato Salad: Creamy coleslaw or a tangy potato salad are excellent choices that complement the flavors of the sliders beautifully.
- Fresh Fruit: A colorful fruit salad or simple sliced melon can add a sweet and healthy component to your meal.
Storing and Reheating Your Sliders
Best Storage Practices
If you happen to have any delicious Maple Chicken and Bacon Sliders left over (a rare occurrence!), they store well. Allow them to cool completely, then place them in an airtight container or wrap them tightly in aluminum foil. They will keep in the refrigerator for up to 2-3 days.
Reheating for Optimal Flavor and Texture
To reheat, the best method is in the oven. Preheat your oven to 300°F (150°C). Place the sliders back into a baking dish, cover loosely with foil, and heat for about 10-15 minutes, or until warmed through and the cheese is melty again. If you want to crisp up the tops, remove the foil for the last few minutes. Avoid the microwave if possible, as it can make the buns soggy and the bacon chewy.
Frequently Asked Questions About Maple Chicken and Bacon Sliders
Can I make these ahead of time?
What if I don’t have Hawaiian rolls?
Can I add vegetables to the sliders?
Is there a dairy-free option?
Maple Chicken and Bacon Sliders
- Total Time: 15 minute
- Yield: 12 sliders
Description
These amazing maple chicken and bacon sliders are bursting with irresistible sweet, savory, and smoky flavors. Easy to make and perfect for any gathering!
Ingredients
- 3 cups cooked, shredded chicken
- 8–10 slices crispy, crumbled bacon
- 12-pack Hawaiian sweet rolls
- 1/2 cup mayonnaise
- 1 tbsp Dijon mustard
- 1/2 tsp onion powder
- 1/2 tsp garlic powder
- 6–8 slices provolone or Havarti cheese
- 1/4 cup unsalted butter, melted
- 2 tbsp pure maple syrup
- Optional: fresh parsley for garnish
Instructions
- Preheat oven to 350°F (175°C).
- In a large bowl, combine shredded chicken, crumbled bacon, mayonnaise, Dijon mustard, onion powder, and garlic powder. Mix well.
- Slice the Hawaiian rolls horizontally, keeping them attached. Place bottom halves in a 9×13 inch baking dish.
- Spread chicken mixture over bottom buns. Lay cheese slices on top. Place top halves of rolls over cheese.
- In a small bowl, whisk together melted butter and maple syrup. Brush generously over the tops of the rolls.
- Cover loosely with foil and bake for 15 minutes. Remove foil and bake 5-10 minutes more, until golden and bubbly.
- Let cool slightly before serving. Garnish with extra crumbled bacon or parsley if desired.
- Prep Time: 15 mins
- Cook Time: 20-25 mins